AI tools that help doctors diagnose are transforming patient care at an unprecedented pace. Consider this: the global market for AI in medical diagnostics reached $748 million in 2021, and experts project a 39.8% compound annual growth rate through 2026.
- Global market value in 2021: $748 million
- CAGR from 2021 to 2026: 39.8%
That explosive growth raises a critical question: how do you design a medical AI device housing that protects sensitive computing components while meeting stringent regulatory standards? This guide walks engineers and decision-makers through that exact challenge. You’ll learn what sets medical AI device housing apart, which materials can withstand repeated cleaning and sterilization, and how your manufacturing choices impact both timeline and budget. No fluff—just actionable insights for your next project.
Core Requirements for Medical AI Device Housing
AI processors inside diagnostic tools create much more heat than older medical electronics. These chips process huge amounts of data quickly, which produces heat you must manage. Your housing design needs to pull heat away from sensitive parts efficiently. Otherwise, you may face slower performance, shorter part life, or failures during critical procedures.
Thermal and EMI Protection for AI Components
Heat Dissipation for Processors
Managing heat starts with picking the right material. Thermally conductive plastics and aluminum both spread heat across the housing surface well. You can also add heat sinks, heat pipes, or cooling fans to your design. Each option has pros and cons. Fans make noise and have moving parts that can break. Passive options stay simpler but need careful airflow planning. Your housing shape matters too. Ventilation slots, fin patterns, and internal baffles all affect how well heat leaves the enclosure.
Shielding Against Electromagnetic Interference
AI parts give off electromagnetic radiation, and they can also be harmed by outside interference. Other equipment in a hospital room can disturb sensitive AI processing. You have two main shielding options. Conductive coatings on plastic housings give a lightweight solution. Metal enclosures block interference naturally without extra steps. The best pick depends on your weight goals, cost limits, and design needs. Remember that seams, openings, and connector ports can let interference leak in. Your design must handle these weak spots.
Antenna Performance Considerations
Many medical AI devices use wireless communication. This creates a conflict between shielding and antenna function. You need enough shielding to guard internal parts, but you also need radio signals to pass through well. Placing antenna windows wisely or using special materials in certain housing areas can fix this issue. Plan for this early in your design process. Adding antenna fixes after production starts costs both time and money.
Biocompatibility and Safety Standards
ISO 10993 Compliance
Any material that touches patient tissue must go through biological testing. ISO 10993 sets the testing rules for this review. Tests check for cell damage, allergic reactions, irritation, and other biological risks. Your chosen materials need papers proving they meet these rules. That paperwork becomes part of your regulatory submission.
Skin Contact vs. Implantable Devices
Surface-contact housings face different rules than implantable devices. A wearable diagnostic tool that sits on skin needs less testing than something placed inside the body. Know your device type early. That knowledge guides your material choices and testing budget.
Material Toxicity Testing
Even indirect contact matters. Patients might touch the housing during use. Cleaning staff handle it every day. Your materials must not release harmful substances under normal use. Medical-grade plastics and metals usually come with safety data from suppliers. Check that those papers cover your specific use case.
Sterilization and Environmental Durability
Autoclave and Chemical Sterilization
Hospitals clean equipment with strong methods. Autoclave sterilization uses high-pressure steam at high temperatures. Chemical cleaning involves harsh agents that can break down plastics over time. Your materials must survive repeated cycles without cracking, changing color, or losing strength. This durability need directly affects your material choice.
Moisture and Ingress Protection
Liquids find their way into devices. Spills happen. Cleaning solutions seep into seams. Your housing needs proper protection ratings against water and dust. Gaskets, sealed seams, and careful port design keep fluids away from internal electronics. Test your medical AI device housing fully under realistic conditions.
Chemical Resistance to Cleaning Agents
Different facilities use different disinfectants. Bleach solutions, hydrogen peroxide, and alcohol wipes all react differently with housing materials. Make sure your chosen materials resist the specific chemicals your customers will use. A housing that breaks down after months of routine cleaning creates safety risks and legal concerns. A good medical AI device housing plan accounts for these environmental stresses during design. Medical instrument housings face the same tough conditions in hospitals and clinics worldwide.
Material Selection Criteria for Medical AI Device Housing
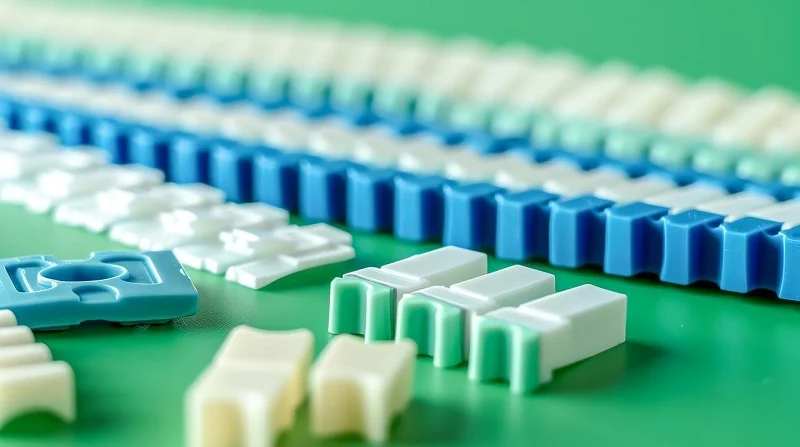
Choosing the right material for your medical AI device housing affects every later decision. The material you pick impacts sterilization compatibility, EMI shielding effectiveness, and regulatory approval timelines. Medical-grade polymers, stainless steel, titanium alloys, and ceramics each offer different trade-offs. Understanding those trade-offs early prevents costly redesigns later.
Medical-Grade Thermoplastics
Thermoplastics lead medical AI device housings because they mold easily and cost less than metals. They also weigh less, which matters for portable diagnostic tools that clinicians carry between rooms.
PC-ABS for Impact Resistance
PC-ABS combines polycarbonate’s toughness with ABS’s ease of molding. This mix delivers excellent impact resistance, making it a strong choice for handheld devices that might drop onto hard hospital floors. However, PC-ABS needs specific grades and protective coatings to resist alcohol and peroxide. Prolonged bleach exposure risks stress-cracking at the rim of the housing, so verify your cleaning protocol matches the material’s limits.
Polycarbonate for Clarity
Polycarbonate offers transparency when your design needs a window or lens built into the housing. It also withstands impacts well. Like PC-ABS, standard polycarbonate grades can struggle with harsh chemical disinfectants. Protective coatings or specialized medical grades solve that problem. If your device displays patient data through a clear panel, polycarbonate gives you optical clarity without sacrificing structural strength.
High-Temperature Polymers (PEEK, PPSU)
Devices that undergo autoclave sterilization need materials that survive repeated steam cycles. Polysulfone (PSU) and polyetherimide (PEI) handle this challenge well. PSU has a glass transition temperature of 190°C (374°F) and resists impacts. PEI offers continuous use up to 170°C (338°F) with a glass transition temperature of 217°C. PEEK and PPSU perform similarly for demanding reusable surgical equipment near sterile fields. These high-temperature polymers cost more, but they eliminate the need for special handling after each cleaning cycle.
Metals for Medical Device Enclosures
Metals bring natural EMI shielding and structural rigidity to medical AI device housings. They also handle harsh disinfectants better than most plastics.
Aluminum for Lightweight Shielding
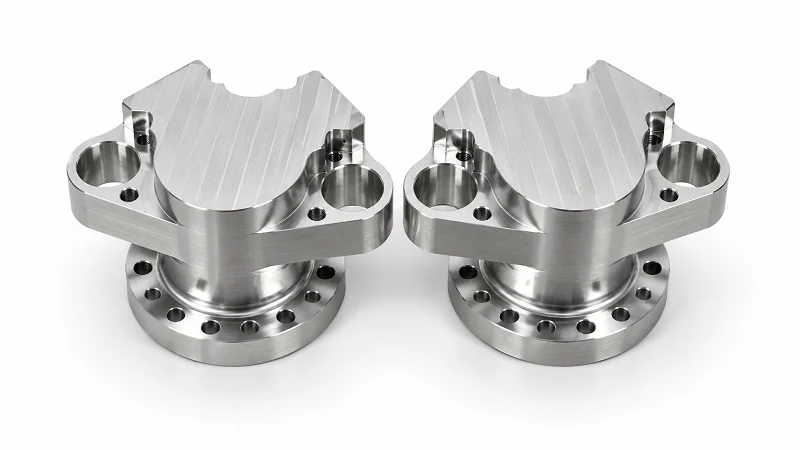
Aluminum alloys like 6061 and 5052 appear frequently in portable ultrasound systems, patient monitors, and internal chassis. Aluminum conducts electricity naturally, which blocks electromagnetic interference without extra coatings. Anodizing improves corrosion resistance and adds a durable finish. Aluminum also conducts heat well, helping cool AI processors inside. Its strength-to-weight ratio makes it ideal for devices that move around a hospital.
Stainless Steel for Durability
Stainless steel, particularly grade 316L, excels in large diagnostic equipment like MRI and CT scanners. These machines need rigidity and effective electromagnetic shielding. Stainless steel resists bodily fluids and harsh disinfectants, offering superior cleanability. It also provides high tensile strength for structural components. The trade-off is weight—stainless steel weighs more than aluminum, so it suits stationary equipment better than portable devices.
Titanium Alloys for Premium Applications
Titanium alloys like Ti-6Al-4V rarely appear in medical AI device housings. Their primary advantage is biocompatibility for long-term implantation, not shielding or structural enclosure needs. While titanium is strong and lighter than steel, the cost rarely justifies its use in housings. Reserve titanium for orthopedic implants, dental parts, and stents where biocompatibility matters more than medical AI device housing performance.
Ceramics and Specialty Materials
Ceramics and specialty additives fill specific niches in medical instrument housings.
Ceramic Substrates for Electronics
Ceramic substrates sit inside housings, supporting electronic components that generate heat. They dissipate thermal energy efficiently and resist high temperatures. While ceramics don’t form the outer shell often, they play a critical role in keeping AI processors cool.
Antimicrobial Polymer Additives
Adding antimicrobial agents to polymer resins reduces bacterial growth on surfaces. This feature helps devices that patients touch frequently. The additives work throughout the material’s lifetime, unlike surface coatings that wear off. For devices used in infection-sensitive environments, antimicrobial polymers add a layer of protection.
Surface Coatings for Wear Resistance
Surface treatments extend the life of both plastic and metal housings. Hard coatings protect against scratches and abrasion. Conductive paints containing silver, nickel, or copper provide 40-80 dB attenuation between 10 MHz and 1 GHz for plastic medical AI device housings. These coatings let you use lightweight plastics while still meeting EMI requirements.
Material Comparison at a Glance
| Criterion | Medical-Grade Polymers | Metals | Ceramics |
| Cost | Low to moderate | Moderate to high | High |
| Weight | Light | Heavy (aluminum lighter) | Moderate |
| Biocompatibility | Good with proper grades | Excellent (stainless, titanium) | Excellent |
| Thermal Conductivity | Poor | Good (aluminum excellent) | Good |
| EMI Shielding | Poor (needs coatings) | Excellent (native) | Poor |
| Sterilization Resistance | Varies by polymer | Excellent (stainless) | Excellent |
The right material balances these factors against your device’s specific needs. A portable AI diagnostic tool might favor aluminum for shielding and heat management. A single-use device might choose a lower-cost polymer. A reusable surgical instrument near sterile fields demands high-temperature polymers or stainless steel. Your material choice also affects the manufacturing process, quality control steps, and total cost. Think through each factor carefully before committing to a material family.
Manufacturing Processes for Medical AI Device Housing
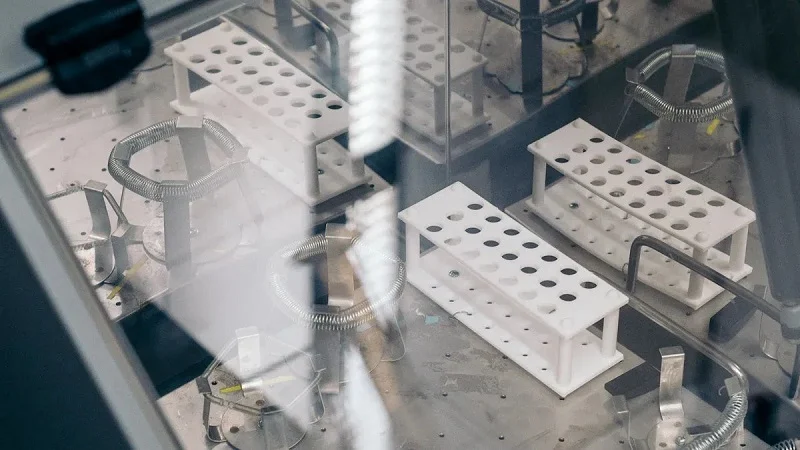
Choosing the right way to make your medical AI device housing depends on a few things. You need to think about how many units you will make, how complex the shape is, what materials you need, and what paperwork regulators require. Each method has its own strengths and weaknesses that affect your schedule, budget, and product quality.
Injection Molding for High-Volume Production
Injection molding is the best choice when you plan to make more than 10,000 units each year. This method gives you consistent parts at a low cost per unit once you pay for the initial mold.
Tooling Investment and Mold Design
The mold is your highest upfront cost. A typical production mold for medical AI device housings can cost anywhere from $10,000 to $100,000. The price depends on how many cavities it has and how complex it is. This investment pays off because each part becomes much cheaper when you make many. Your mold design must match the material you picked, including how much it shrinks and how it flows. Working with an experienced mold maker early in your design phase prevents costly fixes later.
Tolerance and Surface Finish Control
Injection molding can hit tight tolerances when your mold is made with precision. Standard production tolerances usually land around ±0.005 inches for well-designed parts. The surface finish depends on how well the mold is polished. Medical device housings often need textured or matte finishes to hide fingerprints and resist scratches. The mold’s surface treatment shows up on every part you produce.
Material Flow and Warpage Prevention
Plastic flows through the mold in ways that affect the final part quality. Uneven cooling causes warpage, where thin sections cool faster than thick ones. Your design should keep the wall thickness the same throughout the housing. Adding ribs for stiffness without making walls thicker helps prevent sink marks. Gate placement controls how material fills the cavity, which affects weld lines and structural strength. Pay special attention to the rim where two housing halves meet. Rim molding needs careful gate positioning to ensure complete fill without trapped air. Mold flow analysis software can predict these issues before you cut steel.
CNC Machining for Prototypes and Low Volumes
CNC machining works great for prototyping and low-volume production runs. This method removes material from solid blocks using computer-controlled cutting tools. It offers excellent precision and works with nearly any material you might choose.
Precision and Material Versatility
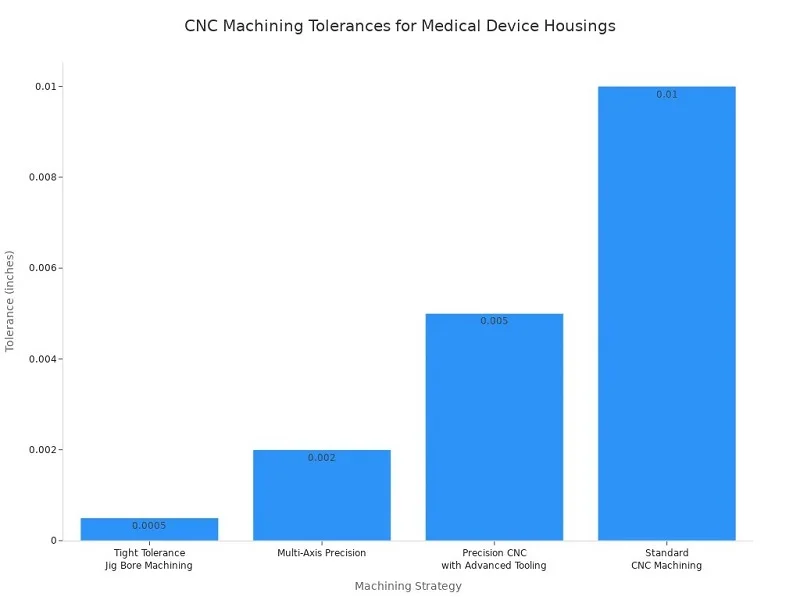
CNC machining can hit tolerances that injection molding struggles to match. Standard CNC machining holds ±0.010 inches for general components. Precision CNC with advanced tooling reaches ±0.005 inches for surgical instruments. Tight tolerance jig bore machining achieves ±0.0005 inches for critical interfaces. Multi-axis precision machines deliver ±0.002 inches for implantable devices.
Surface finish matters just as much as dimensional accuracy. Implantable device housings need Ra values between 0.1–0.4 μm to prevent bacterial growth. Surgical instruments require handle surfaces at 0.4–0.8 μm Ra and functional surfaces at 0.2–0.4 μm Ra for precise operation and sterilizability. Fluid pathway components demand 0.2–0.4 μm Ra to prevent platelet activation.
Lead Time Advantages
CNC machining skips the mold-making phase entirely. You can receive machined parts within days of finalizing your design files. This speed proves invaluable during iterative prototyping, where you test multiple design variations before committing to production tooling. Companies like NOBLE, a leading manufacturing partner in China, offer rapid CNC prototyping services that help clients validate designs quickly before scaling to mass production.
Cost Structure for Small Batches
CNC machining costs more per part than injection molding at high volumes. However, for runs under 1,000 units, machining often proves more economical because you avoid the tooling investment entirely. Each part requires machine time and material, but no upfront mold cost. This cost structure makes CNC machining ideal for clinical trials, pilot programs, and specialized low-volume devices.
Additive Manufacturing for Complex Geometries
3D printing opens possibilities that traditional manufacturing cannot match. Complex internal channels, organic shapes, and consolidated assemblies become feasible with additive techniques.
SLA and SLS Thermoplastic Printing
Stereolithography (SLA) produces parts with smooth surfaces and fine details using photopolymer resins. Selective laser sintering (SLS) fuses nylon powder into durable parts without support structures. Both methods work well for prototyping medical AI device housings. SLS parts offer better mechanical properties for functional testing, while SLA excels at visual models and fit checks.
Metal 3D Printing with Titanium
Metal additive manufacturing using titanium alloys creates parts with excellent strength-to-weight ratios. This process suits complex geometries that would require multiple machined components assembled together. However, metal 3D printing costs significantly more than CNC machining for simple shapes. Reserve this technology for designs that genuinely require its unique capabilities.
Regulatory Acceptance of 3D-Printed Parts
Regulatory bodies accept 3D-printed components when you validate the process thoroughly. Your quality system must document every build parameter, material batch, and post-processing step. Each manufacturing process carries specific documentation requirements. Welding demands Procedure Qualification Records and welder qualification records. Heat treatment requires temperature uniformity surveys. Cleaning needs validated procedures with documented residue testing. Your Design History Files, Device Master Records, and Batch Production Records must capture all process details for regulatory review.
The manufacturing process you select shapes your regulatory strategy, production costs, and product quality. Evaluate each option against your specific volume, geometry, and timeline requirements before committing.
Design for Manufacturability in Medical AI Device Housing
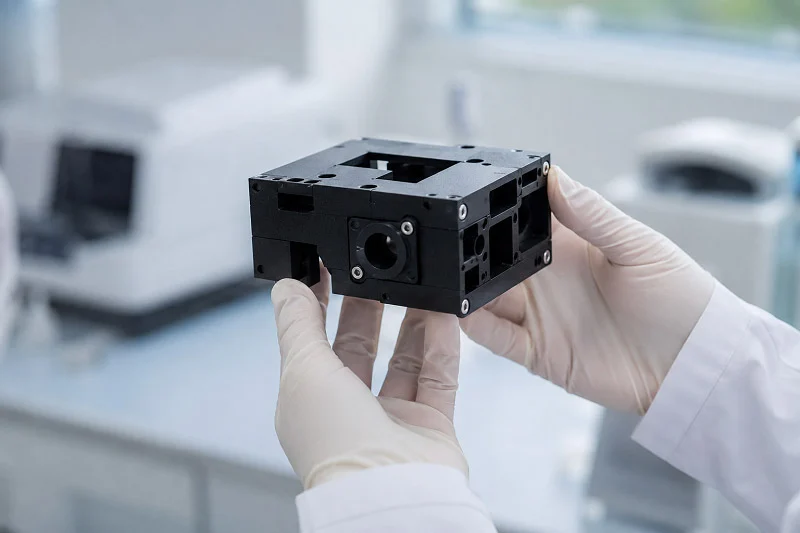
Early DFM checks stop expensive mold changes and help with faster approvals. Parts that users touch, like screens, buttons, and ports, affect the case design, material choice, and how it is made. Getting these details right early saves you from costly tool changes later.
DFM Guidelines for Plastic Housings
Common problems come from mistakes you can avoid. Focus on these basics.
Uniform Wall Thickness
Parts made by injection molding need a steady wall thickness between 1 and 5 mm. Changes in thickness cause warping and air pockets. An IV set Y-connector leaked until engineers fixed uneven wall sections. The rim area needs careful gate placement near the housing edge to fill it fully. Use core-outs and ribs for strength instead of thick walls that slow cooling.
Draft Angles and Corner Radii
Medical device cases need a slight taper on every vertical surface. Less than 1 degree is a common error. Use 1 degree per inch of cavity depth. Shutoffs need at least 3 degrees. Light texture needs 3 degrees; heavy texture needs 5 or more. A catheter handle redesign raised draft from 0.5 to 2 degrees and cut tool maintenance by 60 percent. Keep corner radii at least half the wall thickness.
Boss, Rib, and Snap-Fit Design
Rib thickness should be 60 to 70 percent of the wall to avoid sink marks. Use more small ribs instead of one thick one. Pump enclosure surfaces improved when engineers reduced boss base thickness. Add fillets at rib joints to prevent stress points. Glass-filled resins shrink differently and need extra care during molding.
Human-Machine Interface Integration
Places where users interact create the toughest design problems. Every opening can let in liquids.
Display and Touchscreen Mounting
Gaskets behind display windows seal out moisture. Use silicone or EPDM with 360-degree coverage and 25 to 40 percent compression. Optically clear adhesives bond displays and stop fluid seepage. Diagnostic monitors use sealed overlays and bonded bezels.
Button and Connector Sealing
Recessed controls direct liquid away from seams. Silicone keypads with built-in skirts protect switches. Connector ports need O-rings where they pass through the housing. Every seal must survive cleaning cycles without breaking down.
Acoustic and Ventilation Openings
Vented membranes let sound pass while blocking moisture. They keep pressure balanced inside the case. Portable ECG units use edge-sealed enclosures with coated circuit boards.
Assembly and Serviceability Strategies
Think about how the device goes together and how workers reach inside parts later.
Modular Construction for Upgrades
AI hardware changes fast. A modular design lets you swap processing modules without redesigning the whole case. Separate areas for major parts make future upgrades easier.
Gasketing and Sealing Methods
Gaskets along the housing edge provide the main barrier against fluids. Silicone handles repeated sterilization well. Conformal coatings on circuit boards add a backup layer against humidity. Gaskets need 360-degree coverage with 25 to 40 percent compression. Avoid sharp corners in gasket channels—they create leak paths.
Fastening Systems Comparison
Screws give strong, removable joints but add assembly time. Snap-fits speed assembly but make disassembly harder for service. Ultrasonic welding creates permanent bonds. Choose based on how often the housing opens. A medical AI device case with regular firmware updates benefits from screws over the processor area and snaps for cosmetic covers.
Cost and Lead Time Factors for Medical AI Device Housing
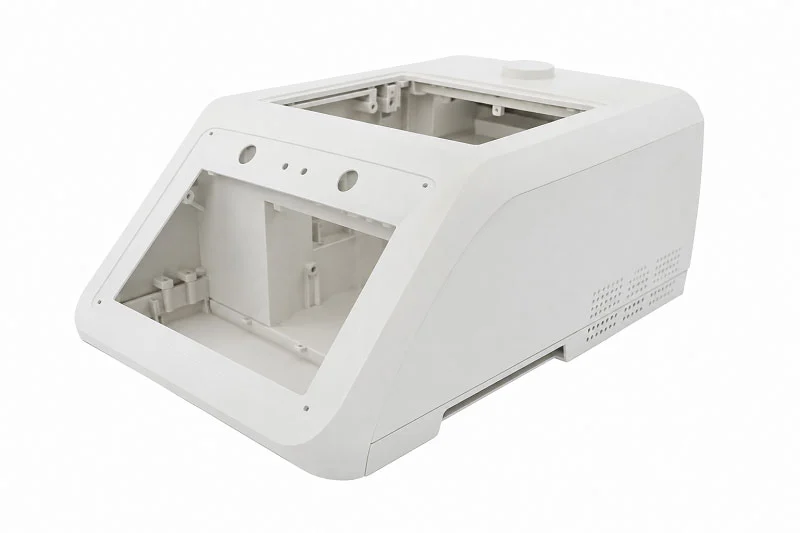
The final price of a medical AI device housing depends on several things. The manufacturing method you choose affects how much you pay upfront versus over time. How many units you make also changes the cost picture greatly.
Cost Drivers Across Production Processes
Material Cost vs. Performance Trade-offs
Resin costs set a starting point for plastic housings. A standard medical-grade polymer might cost a few dollars per unit for raw material alone. Labor and utilities add more. High-performance polymers like PEEK or specialty alloys cost much more. They offer better heat resistance or EMI shielding. Your choice must weigh performance against budget.
Tooling Amortization Strategies
Injection molding tools cost real money. A typical mold for a housing runs around $42,000. The injection molding machine itself adds $215,000 over an 8-year life. You spread these expenses across every part you make. At a volume of 8,500 units per year, making parts in-house costs $31.87 per unit. Outsourcing the same volume costs $18.75 per unit. Tooling amortization drives the difference.
The breakeven point matters. At about 14,200 units a year, in-house production saves roughly $43,600 annually. Below that volume, outsourcing makes more sense. Spread that $42,000 mold over 5 years and 50,000 units per year, and it adds under a dollar per unit. Include the opportunity cost of capital, typically 8 to 12 percent annually on the undepreciated balance, and you add another $0.12 per unit. Refurbishment costs, usually 15 to 30 percent of the original investment at about half the tool life, add more.
The housing rim often sets mold complexity. A poorly designed rim adds cost and slows cycle time.
Volume-Based Pricing Models
Low volumes push per-unit costs higher. CNC machining and 3D printing skip the tooling expense but charge more per part. These methods suit clinical trials and small pilot runs. Higher volumes make injection molding the clear economic winner.
Lead Time Optimization Approaches
Getting a medical AI device to market faster matters. The right prototyping method cuts weeks off your schedule.
| Prototyping Method | Lead-Time Advantage |
| 3D printing | Parts in hours or days, rapid geometry iteration |
| CNC machining | Fast turnaround for functional housings with tight tolerances |
| Rapid injection molding | Days instead of weeks for pilot runs |
| Urethane casting | Quick low-volume production without hard tooling |
| Sheet metal prototyping | Accelerated fabrication for metal housings |
Rapid Prototyping Methods
3D printing can produce a housing in hours. CNC machining gives you functional parts in days. Rapid tooling shrinks injection molding lead times from months to days. These methods let you test fit, function, and looks before committing to production tooling.
Supply Chain Risk Mitigation
Single-source suppliers create real risk for medical AI device production. A backup supplier for critical resins or custom molds protects your schedule. Long lead times for specialty materials demand early planning. Quality issues from untested sources can derail production. Testing multiple suppliers during development prevents delays later in the process.
Parallel Development Workflows
Running design iterations while tooling gets quoted saves weeks. Engineering teams check housing geometry through 3D-printed prototypes. Mold designers work on production tooling at the same time. This overlap cuts total development time significantly.
Total Cost of Ownership Analysis
The purchase price of a housing is only the start. Maintenance, disposal, and future upgrades all add to the true cost.
Maintenance and Repair Implications
A cheap housing that cracks after repeated sterilization cycles costs more over time. Replacement parts, service visits, and device downtime add up fast. Durable materials reduce these hidden expenses. The housing rim faces repeated stress during assembly and cleaning.
End-of-Life Disposal Considerations
Medical device disposal rules vary by region. Housings that separate easily for recycling lower end-of-life costs. Choosing materials that reduce hazardous waste helps too. Plan for disposal during the material selection phase.
Scalability for Future Iterations
AI hardware evolves quickly. A modular housing design lets you swap processing modules without redesigning the entire medical AI device housing. This future-proofing saves significant money on the next device revision. Medical AI device housing that supports upgrades extends product life and reduces long-term costs.
NOBLE: Manufacturing Partner for Medical AI Device Housing

The right partner can change how your project turns out. It saves you time and lowers risk. NOBLE brings engineering help, manufacturing skills, and regulatory know-how all in one place. Fewer handoffs mean fewer mistakes. Their team works with you from the first design review all the way to final packaging.
Full-Service Capabilities from Development to Assembly
In-House Engineering and DFM Support
Our in-house team offers full DFM advice, help picking materials, and expert tooling support. This method makes sure your parts work well and cost less to produce.
DFM finds problems early in the design stage. It cuts defects by helping engineers build housings that go together easily. DFM removes parts you do not need, which makes tooling simpler and reduces waste. Early checks spot weak points in the housing rim. The rim needs careful study during this stage. Cost control gets better with simpler tooling. Rules compliance gets stronger with steady processes. These checks also improve validation plans and stop unwanted changes.
Prototyping Through Production
NOBLE follows a clear path. Concept review and requirement analysis come first. Fast prototyping and validation tests improve the shape. Tooling development ensures parts come out the same every time. Cleanroom production happens in an ISO certified space. Assembly options include manual, semi-automated, and fully automated lines. Quality checks follow ISO 13485 rules.
Assembly, Testing, and Packaging Services
Assembly options match how many units you need. Manual assembly works for complex devices that need care. Semi-automated mixes worker oversight with machine consistency. Fully automated handles large volumes with camera checks. Cleanroom assembly in ISO Class 7 and 8 spaces handles delicate parts. Packaging development and testing finish the job.
Quality Certifications and Compliance
ISO 9001:2015 Certified Operations
ISO 9001:2015 covers NOBLE’s quality system. It keeps processes steady from supplier management to final checks. You get dependable parts every batch.
ISO 13485:2016 Medical Device Quality Management
This standard guides the making of safe medical AI devices. It gives a clear structure that links design and production with regulatory needs. ISO 13485 improves risk control through better tracking and consistency. Global recognition helps win more contracts. Many partners require this certification before they start work.
Regulatory Documentation Assistance
Regulatory filings need proper records. NOBLE helps with DHF files and Device Master Records. Their team knows what regulators look for. This support speeds up your submission.
Metal and Plastic Processing Expertise
CNC Machining and Injection Molding
NOBLE works with both metals and plastics. CNC machining gives tight tolerances for prototypes. Injection molding makes steady parts in large numbers. Having both skills means honest advice on which process fits best.
Sheet Metal Fabrication and Finishing
Sheet metal work gives strength and EMI shielding for medical AI device housings. Welding creates strong joints. Finishing like anodizing adds toughness.
Integrated Supply Chain Solutions
NOBLE manages supply chains to stop delays. They source materials and coordinate subcontractors. This method keeps your timeline on track.
Building a successful medical AI device housing means following a clear path. Start with your requirements. Pick your materials. Choose your manufacturing process. Optimize your production design. Handle regulatory compliance. Manage your costs carefully. Each step builds on the one before it. The housing rim demands special attention during design review. Getting these decisions right requires balancing technical performance with medical standards and budget limits. That balance comes easier when you engage an experienced manufacturing partner early. That partnership prevents costly redesigns and accelerates market entry. Evaluate your specific medical AI device needs against the guidance in this guide. Then contact NOBLE’s engineering team for personalized housing production guidance.
FAQ of for Medical AI Device Housing
How do I choose between plastic and metal for my medical AI device housing?
Think about how the device will be used every day. Plastics are lighter and cheaper when you make many units. Metals block electromagnetic interference on their own and stand up better to strong cleaners. Aluminum is a good middle choice because it handles heat well. Pick the material based on how you will sterilize it and whether it needs to be portable.
What does ISO 10993 testing actually involve?
This standard checks how materials react with living tissue. Labs test for cell damage, allergic reactions, and irritation. Devices that touch only the skin need fewer tests than those placed inside the body. Your material supplier should give you safety data. Save that paperwork for your regulatory submission later.
Can I use standard plastics for a medical AI device housing?
Standard plastics often break down when exposed to hospital cleaners. Bleach and hydrogen peroxide can crack or discolor them over time. Medical-grade polymers have special additives that resist these chemicals. If your device goes through autoclave sterilization, you need high-temperature plastics like PSU or PEI instead.
How much does injection molding tooling cost?
A production mold usually costs between $10,000 and $100,000. The price depends on how many cavities it has and how complex the shape is. That cost spreads across every part you make. When you produce high volumes, the cost per part drops a lot. For small batches under 1,000 units, CNC machining often makes better financial sense.
What is the fastest way to get prototype housings?
3D printing can make parts within hours or days. CNC machining gives you working housings with precise measurements in about a week. Both methods skip the mold-making step entirely. Use these approaches to test your design before spending money on production tooling.
How do I prevent electromagnetic interference without adding weight?
Conductive coatings on plastic housings give you a light option. Silver, nickel, or copper paints block signals well between 10 MHz and 1 GHz. Watch out for seams and connector ports—they let interference escape. Good gasket design seals those gaps effectively.
What causes warpage in injection-molded housings?
Uneven cooling causes warpage. Thin sections cool faster than thick ones, which creates internal stress. Keep wall thickness the same throughout your design, usually between 1 and 5 mm. Use ribs for stiffness instead of making walls thicker. The housing rim needs careful gate placement so it fills completely without trapped air.
When should I bring a manufacturing partner into my project?
Bring them in during the design phase, not after. Early DFM reviews catch problems before you make molds. A partner skilled in both metal and plastic gives you honest material advice. This approach prevents costly redesigns and speeds up your regulatory submission timeline.