Reagent disc components power modern diagnostics. These microfluidic devices hold reservoirs, mixing zones, and detection chambers. Manufacturers shape them using injection molding, thermoforming, CNC machining, laser cutting, embossing, coating, casting, and secondary finishing like engraving, heat treating, or plating.
Each manufacturing method brings its own strengths. The right choice depends on your production volume, precision needs, material limits, and budget. This guide looks at how each process works, where it does well, and where it falls short. You will also find practical selection tips for diagnostics research and development.
Blood component analysis, affordable diagnostics, and in vitro diagnostics all depend on well-made discs. Local and domestic manufacturing teams need clear direction. Whether you support research or clinical testing, knowing these processes matters. Reagents interact with surfaces differently across materials and methods, and the performance of reagent disc components can vary significantly based on how they are fabricated.
Keep reading for a clear comparison and useful advice you can put to work right away.
Manufacturing Processes for Reagent Disc Components
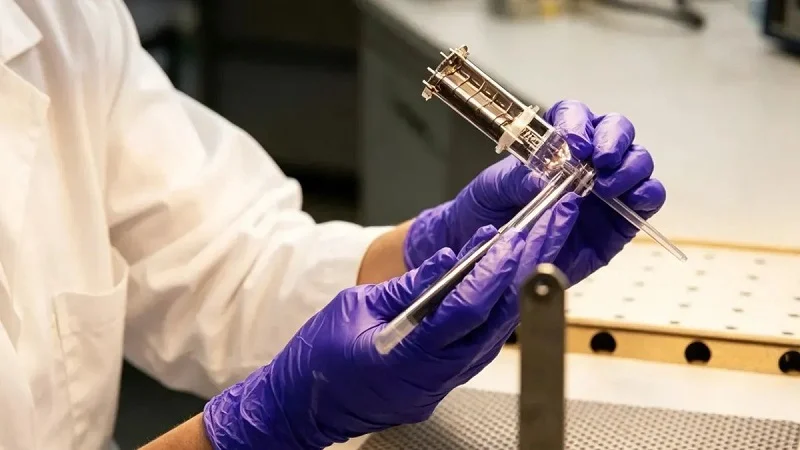
Making reagent disc components means changing raw materials into working devices. Most processes make one disc at a time. This gives you control over quality at each step. The method you choose affects everything from cost to capacity. Diagnostics teams need to know these options to make smart choices.
Let’s check out the main ways to make these parts.
Injection Molding
High-volume production and materials (PC, COC, PP)
Injection molding works well for big batches. You melt plastic pellets and push them into a steel mold. The mold shapes the disc. Then the part cools and comes out.
Common materials are polycarbonate (PC), cyclic olefin copolymer (COC), and polypropylene (PP). PC is tough and clear. COC has low autofluorescence and high purity. PP resists chemicals well. Each material fits different uses in diagnostics research and development. This method works well for high-volume diagnostics needs.
Tooling cost, cycle time, precision trade-offs
The mold costs a lot at first. But the cost per part drops fast with volume. This method supports high-volume production with steady results.
Cycle time matters for planning. For small, thin parts like reagent discs, each cycle takes about 10 seconds. Thicker optical parts may need 2 to 5 minutes. The exact time depends on part shape and material choice.
| Part Category | Cycle Time Range |
| Small, thin parts (e.g., reagent discs) | ~10 seconds |
| Optical parts (thicker, requiring precise molding) | 2 to 5 minutes (120–300 seconds) |
Precision stays high. Injection molding keeps tight tolerances. You get consistent parts across thousands of cycles. But the upfront cost means you need enough volume to justify the tooling. For diagnostics, this process gives the reliability you need. Production capacity grows well with this method.
Thermoforming
Vacuum and pressure forming, thin-wall discs
Thermoforming starts with a flat plastic sheet. You heat the sheet until it softens. Then you pull it over a mold with vacuum or push it with pressure. The plastic takes the mold’s shape. After cooling, you cut off the extra.
This method works well for thin-wall discs. The walls stay even and light. It fits uses where optical clarity matters. Part preparation happens quickly with this approach.
Lower tooling cost, design limitations
Tooling costs less than injection molding. Thermoforming molds use aluminum or even wood for prototypes. You can start with a smaller budget.
But design limits exist. You cannot make sharp corners or deep undercuts. This process works best for shallow features. You also get less dimensional precision. Parts may vary more from batch to batch. Cutting parts from the sheet adds another step.
For medium volumes, thermoforming balances cost and capability. It fits well when you do not need extreme precision. The process is simpler and faster to set up. Many diagnostics teams use it for early-stage testing. The quick turnaround makes it popular in development work.
Other Primary Processes
Embossing for microfluidic channels
Embossing presses a pattern into a heated plastic sheet. A master tool with raised features pushes into the material. The plastic moves around the tool and creates channels.
This process works well for microfluidic structures. You can make fine channels for fluid flow. The depth and width stay consistent. Embossing fits medium volumes and gives good repeatability. Research labs often use this method for custom designs. It supports ongoing work on new formats.
Coating for reagent immobilization
Coating adds a functional layer to the disc surface. You apply a thin film of material that holds reagents. This step is critical for diagnostics. The coating protects your reagents during storage and use.
The coating must bind active diagnostic ingredients without harming them. It also needs to stay stable during storage. Many coating methods exist, including spray, dip, and spin coating. The right choice depends on your reagent chemistry. The right coating ensures your reagents work as expected during diagnostics testing.
Casting and fabrication (investment, die casting)
Casting works for metal parts. Investment casting starts with a wax pattern. You coat the wax with ceramic. Then you melt out the wax and pour in metal. The metal fills the space and forms the part.
Die casting forces molten metal into a steel mold under high pressure. It works for aluminum, zinc, and other alloys. The parts come out with good surface finish and tight tolerances.
For reagent discs, plastic processes dominate. But some parts use metal. Housings, heat sinks, or structural parts may need casting. The choice depends on thermal and mechanical needs. This method expands your options for complex designs.
These processes form the backbone of reagent disc manufacturing. Each one has strengths and trade-offs. The next section covers secondary processes like annealing, engraving, and plating. Knowing these methods helps you move from development to production with confidence.
Injection Molding for Reagent Disc Components
Process Mechanics
Melting, injection into mold, cooling, ejection
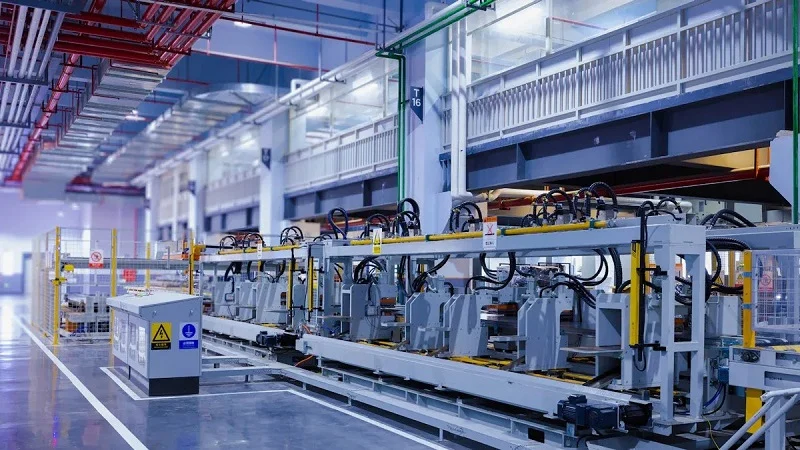
Injection molding changes plastic pellets into finished discs using a repeating cycle. The machine first melts the pellets inside a heated barrel. Temperatures get high enough to make the plastic flow like syrup. Then a screw pushes the melted material forward. It enters the mold through a nozzle under high pressure.
The mold stays shut while plastic fills every space. Cooling starts right away. The part must cool enough to keep its shape. Once solid, the mold opens and ejector pins push the disc out. The whole cycle repeats. For thin discs, this takes about ten seconds. Thicker parts with optical needs may take several minutes. This cycle forms the core of high-volume manufacturing.
Mold design features (gates, vents, draft angles)
The mold controls everything about part quality. Gates control where plastic enters the cavity. Their size and position affect flow patterns and weld lines. Vents let trapped air escape. Without them, air pockets cause burn marks or incomplete filling.
Draft angles need special attention. These are slight tapers on vertical walls. They let the part release cleanly from the mold. A disc with straight walls sticks and may warp during ejection. Adding even one or two degrees of draft prevents damage. Mold designers balance these features carefully. The goal is steady filling, full venting, and smooth release every cycle.
Key Parameters and Materials
Temperature, pressure, cooling rate control
Three variables control molding success. Barrel temperature determines how easily plastic flows. Mold temperature affects surface finish and cooling speed. Injection pressure pushes material into every corner of the cavity.
Cooling rate matters most for optical parts. Fast cooling creates internal stress. This stress causes warping or birefringence. Birefringence distorts light passing through the disc. Slow, even cooling produces stable parts. Process engineers watch these parameters closely. Small adjustments stop defects before they start. This precision makes injection molding reliable for diagnostics.
Polycarbonate, COC, polystyrene for optical clarity
Material choice shapes optical performance. Polycarbonate offers toughness and clarity. It handles handling and shipping stress. Cyclic olefin copolymer (COC) has low autofluorescence. This property matters when optical sensors read fluorescent signals. COC also absorbs little water, keeping dimensions stable.
Polystyrene gives excellent clarity at lower cost. It works well for simple designs. However, it cracks more easily than polycarbonate. Each material brings trade-offs. The right choice depends on your detection method and reagent chemistry. Many teams test multiple materials during development.
| Material | Key Strength | Main Limitation |
| Polycarbonate | Tough, clear | Higher autofluorescence |
| COC | Low autofluorescence | Higher cost |
| Polystyrene | Clear, economical | Brittle |
Pros and Cons
Advantages: high precision, fast cycles, low unit cost
Injection molding delivers tight tolerances across thousands of parts. Each disc matches the next. This consistency matters for fluid flow and optical readings. Cycle times stay short once the process stabilizes. Unit costs drop sharply at scale. For large production runs, no other method competes on price per part.
Disadvantages: high initial tooling, design constraints
The mold itself costs tens of thousands of dollars. That investment only makes sense with enough volume. Design constraints also apply. Undercuts require complex mold actions. Deep channels need special ejection systems. Component preparation and component separation happen after molding, adding handling steps. These factors push many prototyping teams toward machining first. But when production volume justifies the tooling, injection molding delivers unmatched efficiency. This technology supports the entire diagnostics industry. Manufacturing capacity grows simply by running more cycles. Reagents stay protected inside precisely formed reservoirs. The result is a dependable platform for clinical testing and research alike.
Thermoforming for Reagent Disc Components
Process Steps
Sheet heating, forming (vacuum/pressure), trimming
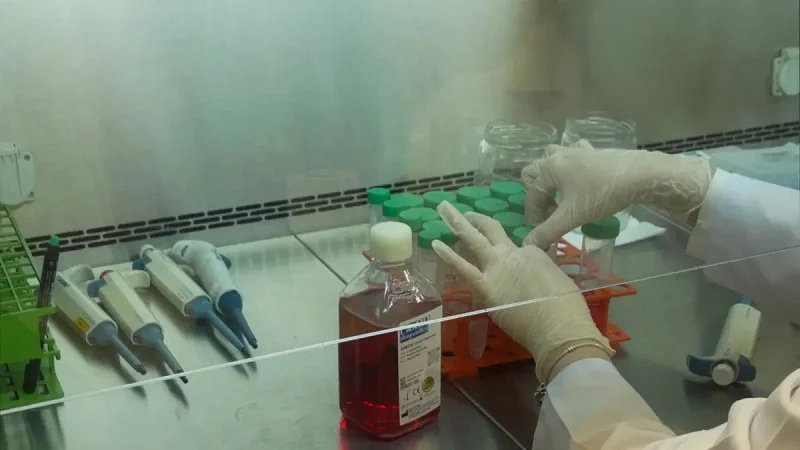
Thermoforming begins with a flat plastic sheet. The machine heats the sheet until it softens. Each material needs its own exact temperature. If it’s too hot, the plastic burns. If it’s too cold, it won’t shape correctly. This step needs careful control.
After the sheet is ready, the forming step starts. Vacuum forming pulls the sheet down onto a mold. Pressure forming pushes it with compressed air. Both methods work well for reagent disc parts. The plastic takes the shape of the mold below.
After forming, the sheet cools. The plastic keeps its new shape. Then trimming happens. A cutting tool removes the extra material around the disc. The finished part comes out clean. This step is important for diagnostics. The edges must seal right later.
Suitable materials: PETG, PVC, polypropylene
PETG works well for clear discs. It gives good optical clarity and chemical resistance. Many teams use it for prototypes. The material supports consistent diagnostic results.
PVC gives good stiffness and surface quality. But some chemicals react with PVC over time.
Polypropylene offers strong chemical resistance. It handles many reagents without issues. The material stays stable during storage. Each material has trade-offs for your final design.
Design Guidelines
Draft angles, wall thickness uniformity
Draft angles help the part come off the mold. Without enough draft, the plastic sticks and warps.
Male molds need 3 to 5 degrees of draft. This range works well for most reagent disc parts. Female molds need less, about 1 to 2 degrees. The best angle for vertical surfaces is 5 degrees. This helps the sheet keep a steady thickness.
Shallow parts need 3 to 4 degrees. Deep draws need more, around 5 to 7 degrees. If your surface has texture, add 1 to 2 degrees extra. These tips help you get even wall thickness. Even walls mean steady fluid flow. That matters for accurate diagnostics. The thermoforming technology for draft angles is well known.
Wall thickness changes more in thermoforming than in injection molding. The sheet stretches more in some areas. Deep corners become thinner than flat sections. You must design for this change. Knowing manufacturing limits helps you succeed.
Limitations in feature complexity vs. injection molding
Thermoforming cannot match injection molding for fine details. You cannot make sharp corners. The plastic rounds off during forming. Undercuts are almost impossible. This manufacturing limit affects your design choices.
Deep channels are hard to make. The sheet gets too thin in deep areas. Shallow features work best. You also get less precision. Tolerances are wider. Parts may vary more between batches.
But for many diagnostic uses, the limits are okay. You get good parts at lower cost. The trade-off works well for medium production volumes.
Cost and Scalability
Lower tooling, good for medium volumes
Tooling costs much less than injection molding. Thermoforming molds use aluminum or even wood. You can start with a smaller budget. This makes the process good for medium volumes. Prototyping and small runs are affordable. The setup costs stay low.
The process also scales well. You can run many parts per sheet. Output goes up with each cycle. For diagnostic teams, this means faster time to market. You can test designs and adjust quickly. Production capacity grows with demand.
Tolerance and repeatability trade-offs
The trade-off is lower precision. Parts vary more than injection-molded ones. The sheet thickness changes during forming. Temperature differences cause small changes. You get wider tolerances on dimensions. The manufacturing process brings these changes.
Repeatability also suffers. The first part may differ from the hundredth part. You need more quality checks. But for many reagent disc parts, the precision is good enough. The cost savings make up for the extra inspection. The reagents stay secure inside the formed features. Scaling up for larger batches is easy with this method.
Precision Machining for Reagent Disc Components
CNC Milling and Turning
Prototyping and low-volume production
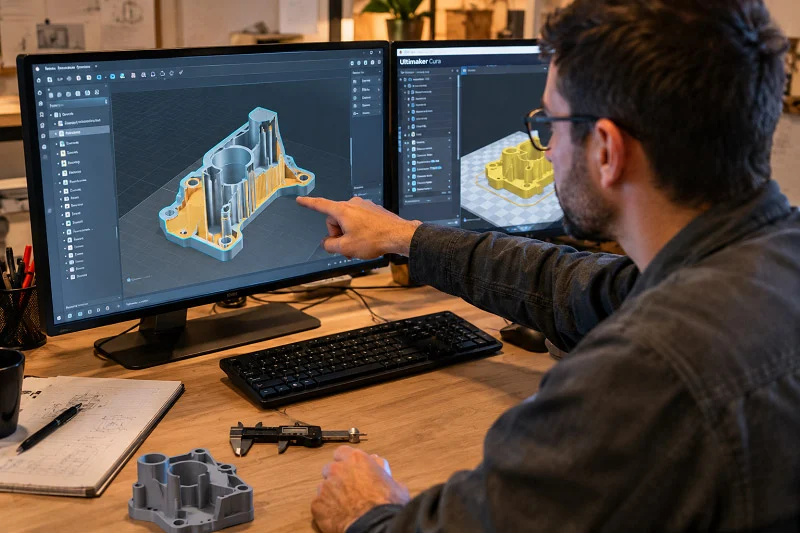
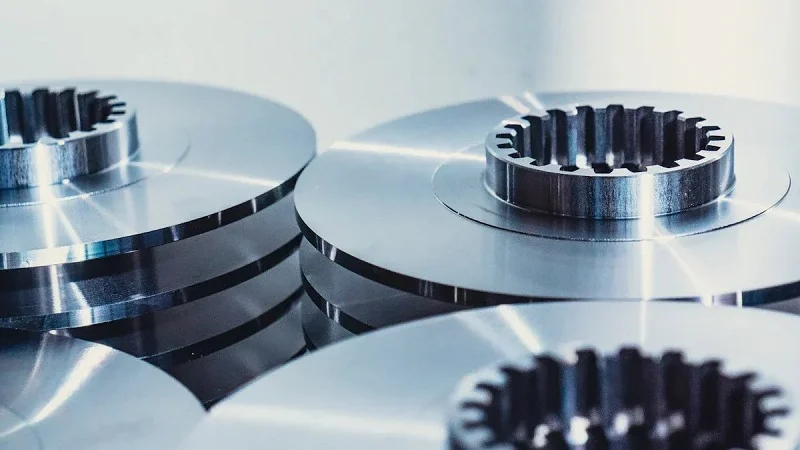
CNC machining is great when you need parts fast and don’t want to pay for expensive molds. A computer guides cutting tools that remove material from a solid block. This method lets you test designs freely. You can make one part, check it, change the design, and make another. That flexibility makes CNC the top pick for prototyping in diagnostics research and development.
Making small batches also works well here. If you need a few hundred discs for clinical trials, machining beats injection molding. You skip the mold cost completely. Each part costs more, but your total spending stays lower. For startups and research teams, this balance is key. You get real parts for testing without risking your whole budget on a mold.
Achieving tight tolerances: metal and plastic work
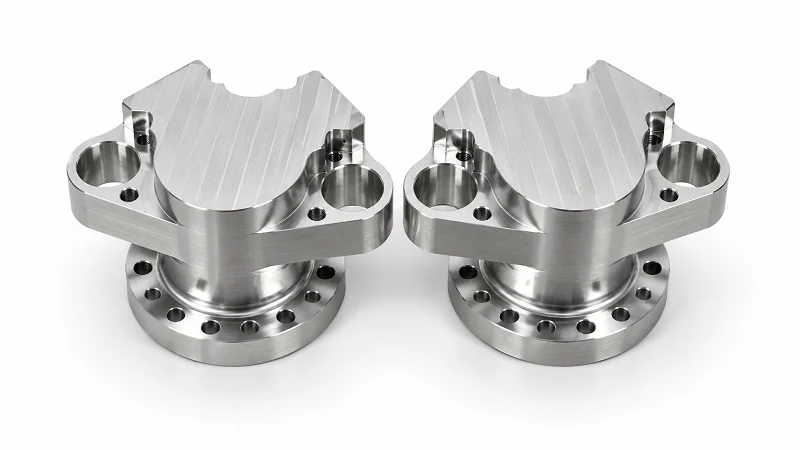
CNC machines are very precise. They can hit measurements within fractions of a millimeter. This accuracy matters for reagent discs components where channels must line up perfectly. A tiny mistake changes fluid flow and ruins test results.
This process handles both metals and plastics. Aluminum and stainless steel last long for reusable parts. Plastics like polycarbonate and COC work well for optical parts. Each material needs different cutting speeds and tool shapes. Skilled machinists know these settings well. They adjust speeds to stop melting or chipping.
Laser Cutting and Micro-Machining
Ablation for microfluidic features
Lasers provide another way to be precise. A focused beam removes material through ablation. The laser vaporizes tiny bits of plastic or metal with each pass. This method creates microfluidic channels with amazing detail. Channel widths can be smaller than a hair’s width.
Laser cutting doesn’t touch the material. No tool wear happens. The beam never gets dull. This steadiness helps when you need identical features across many parts. The heat-affected zone stays small, so nearby material keeps its properties. For diagnostics, this means clean channels that handle reagents the same way every time.
Additive manufacturing for rapid prototyping
Additive manufacturing, or 3D printing, builds parts layer by layer. This method works well alongside machining. You can print complex internal shapes that cutting tools can’t reach. Early design changes happen fast. A part goes from digital file to physical object in hours.
The downside is surface finish. Printed parts show layer lines that trap fluids or scatter light. Extra steps help smooth these surfaces. Many teams use printing to test ideas, then switch to machining or molding for final parts. This workflow speeds up diagnostics research while keeping quality high.
Post-Processing and Finishing
Deburring, cleaning, surface treatments
Machined parts rarely ship straight from the machine. Burrs and sharp edges need removal. Deburring tools smooth these rough spots. Then cleaning removes cutting fluids and debris. Ultrasonic baths work well for detailed parts. They shake loose particles from tiny channels.
Surface treatments add function. Polishing improves optical clarity. Chemical treatments can change surface energy for better reagent binding. These steps turn a raw machined part into a finished component ready for assembly.
When machining is preferred over molding
Machining wins when volumes stay low, or shapes stay complex. If your design changes often, machining avoids mold revision costs. If you need undercuts or deep channels, cutting tools reach where molded parts can’t. The choice comes down to your timeline and budget.
For runs under a few thousand units, machining often makes sense. No tooling investment keeps your startup costs low. As volumes grow, molding becomes cheaper. Many diagnostics companies start with machined parts, test their design, then move to injection molding for large-scale production. This step-by-step approach lowers risk and builds manufacturing capacity slowly.
Casting and Fabrication for Reagent Discs Components
Investment Casting
Wax pattern, ceramic shell, metal pouring
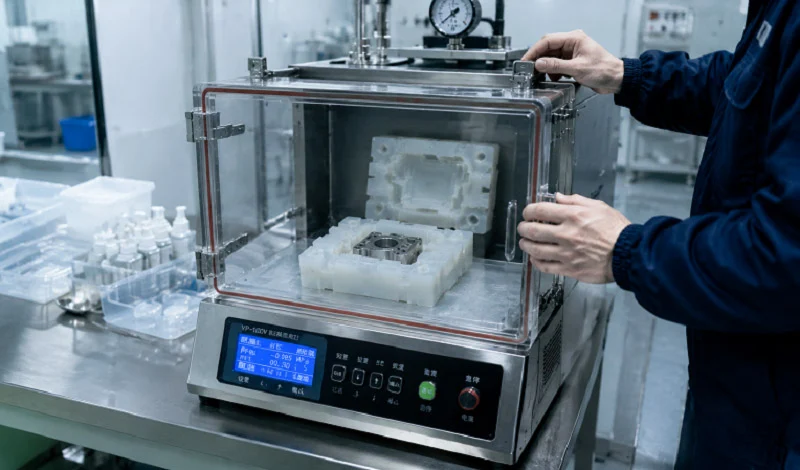
Investment casting begins with a wax copy of your part. You inject wax into a metal die. Then you attach several patterns to a central sprue. This forms a tree. Next comes the ceramic shell. Workers dip the wax tree into ceramic slurry. Fine sand coats the wet surface. They repeat this until the shell is thick enough. The coated tree then goes into an oven. The wax melts and drains out. A hollow ceramic mold remains. You pour molten metal into this cavity. After cooling, you break away the ceramic shell. The metal part stays. This method captures fine details well.
Suitable for complex metal disc parts
Complex shapes are no problem for investment casting. Deep channels and thin walls all work. You can make reagent disc components with intricate fluid paths. The process suits stainless steel and other alloys. These materials resist harsh chemicals that some reagents need. Diagnostics teams choose this method when plastic won’t survive thermal stress. Metal parts withstand repeated sterilization cycles. This matters for reusable components in diagnostics equipment. This technique offers good capacity for low to medium production runs.
Die Casting
High-pressure injection, rapid cooling
Die casting works differently. This technology injects molten metal into a steel mold. High pressure packs the metal tight against the mold walls. Rapid cooling follows right after injection. The part solidifies quickly. Cycle times stay short, often under a minute. This approach supports medium to high volumes. The steel mold lasts for many thousands of cycles. Each part comes out with consistent dimensions. Your production capacity grows with each additional mold.
Tolerances, material choices (aluminum, zinc)
Die casting holds tight tolerances. You get repeatable parts across long runs. This precision helps when reagent disc components must seal against other parts. Common materials include aluminum and zinc. Aluminum is light and strong. Zinc gives better detail at lower cost but weighs more. Both materials accept secondary operations like plating or coating that protect against reagents. The right choice depends on your thermal and mechanical needs. For diagnostics hardware, aluminum often wins out. This method delivers consistent quality for metal parts.
Comparison with Other Methods
Higher upfront cost, good for metal components
Casting requires significant upfront investment. The wax die or steel mold, costs thousands of dollars. Tooling for die casting runs even higher. These costs make sense when you need many metal parts. The unit price drops with volume. For plastic parts, injection molding usually beats casting on cost. But metals offer durability that plastics cannot match. Your manufacturing decision depends on your application. Consider casting when heat, wear, or aggressive reagents push you toward metal. Diagnostics systems often need both material types.
Not typical for plastic discs; combined with molding
Pure plastic discs dominate the diagnostics field today. Casting plays a smaller role. But many diagnostics systems combine metal and plastic components. A cast metal housing might hold a molded plastic disc. This hybrid approach uses each material where it performs best. The manufacturing team coordinates both processes. Understanding this helps you plan smarter production lines.
Secondary Manufacturing and Finishing for Reagent Discs Components
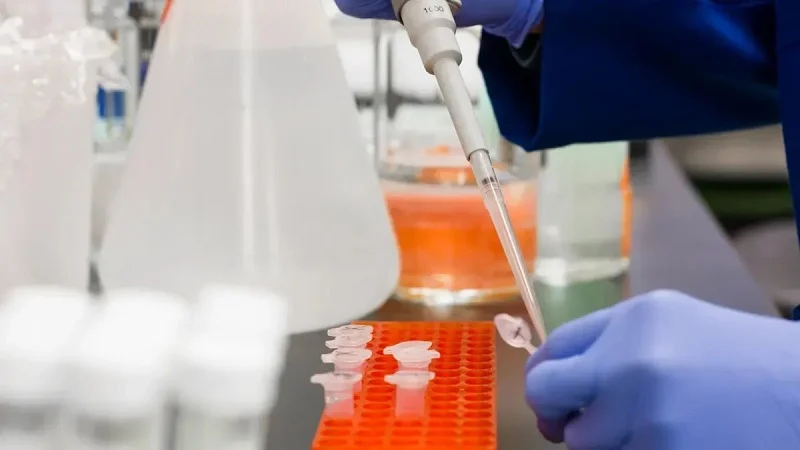
Primary processes give your reagent disc components their shape. But secondary steps make them work. These finishing operations add markings, reduce stress, and guard surfaces. Each step has a specific job in the whole manufacturing process. Skipping them can cause failed tests or broken parts.
Engraving and Marking
Laser or chemical engraving for identification
Engraving puts permanent marks on your parts. Laser engraving uses a focused beam to burn off the surface. This makes clear, readable text and symbols. Chemical engraving uses acids to etch patterns. Both work well for diagnostic parts.
Laser engraving gives you more control. You can easily change depth and contrast. Chemical engraving works better for metals than plastics. The choice depends on your material and marking needs. Most manufacturers pick lasers for speed and accuracy.
Alignment features, barcodes
Marks do more than just brand your product. Alignment features help during assembly. They show workers where parts connect. Barcodes track each disc through production. This traceability is important for quality control.
A simple dot or crosshair can guide automated machines. These small features prevent expensive misalignment errors. Barcodes store batch numbers and expiration dates. Scanning them gives quick access to manufacturing records. This tracking helps with recalls and quality checks.
Heat Treating and Annealing
Stress relief after forming or machining
Machining and molding create internal stress in materials. This stress can cause warping later. Heat treating releases that tension. It heats parts to a certain temperature, then cools them slowly.
For plastics, annealing works best. You warm the part below its melting point. You hold it there for a set time, then cool it gradually. This lets polymer chains settle into stable positions. Your parts keep their shape during storage and use.
Improving machinability and dimensional stability
Annealed parts machine better. They cut cleaner without moving unexpectedly. Dimensional stability improves too. Parts keep their measurements after annealing. This consistency matters for reagent disc components that must seal precisely.
Metal parts get similar benefits from treatments. Stress relief prevents cracking during later steps. The right heat treatment schedule depends on your material. Each alloy responds differently to temperature changes. Your manufacturing partner can suggest the correct cycle.
Plating and Coating
Electroplating for wear-resistant surfaces
Electroplating adds a thin metal layer to parts. An electric current places metal ions onto the surface. This layer protects against wear and corrosion. Nickel and chrome are common choices for diagnostics equipment.
Plated surfaces resist scratches during handling. They also handle repeated cleaning cycles. This durability makes parts last longer. For metal parts that move or connect often, plating stops early failure.
Chemical-resistant coatings for reagent contact
Coatings protect parts from harsh chemicals. Some reagents damage untreated plastics over time. A barrier coating keeps the base material safe. It also stops leaching. Plastic additives won’t contaminate your samples.
These coatings must not affect active diagnostic ingredients. The right formulation keeps reagent activity. It also keeps optical clarity where detection happens. Choosing a coating requires careful testing with your specific chemistry.
Surface treatments finish the manufacturing process. They turn raw parts into reliable components. Each finishing step adds value through protection or identification. Together, they make sure your reagent disc components work consistently across production batches. This attention to detail separates good diagnostics from bad ones.
Materials for Reagent Discs Components
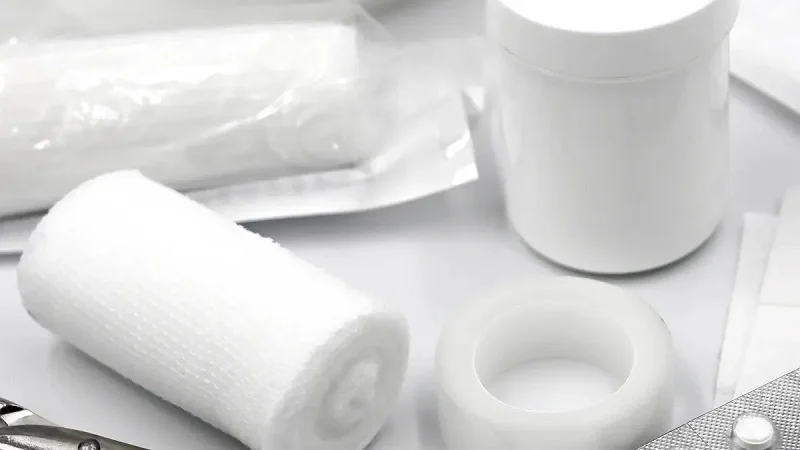
The material you choose affects how your reagent discs components work. It changes optical clarity, chemical resistance, and how easy they are to make. Every option has pros and cons. Let’s look at the main choices.
Thermoplastics
PC, COC, PS, PP, PETG – properties and uses
Polycarbonate (PC) is strong and clear. It handles rough use during shipping and storage. Many teams pick PC for discs that need to be tough. Cyclic olefin copolymer (COC) is known for low autofluorescence. This matters when optical sensors read fluorescent signals. COC also takes in little water, so its size stays steady.
Polystyrene (PS) gives great clarity for less money. It fits simple designs well. But PS breaks more easily than PC. Polypropylene (PP) stands up to chemicals. It handles strong reagents without breaking down. PETG balances clarity with easy shaping. Thermoforming teams often use PETG for thin-wall discs. Each material fits different needs in diagnostics research and development.
Optical clarity, chemical resistance, autofluorescence
Optical clarity controls how well light moves through the disc. Detection systems need clean optical paths. Any haze or distortion ruins readings. Chemical resistance matters just as much. Reagents can damage the polymer surface over time. A material that reacts with your chemistry will fail.
Autofluorescence creates background noise in fluorescent assays. This noise hides weak signals. COC and some PS grades show very little autofluorescence. PC shows more. Your detection method should guide this choice. If you run nucleic acid molecular diagnostics, low autofluorescence becomes very important. The manufacturing process also changes these properties. Molding conditions alter polymer structure. This changes optical behavior. Test materials under real conditions before you commit.
Metals and Specialized Materials
Stainless steel, aluminum, silicon, glass
Metals show up less often in discs but appear in housings and structural parts. Stainless steel resists rust and handles high heat. Aluminum is light but still strong. Both materials survive repeated sterilization cycles. This durability matters for reusable parts.
Silicon and glass fill special roles. Silicon works for microfluidic research prototypes. Photolithography creates fine channels in silicon wafers. Glass gives excellent optical clarity and chemical resistance. It fits detection windows where light must pass cleanly. These materials cost more and need different manufacturing methods. But they deliver performance that plastics cannot match.
When to choose metals (durability, heat resistance)
Choose metals when plastic won’t survive the environment. High temperatures soften most thermoplastics. Metal parts keep their shape. Strong solvents can dissolve or swell plastics. Metals resist these attacks. Component therapy equipment often uses metal parts that touch blood components again and again. The metal surface cleans and sterilizes without breaking down.
Selection Criteria
Reagent compatibility, manufacturability, cost
Start with reagent compatibility. Your material must not react with active diagnostic ingredients. It also must not release additives into samples. Test compatibility early in development. Next comes manufacturability. Can your chosen process handle this material? Injection molding works with most thermoplastics. Thermoforming needs materials that stretch evenly. Machining works for both metals and plastics.
Cost ties everything together. Material price matters, but so does processing cost. A cheap resin that molds poorly costs more overall. Consider the full manufacturing picture. Blood component preparation systems need materials that handle biological samples safely. The right choice balances performance with practical production limits.
Surface energy and biocompatibility
Surface energy controls how liquids wet the disc. High surface energy spreads fluids evenly. Low surface energy makes droplets bead up. This behavior affects reagent flow through channels. You can change surface energy with coatings or plasma treatment.
Biocompatibility matters for blood components and clinical samples. Materials must not trigger immune responses or change sample chemistry. ISO standards guide biocompatibility testing. Many medical plastics meet these requirements. Your manufacturing partner should document compliance. This documentation supports regulatory approval for in vitro diagnostics products. The right material keeps reagents stable and results reliable across every production batch.
Design for Reagent Discs Components
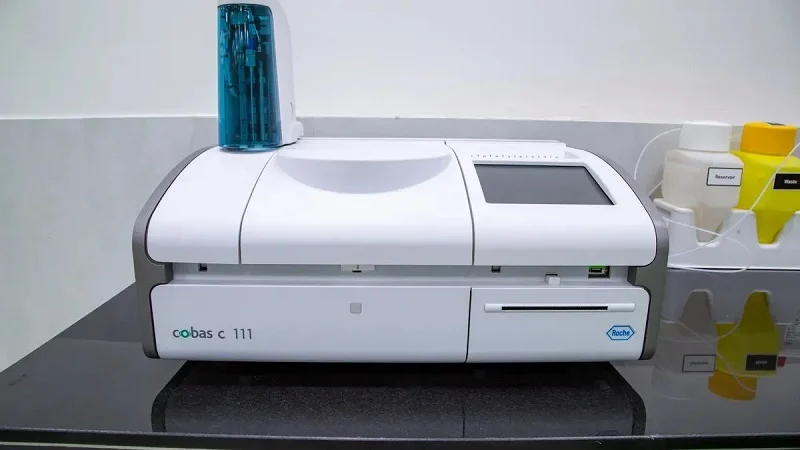
Good design turns a concept into something you can actually make. The choices you make on paper affect every step later on. Feature size, tolerance, and material all work together. Getting these right saves time and money during development.
Feature Geometry and Complexity
Minimum feature sizes, draft angles, undercuts
Every manufacturing process has limits on how small or detailed a feature can be. Injection molding handles fine details well, but sharp corners trap stress. Thermoforming rounds off edges naturally. Machining reaches deep into parts but takes time.
Draft angles matter more than most designers realize. These slight tapers on vertical walls let parts release from molds cleanly. Without enough draft, parts stick and warp during ejection. For shallow features, 3 to 4 degrees works well. Deep draws need 5 to 7 degrees. Textured surfaces need extra angle too.
Undercuts create real problems. These are features that lock into the mold. You need special slides or lifters to release them. That adds cost and complexity. Ask yourself if the undercut truly serves a purpose. Often you can redesign around it. Simpler geometry means fewer molding defects and faster cycle times.
Alignment of reservoirs, channels, detection windows
Your disc holds several functional zones. Reservoirs store reagents. Channels move fluids between them. Detection windows let light pass for readings. These features must line up precisely. A misaligned channel blocks flow. A shifted window ruins optical measurements.
Think about the whole fluid path as one system. Each transition between zones needs careful positioning. The manufacturing process you choose sets the alignment accuracy you can expect. Injection molding holds tight positions across thousands of parts. Thermoforming gives more variation. Plan your tolerances around your process capability.
Tolerances and Quality Control
Critical dimensions for sealing and fluid flow
Not every dimension needs tight control. Focus on the ones that affect function. Channel width controls flow rate. Reservoir depth sets reagent volume. Sealing surfaces must match mating parts exactly. These critical dimensions deserve the tightest tolerances.
Work with your manufacturing partner to identify these features early. They can tell you what tolerance their process holds consistently. Over-specifying every dimension drives cost up without adding value. Under-specifying critical seals causes leaks and failed tests. Balance matters in diagnostics.
Inspection methods (optical, CMM)
Quality control catches problems before parts reach your assembly line. Optical inspection works well for surface features and alignment checks. Cameras measure channel widths and detect surface defects quickly. Coordinate measuring machines (CMMs) probe physical dimensions with high accuracy. They verify critical tolerances on sample parts.
For high-volume production, automated optical inspection scans every part. This catches defects early. Statistical process control tracks measurements over time. Trends warn you before parts drift out of spec. This proactive approach keeps quality consistent across production runs.
Design for Manufacturability (DFM)
Matching design to chosen process
Design for manufacturability means designing with your process in mind. A part that works beautifully as a machined prototype may fail as a molded part. Wall thickness changes between processes. Draft angles differ. Feature resolution varies. Review your design against your chosen method early.
Your manufacturing partner should review drawings before you commit to tooling. They spot problems you might miss. This review saves thousands in mold revisions. It also speeds up your path to production. Good DFM support makes the difference between smooth launches and costly delays.
Avoiding unnecessary complexity
Every extra feature adds risk. Every tight tolerance adds cost. Ask yourself what your disc truly needs. Does that decorative ridge serve a purpose? Can that channel tolerate a wider tolerance? Simplify wherever you can without hurting function.
Simple designs also support blood component testing better. Clean geometry means fewer places for samples to get trapped. Easier cleaning between uses. More reliable results across diagnostic testing runs. The best designs feel obvious in hindsight. They balance function with practical manufacturing limits. This discipline separates successful products from ones that struggle in development.
Choose NOBLE for Your Reagent Disc Components

Comprehensive Capabilities
Design, prototyping, production, and assembly in-house
NOBLE handles everything in one place. You bring an idea. Our team manages design review, prototyping, full production, and final assembly. No outside shops are needed. No waiting on vendors. This setup shortens your timeline from weeks to days.
Keeping work inside also protects your ideas. Drawings stay private. Process details remain internal. For diagnostics companies, this security matters. Your reagent disc components hold special chemistry and design work. Keeping everything inside lowers risk.
Expertise in metal and plastic processing (injection molding, CNC, casting)
Such a partner works with many materials. Our injection molding lines make high-volume plastic discs with tight tolerances. CNC machining handles prototypes and small runs. Casting services cover metal housings and structural parts. This range means you choose the best process for each part.
NOBLE’s engineering team knows how materials act. Polycarbonate flows differently than COC. Aluminum cuts differently than stainless steel. This knowledge stops costly errors. They suggest the right process before you invest in tooling. Their manufacturing skills cover all types of component production.
Partnering with NOBLE from Concept to Completion
DFM support, testing, scalable production
NOBLE reviews your designs early. Our engineers spot manufacturing issues before tooling starts. They suggest draft angle changes or wall thickness fixes. This design for manufacturability support saves thousands in mold revisions.
Testing happens throughout development. Prototypes get checked for dimensional accuracy. Functional tests verify fluid flow and reagent compatibility. Blood components testing confirms your discs handle biological samples correctly. This careful approach finds issues early.
When you’re ready to grow, NOBLE grows with you. Our production capacity expands to meet demand. Start with machined prototypes. Move to injection molding for high volumes. The switch stays smooth because the same team handles both stages.
Single-source solution reduces lead time and risk
Working with one partner makes everything easier. You send one purchase order. You track one timeline. You manage one relationship. This single-source approach cuts lead time a lot. No coordination delays between separate suppliers.
Risk drops too. When problems come up, our team owns the fix. No finger-pointing between vendors. No gaps in responsibility. For domestic manufacturing teams, this clarity matters. You know exactly who to call when something needs attention.
NOBLE supports local manufacturing efforts across the diagnostics industry. Their domestic manufacturing capabilities keep your supply chain close. This proximity lowers shipping costs and delivery delays. Your research and development teams get faster feedback. Your production stays flexible.
The partnership goes beyond parts. NOBLE helps with material selection, surface treatments, and assembly. We understand how reagents interact with different polymers. This knowledge guides better design choices. Your development cycle shortens because you avoid trial-and-error.
For diagnostics companies building next-generation platforms, this partnership pays off. You focus on assay chemistry and clinical validation. The partner handles the manufacturing complexity. Together, you bring reliable products to market faster. That speed creates competitive advantage in a growing field.
Every manufacturing method we covered has real strengths. Injection molding gives you speed in large batches. Thermoforming keeps tooling costs low. Machining offers precision for prototypes. Casting handles metal parts. Secondary finishing adds durability through annealing, plating, or engraving.
No single process fits every reagent disc components project. Your production volume, precision needs, material limits, and budget all shape the right choice. Secondary steps can greatly boost performance, so don’t skip them.
Think about your next diagnostics project. Consider how blood components testing, affordable diagnostics, and in vitro diagnostics needs affect your manufacturing choices. NOBLE understands these trade-offs. Domestic manufacturing teams benefit from this technology daily.
Apply this guide to your next research and development cycle. For smooth execution, NOBLE with a leading manufacturer experienced in these processes. Our machining expertise and full-service support move you from prototyping to mass production efficiently. Your diagnostic capacity grows faster with the right partner.
FAQ of Reagent Discs Components
How do I choose between injection molding and thermoforming?
Think about your volume first. Injection molding needs expensive tooling but gives low per-part costs at scale. Thermoforming costs less upfront. It fits medium runs and simpler designs. If you need tight tolerances or complex features, injection molding wins. For quick starts with modest budgets, thermoforming works well.
When should I start with CNC machining instead of molding?
Pick machining for prototypes and low-volume production. You avoid tooling costs completely. Design changes cost nothing extra. Machining also handles undercuts and deep channels that molding cannot make. Once your design stabilizes and volume grows past a few thousand units, switch to injection molding for better economics.
What material offers the best optical clarity?
Polystyrene gives excellent clarity at low cost. Polycarbonate adds toughness but shows more autofluorescence. COC delivers low autofluorescence with stable dimensions. Your detection method should guide this choice. Fluorescent assays need COC. Simple visual reads work fine with polystyrene. Test materials under real conditions before committing.
How do secondary finishing steps affect performance?
Annealing relieves internal stress from molding or machining. Parts stay dimensionally stable during storage. Plating protects metal surfaces from wear and corrosion. Coatings shield plastics from aggressive reagents. Engraving adds barcodes and alignment marks. These steps often determine whether your reagent disc components survive real-world conditions.
What tolerances can I expect from each process?
Injection molding holds the tightest tolerances across high volumes. CNC machining achieves excellent precision for prototypes and small batches. Thermoforming gives wider variation between parts. Casting depends on the method and material. Ask your manufacturing partner which tolerances they hold consistently. Over-specifying every dimension drives cost up without adding value.
How do I transition from prototype to production smoothly?
Start with machined parts to validate your design. Test fluid flow and reagent compatibility early. Share your drawings with your manufacturing partner before tooling begins. They will spot draft angle issues or wall thickness problems. Fixing these on paper costs nothing. Fixing them after tooling costs thousands. Plan this review step into your timeline.
When should I consider metal components?
Choose metal when plastic cannot handle the environment. High temperatures soften thermoplastics. Strong solvents degrade polymer surfaces. Metal housings and structural parts survive repeated sterilization cycles. Stainless steel resists corrosion. Aluminum stays light and strong. Many diagnostic systems combine cast metal frames with molded plastic discs for best performance.
How do I verify quality across production batches?
Automated optical inspection catches surface defects on every part. Coordinate measuring machines verify critical dimensions on sample parts. Statistical process control tracks measurements over time. Trends warn you before parts drift out of specification. Work with suppliers who document their quality systems. ISO quality management and medical device manufacturing certifications signal reliable processes.