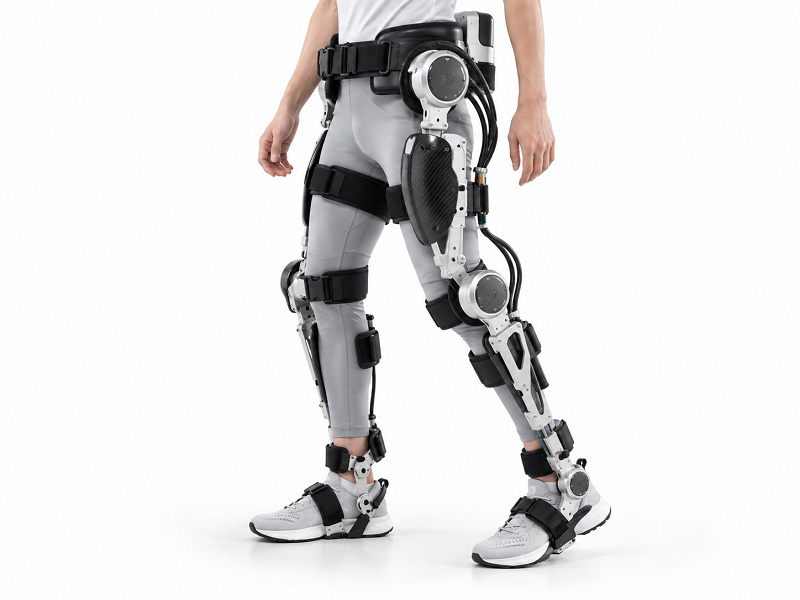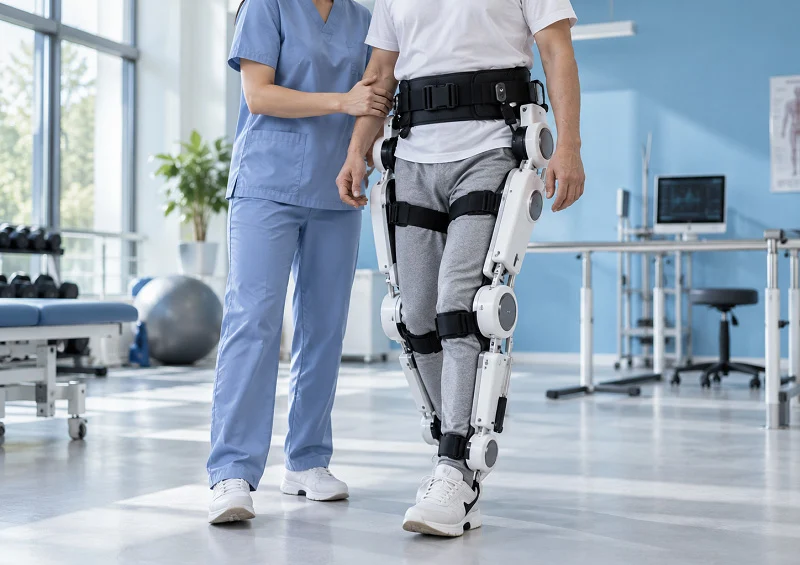
Common ways to make medical robot parts include CNC machining, injection molding, 3D printing, and sheet metal fabrication. These methods shape materials like stainless steel, titanium, PEEK, and silicone into exact parts. Each combo meets different needs. Some parts need to be very precise. Others must be safe for the body. How many you make, the cost, and rules also matter. This guide gives engineers, product managers, and hobbyists a plan for making robot parts. You will learn to choose the right process and material pair. The goal is simple: match your part’s job to the best production method. Whether you build surgical robots or amr robot parts, these ideas still apply. Let’s dive in.
Key Requirements for Manufacturing Medical Robot Parts

Tolerance Ranges for Moving Components
Moving parts in medical robots need very tight tolerances. Any looseness in a joint or actuator can cause positioning errors during surgery. For critical interfaces and alignment features, typical tolerance targets range from ±0.02–0.05 mm, depending on material properties. Surgical robots often need even tighter tolerances—as tight as ±0.002 mm to ±0.005 mm (0.00008″ – 0.0002″). These numbers stop mechanical play and ensure exact positioning during minimally invasive procedures.
Surgical robots, for instance, rely on parts machined to tolerances as tight as ±0.0005 inches.
Getting these tolerances takes careful process selection. Multi-axis CNC machining and precision grinding are common choices for actuators, joints, and robotic arms. In a practical sense, you should define tolerance zones based on what the part does. A gearbox shaft needs a different tolerance than a cosmetic housing cover.
Material Contact with Human Tissue
Any material touching human tissue must be biocompatible. Medical grade polymers must meet ISO 10993-1 standards, which provide a risk-based framework for evaluating biological safety based on contact duration and device type. This standard has replaced older USP Class VI requirements and offers a more rigorous evaluation system that identifies and quantifies chemical constituents in materials.
Medical grade polymers must meet ISO 10993-1 standards, which provide a risk-based framework for evaluating biological safety based on contact duration and device type. This standard has replaced older USP Class VI requirements and offers a more rigorous evaluation system that identifies and quantifies chemical constituents in materials.
For medical robot parts like end-effectors or sensor mounts, you must check the chosen materials against ISO 10993. Titanium and PEEK are common picks because they pass these tests. Silicone works well for grips and seals too.
Autoclave, EtO, and Gamma Methods
Medical robots must survive repeated sterilization. Autoclave uses high-pressure steam and heat. Ethylene oxide (EtO) works at lower temperatures but requires aeration time. Gamma radiation penetrates packaging but can degrade some plastics. Each method affects materials differently. You should test your part under the actual sterilization cycle it will face.
Cleanroom Manufacturing Requirements
Many medical robot parts are made in cleanrooms. These controlled environments limit particles and microbes. Cleanroom manufacturing requires strict gowning, air filtration, and surface monitoring. For manufacturing robot parts that touch patients, cleanroom assembly is often mandatory. Ultrasonic cleaning and vacuum sealing prevent surface contamination before assembly.
FDA and ISO 13485 Documentation
Medical device manufacturing follows strict rules. ISO 13485 certification establishes a comprehensive quality management system specifically designed for medical device manufacturing. This internationally recognized standard requires detailed documentation of all manufacturing processes, from raw material inspection to final product testing.
ISO 13485 certification establishes a comprehensive quality management system specifically designed for medical device manufacturing. This internationally recognized standard requires detailed documentation of all manufacturing processes, from raw material inspection to final product testing.
Under the FDA’s QMSR (effective February 2, 2026), 21 CFR Part 820 incorporates ISO 13485 by reference. The Design History File is now the Design and Development File (ISO 13485 Clause 7.3.10). The Device Master Record and Device History Record are now encompassed by the Medical Device File (ISO 13485 Clause 4.2.3).
Traceability records must link device identification numbers to production batches, component lots, and distribution records. This enables complete product history reconstruction from raw materials through distribution. Key traceability items include:
- Full raw material certification (Mill Test Certificates) and lot tracking.
- 100% dimensional verification using Coordinate Measuring Machines (CMM) and optical measurement tools.
- Cleanroom packaging: Ultrasonic cleaning and vacuum sealing in controlled environments to prevent surface contamination before assembly.
These requirements apply whether you build surgical robots or amr robot parts. The same rigor protects patients and keeps your product compliant.
Common Manufacturing Processes for Medical Robot Parts
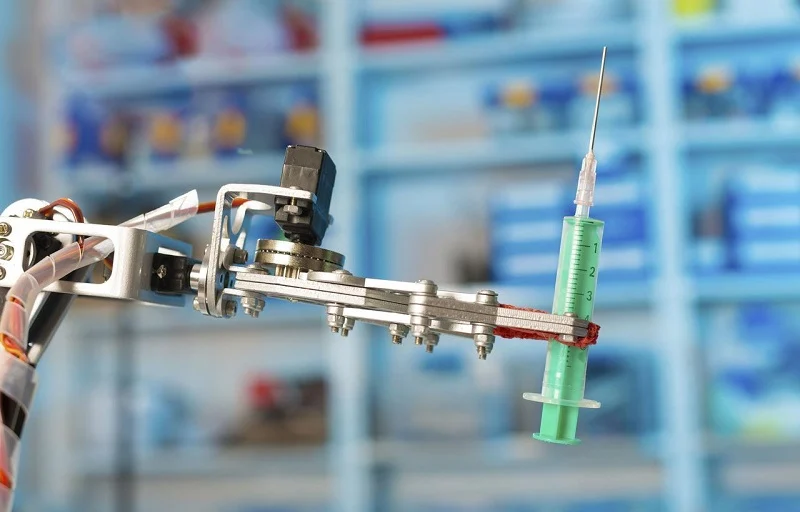
Choosing a process starts with what the part does. Does it move, hold weight, or just protect electronics? The answer quickly narrows your choices. Here are the common ways to make medical robot parts, grouped by how they shape material.
Subtractive Methods: CNC and Laser Cutting
Multi-Axis CNC Milling and Turning
CNC machining for precise parts is still the main workhorse. A 5-axis mill cuts complex angles in one setup, which keeps tight tolerances on joint housings and actuator bodies. Turning makes shafts, pins, and threaded inserts. For medical robot parts that must not wobble, this is often the only way. Precision CNC machining also gives the surface finishes that sealing faces need.
Micro-Scale Laser Cutting and Welding
Laser cutting slices thin sheet and tube with a narrow heat-affected zone. Laser welding joins tiny sensor mounts and stainless frames without filler metal. Both work well for small features where a cutter would distort the work. The focused beam keeps distortion low, so thin walls stay flat.
Additive Methods: 3D Printing Technologies
SLA, SLS, and Material Jetting for Prototypes
Prototyping gains from several different technologies, each with trade-offs:
- SLA cures photopolymer layers with a UV laser. It wins on accuracy and detail, but large parts can warp and the output is not very strong.
- SLS sinters fine powder into solid objects, giving precision and strength in all directions. Machine, maintenance, and operator costs run high.
- Material jetting prints multi-material, multi-color parts that act like end-use products. You can build a stiff case with flexible buttons for haptic feedback, or mix resins into a “digital material” with tuned hardness. Medical teams often use full-color printing for educational models.
Direct Metal Laser Sintering for Production
DMLS moves additive into production. It builds internal cooling channels, lattice cores, and topology-optimized shapes that machining cannot reach. Laser-sintered titanium and nickel alloys match or beat cast and wrought strength. Unfused powder gets reclaimed, which cuts waste. From a practical view, the limits matter too. Overhangs need support structures that must be wire-cut away. Z-axis strength can lag XY-axis strength without HIP or heat treatment. Build volume tops out around 400 x 400 x 400 mm, so larger parts get split and welded. Surface roughness of Ra 8–15 µm usually needs bead blasting or machining on sealing faces. Per-part cost stays high at scale; conventional casting or machining wins above a few thousand units.
Molding and Forming Processes
Injection Molding and Liquid Silicone Rubber Molding
Injection molding makes housings, brackets, and covers in high volume at low unit cost. Tooling takes time and money upfront, so it suits stable designs. Liquid silicone rubber molding covers grips, seals, and soft-touch surfaces. LSR bonds well to PEEK and other substrates, which makes overmolding a clean option for surgical handles.
Sheet Metal Fabrication for Structural Frames
Sheet metal builds the chassis that holds everything together. Material choice drives the design. 316 stainless steel offers high corrosion resistance and durability, though it needs proper tooling and welding practice. 304 stainless is a common, widely available alternative. 5052 aluminum is lightweight, corrosion resistant, and highly formable, which suits enclosures. 6061 aluminum is stronger but less formable and may need larger bend radii. Keep geometry manufacturable with standard bend radii and accessible weld joints. Plan self-clinching hardware and mounting holes early, since they affect forming and finishing. Apply tight tolerances only where fit and function demand them. These DFM habits cut cost and prevent assembly headaches in manufacturing robot parts.
Off-the-shelf components deserve a mention here. Buying standard gearboxes, bearings, and fasteners trims custom work. You save machining and molding for the parts that truly need it. That mix keeps medical robot parts manufacturing lean, whether you build surgical systems or amr robot parts.
Common Materials for Manufacturing Medical Robot Parts

Material choice decides how a part works, how long it lasts, and if it passes rules. Some parts bend, others hold heavy weight, and a few guide tools inside the body. This section looks at the most common materials for amr robot parts and surgical robots. We group them into plastics, metals, and new mixes. Each group fixes different problems.
Biocompatible Polymers and Elastomers
Plastics show up in covers, seals, and moving joints. The right pick depends on how you clean it, friction, and load. The table below compares six options often used for medical robot parts.
| Polymer | Key Properties & Risks | Applications in Medical Robot Parts |
| PEEK | Strong, survives cleaning, keeps shape; high cost, hard to work with | Surgical tool bodies; reusable parts that need sterile strength |
| PPSU | Handles many autoclave cycles; less chemical resistance than PEEK, may change color | Reusable surgical tools; covers that get cleaned many times |
| PTFE (Teflon) | Very low friction; deforms under constant pressure, hard to glue | Low-friction bearings, seals, tube linings, wire cover |
| Silicone Elastomers | Flexible, safe for body; may swell with cleaners, not stable under high heat | Soft robot parts, seals, prosthetic surfaces, flexible joints |
| PU (Polyurethane) | Stretchy; can break down in moisture, get brittle with cleaning, damaged by chemicals | Flexible seals, tubes, coatings where stretch is key but cleaning is limited |
| PC (Polycarbonate) | Tough, clear; cracks with cleaners, gets brittle with repeated cleaning | Clear covers, protective shells, parts with few cleaning cycles |
When you pick these plastics, check four things. First, body safety — test if the material harms cells, causes allergies, or irritates skin. Second, cleaning and sterilization — see how steam, gas, radiation, or cold methods change strength and color over many cycles. Third, wear and tiredness — measure how much material rubs off in joints and seals. Fourth, cost versus performance. High-performance picks like PEEK and PPSU work best for reusable tools because they survive repeated cleaning. Cheaper plastics like PC and PU fit covers and single-use parts where demands are lower. Injection molding is the usual way to make high-volume plastic parts.
PEEK, PPSU, and PTFE for High-Performance Parts
PEEK stands out for strength and cleaning resistance. It keeps its shape through hundreds of steam cleanings. PPSU does almost as well and costs less, though it may turn darker over time. PTFE has the lowest friction of any solid plastic. That makes it perfect for bearing surfaces and sliding seals. The problem with PTFE is creep — it slowly deforms under constant pressure.
Silicone, PU, and PC for Flexibility and Impact Resistance
Silicone is great where parts need to bend and seal. Soft robot parts use silicone for safe patient contact. PU sits between rubber and plastic, giving stretch for tubes and coatings. PC gives you impact strength and clearness. It works for see-through covers where you need to watch moving parts. None of these match PEEK for cleaning durability, but they cost less and process faster.
Medical-Grade Metals and Alloys
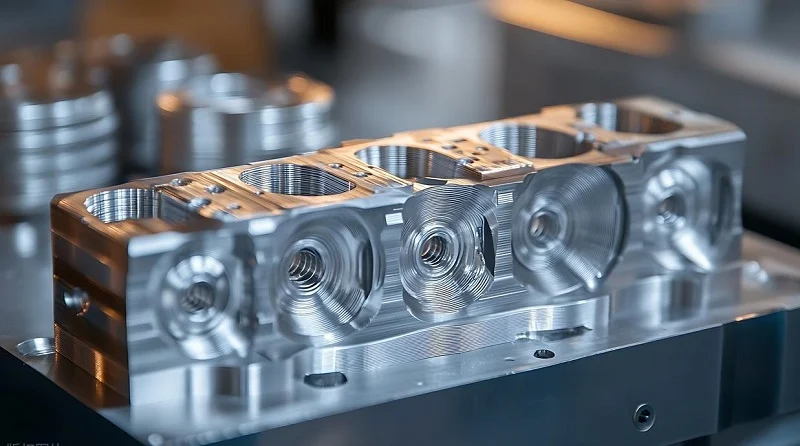
Metals carry the heavy loads and give exact mounting surfaces. Two types lead the field for making robot parts: 316, 316L stainless steel and Grade 5 titanium.
Stainless Steel 316L for Corrosion Resistance
316L stainless steel resists rust from body fluids and cleaning chemicals. The low carbon stops hard particles from forming during welding, so joints stay strong. You find 316L in structural brackets, tool mounts, and parts that face repeated cleaning. Its hardness works well for bearing surfaces and threaded inserts.
Titanium Grade 5 for Strength and Biocompatibility
Grade 5 titanium gives you the best strength-to-weight ratio among medical metals. It passes ISO 10993 tests for long-term body contact. Robot arms and joint bodies made from titanium weigh less. That lets the robot move faster with lower motor power. Titanium also bonds well with bone, so it appears in surgical guide frames that touch the patient directly. These metal and plastic options cover most needs, but advanced mixes push performance further.
Advanced Composites and Ceramics
When weight or wear becomes the main limit, mixes and ceramics step in.
Carbon Fiber Reinforced Polymers for Lightweight Frames
Carbon fiber reinforced polymer (CFRP) gives high bending strength and handles high temperatures. The high strength-to-weight ratio makes CFRP ideal for robot arms and end effectors that must move fast without adding mass. Making robot parts from CFRP needs careful layup and curing, but the weight savings justify the extra steps for high-speed systems.
Alumina and Zirconia for Wear Surfaces
Alumina and zirconia are bio-ceramics with high natural strength, high wear resistance, low friction, and proven body safety. They already serve in artificial joints and dental implants. For medical robot parts, these ceramics work well in robot joints and structural parts that face repeated load. Their low friction also reduces heat buildup in high-speed bearings. The main downside is brittleness — ceramic parts need careful handling during assembly and use.
Understanding these material groups helps you match the right substance to your part’s real needs. The common methods for manufacturing medical robot parts depend heavily on material choice. Next, we look at how each process works with these materials.
Manufacturing Processes for Medical Robot Parts
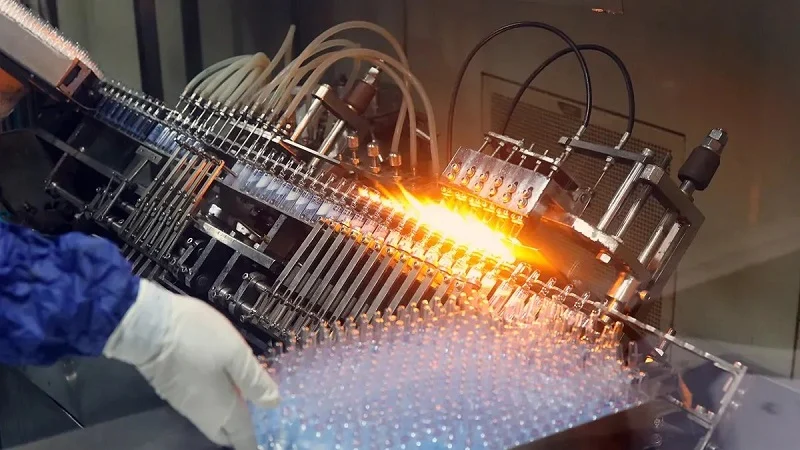
Actuators and Transmission Elements
Gears, Gearboxes, and Shafts
Actuators power every joint in a surgical or amr robot. Their gears, gearboxes, and shafts need exact tooth shapes and smooth surfaces. Gear hobbing cuts small tooth profiles, like planetary gears inside humanoid actuators. Profile grinding then smooths planetary gears, sun gears, and internal tooth profiles. One machine can grind every gear part of a small planetary gearbox. Generating grinding shapes the tooth sides of shafts and gears. Hard turning and grinding often team up on one machine to save time. Vertical turning also has a role here.
Material choice matters just as much. Hardened steel works for gear teeth that face nonstop motion and high torque. It fights wear and carries heavy loads. Aluminum alloys cut weight, which helps mobile robots save energy. Titanium alloys add strength and rust resistance for special medical robots.
Precision Machining of Small Moving Parts
Small moving parts leave no room for mistakes. High-precision medical robot parts machining holds tolerances that stop mechanical play. Precision CNC machining gives the repeatability these tiny parts need. For robot parts manufacturing at this scale, the setup often matters more than the cut itself.
Structural Frames and Housings
Sheet Metal Fabrication and Welding
Structural brackets, covers, and support frames come from laser cutting and sheet metal fabrication. This approach makes building easier and cuts overall weight. Welding joins the frame into one stiff unit. It is worth noting that alignment between welded sections affects every later assembly step.
Multi-Axis Machining of Complex Housings
Complex joint housings, linkages, and interface parts use 5-axis CNC machining. This makes sure fits are accurate and movement is smooth. A key challenge involves joining 5-axis CNC machined parts with sheet metal assemblies while keeping alignment the same across mating parts. From a practical view, cnc machining handles aluminum, stainless steel, titanium, and engineering plastics just as easily. That range covers both prototypes and production runs.
End-Effectors and Sensor Mounts
Micro-Scale 3D Printing and Laser Welding
End-effectors and sensor mounts pack fine features into tight spaces. Micro-scale 3D printing builds these shapes layer by layer. Laser welding then joins tiny stainless mounts without filler metal. The focused beam keeps distortion low, so thin walls stay flat.
Biocompatible Coatings and Surface Finishes
Any medical robot parts that touch tissue need biocompatible coatings. Surface finishes also affect friction, wear, and how easy they are to clean. These steps protect patients and make parts last longer.
For teams that need help, NOBLE is a leading manufacturing company in China. Their outstanding service capabilities and professional machining expertise help clients finish prototyping and mass production efficiently. Whether your project involves precision medical robot parts or full assemblies, their team can guide the right process and materials for amr robot parts. Injection molding and cnc machining both fall within their scope, alongside additive methods. That breadth keeps robot parts manufacturing under one roof.
Selecting Manufacturing Processes for Medical Robot Parts
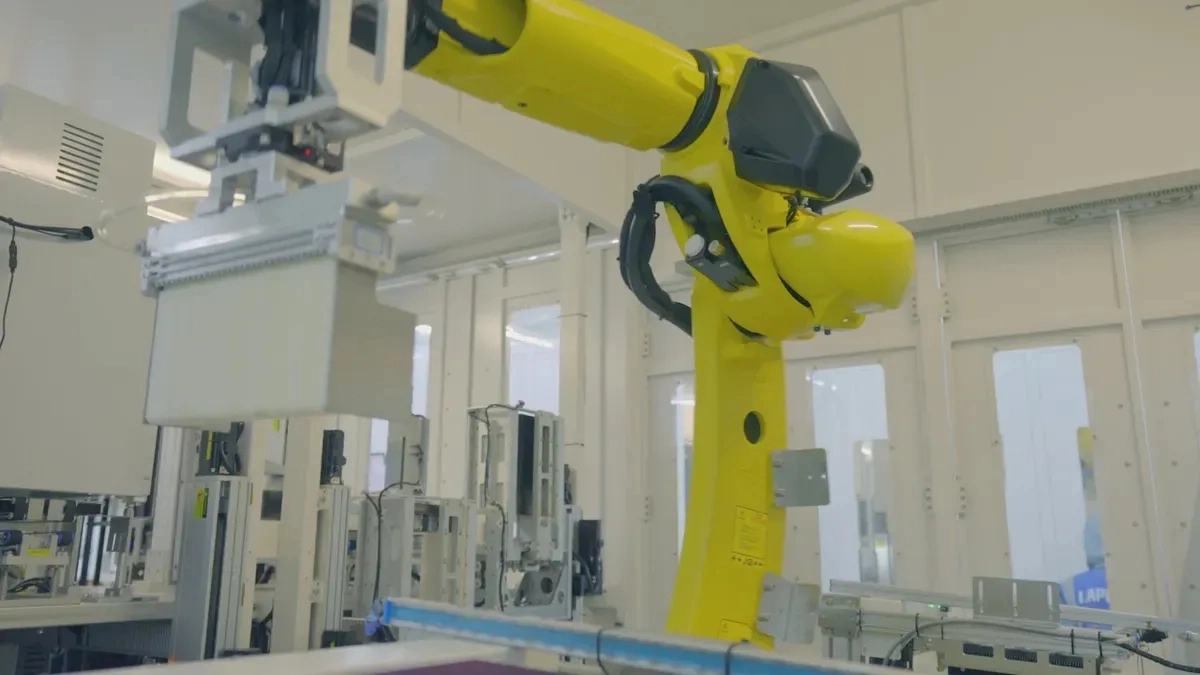
Prototypes: CNC or 3D Printing
For small runs, CNC machining and 3D printing work well because they have no tooling costs. Parts arrive in days, making design changes cheap and fast. CNC makes very precise metal brackets and motor mounts. 3D printing builds complex shapes that would need many setups on a mill. Both let you test fit and function before paying for expensive molds.
Production: Injection Molding or Die Casting
As volumes increase, injection molding becomes the best choice. The mold costs from $1,000 for a simple one to over $100,000 for a complex one. That sounds high, but cost per part drops a lot at large volumes. The break-even point is between 100 and 500 units versus CNC, and between 500 and 1,000 units versus 3D printing. Below those numbers, the mold cost makes it not worth it. Above them, injection molding wins on cost per part and steady cycle times. Lead time also changes: prototypes take days, but molding needs weeks to prepare the mold.
Lead time and cost both affect manufacturing choices, but how much they matter changes by industry and project. In medical devices, patient safety depends on reliable and repeatable manufacturing processes.
Simple Parts vs. Intricate Internal Channels
Simple brackets and plates work well with sheet metal or basic CNC. Complex internal channels, like cooling paths, need additive methods such as DMLS. These channels cannot be cut with a tool. Always match the process to the part’s shape.
Incorporating Threads, Bosses, and Snap-Fits
Threads, bosses, and snap-fits affect which process to use. CNC cuts threads well in metal. Injection molding makes bosses and snap-fits in one step, saving assembly time. Additive methods can also make these features, but post-machining often smooths critical surfaces. Designing for manufacturing cuts costs and lead times, so early decisions matter.
Reducing Custom Manufacturing Costs
Standard parts like motors, wheels, and controllers reduce the need for custom parts. They are easy to buy and speed up building. Use standard parts first, then custom only where needed. That mix keeps manufacturing lean.
Integration with Custom Parts
Standard parts must fit with custom housings and mounts. Plan connections early so tolerances stack correctly. A standard gearbox needs a machined flange that fits your amr robot parts. This balance keeps costs low while keeping precision.
Design for Medical Robot Parts

Design for Manufacturability (DFM)
Draft Angles and Wall Thickness
Good design starts before any cutting or molding begins. DFM finds problems while changes are still cheap. For making robot parts, how well plastic parts mold is very important. Complicated shapes can cause sink marks, warping, weak weld lines, or parts that stick in the tool. Changing wall thickness and adding proper draft helps the part mold evenly every time.
Wall thickness should stay the same across the whole part. Here are normal ranges for common plastics used in injection molding:
| Material | Recommended Wall Thickness |
| ABS | 1.5 – 3.0 mm |
| Polycarbonate | 1.0 – 3.0 mm |
| Polypropylene | 1.0 – 4.0 mm |
| Nylon | 1.0 – 3.0 mm |
Ribs add strength without making walls thicker. Make them about 40%–60% of the main wall thickness to avoid sink marks. Draft angles let the part come out of the mold easily. Smooth surfaces need about 1°, while textured surfaces need 2° or more. Deeper features need more draft. A feature 0.5 inches deep might need 1° of draft, but a 2-inch feature needs over 2°. Without draft, the part drags on the mold and gets scratched.
Avoiding Stress Concentrations
Sharp corners create weak spots that can crack under pressure. Round inside corners with generous curves. This spreads stress over a larger area. For amr robot parts that move all the time, this step stops early breakage. Changes between thick and thin sections should be slow and smooth. Sudden changes cause weak spots and uneven cooling. Working with your manufacturer early lets engineers check draft, gate spots, and ribbing before the tool is made.
Tolerances and Surface Finish
Functional vs. Aesthetic Requirements
Not every surface needs the same level of precision. Working surfaces need tight tolerances for sealing, wear, or strength over time. Look-only surfaces just need to look good and resist damage. Mixing these up wastes money. Making roughness too strict raises cost without helping. Making it too loose risks part failure. Define the job first, then set tolerances to match.
Surface Roughness Specifications (Ra Values)
Surface roughness is often a working need, not just a look. Sealing ability, friction, and wear all depend on Ra values. Different machining methods give different finishes. Grinding reaches 0.2–0.8 µm Ra. Milling usually lands between 1.6–6.3 µm Ra. Finishing surfaces for medical robot parts must balance cost and performance. Set Ra only where it matters. A cover that just looks good does not need the same finish as a bearing surface. This approach keeps manufacturing lean and focused on what the part really does.
Case Studies in Manufacturing Medical Robot Parts

Robotic Arm Joint Housing
Titanium Alloy, 5-Axis CNC Milling
A surgical robot arm needs a joint housing that stays firm when weight is put on it. Grade 5 titanium works well for this job. It is very strong and passes ISO 10993 tests for touching the body. The housing has angled holes and curved mounting surfaces. A 5-axis mill cuts all of these shapes in one setup. This keeps every surface lined up to the same reference point. Precision cnc machining like this removes the piled-up errors that happen when you move a part between machines.
Tight Tolerances for Smooth Articulation
Loose joints ruin surgical accuracy. The hole for the actuator shaft must hold a tolerance as tight as ±0.002 mm to ±0.005 mm. Hitting tight tolerances for medical robot parts at this level takes more than a good machine. It takes temperature control in the shop, sharp tools, and measuring while the part is still on the machine. The reward shows up in the motion. The arm moves without any wobble, and the surgeon gets the exact positioning that minimally invasive work requires.
Surgical Instrument Grip
PEEK with Overmolded Silicone
A handpiece grip must survive hundreds of autoclave cycles. PEEK handles that heat and steam without losing its shape. The core body is machined or molded from PEEK. Liquid silicone rubber then overmolds the finger contact areas. LSR bonds well to PEEK, so the soft layer stays in place. This pairing gives you a stiff frame with a soft, non-slip surface.
Ergonomic Design and Sterilization Compatibility
The grip shape follows the hand. Rounded edges and a textured silicone pad reduce tiredness during long procedures. Silicone may swell with some cleaning chemicals, so the team tests the full sterilization cycle before release. This is a good example of how manufacturing robot parts balances feel, function, and repeated cleaning.
End-Effector Sensor Mount
316L Stainless Steel, Additive + Post-Machining
An end-effector sensor mount packs fine features into a small space. 316L stainless steel resists corrosion from body fluids and cleaning agents. Direct metal laser sintering builds the near-net shape. Post-machining then finishes the critical surfaces. This hybrid route works well for cnc machined medical robot parts with shapes a cutter cannot reach.
Internal Cooling Channels and Complex Geometry
The mount carries internal cooling channels that follow curved paths. No drill can make those. DMLS builds them layer by layer. The as-built surface lands around Ra 8–15 µm, so sealing faces get bead blasting or a light finish cut. The same approach serves amr robot parts that need light, stiff brackets with hidden passages. Injection molding cannot match this geometry, and cnc machining alone cannot cut it.
Partner with NOBLE for Your Medical Robot Parts

Precision CNC Machining of Stainless Steel, Titanium, Aluminum
NOBLE has strong metalworking skills for medical robot parts. Their precision cnc machining makes gears, shafts, and actuator housings. These parts need very tight tolerances. Stainless steel, titanium, and aluminum all go through their shop. Each material gets the right cutting plan for strength and rust resistance.
Injection Molding of Medical-Grade Plastics and LSR
Plastic parts need the same care. NOBLE does injection molding for complex housings and covers. Liquid silicone rubber molding also covers grips and seals. Engineering plastics and medical-grade resins run through checked presses. This keeps your amr robot parts the same from the first shot to the last.
Additive Manufacturing for Rapid Prototyping
Sometimes you need a part fast. Additive manufacturing builds prototypes in days, not weeks. NOBLE uses this for early fit checks and design reviews. You test form and function before you pay for tooling. That saves money and shortens your path to production.
Certified Quality Systems
ISO 9001:2015 and ISO 13485:2016
Quality systems separate serious makers from the rest. NOBLE holds ISO 9001:2015 and ISO 13485:2016 certifications for medical devices. These standards guide their manufacturing for medical robots. The ISO 13485 medical-grade quality assurance framework means every process gets written down and tracked.
NOBLE holds ISO 9001:2015 and ISO 13485:2016 certifications for medical devices. These standards govern our manufacturing for medical robots.
Their commitment runs deep. Norman Noble renewed its Quality Management System certification to ISO 13485:2016 after a long audit by the British Standards Institute, a European Union Notified Body. They have kept ISO 13485 certification since 2004 while meeting FDA, European MDR, and Brazil ANVISA requirements.
Controlled Manufacturing Environments
Cleanrooms and controlled environments keep contamination out. NOBLE tracks particles, temperature, and humidity. This matters when you are manufacturing robot parts that touch patients. The controlled setting protects both part quality and patient safety.
End-to-End Services
Design for Manufacturability Support
Good manufacturing starts with good design. NOBLE offers Design for Manufacturing support to improve your designs for yield and cost. They review draft angles, wall thickness, and tolerance stack-ups early. This catches problems before they become expensive.
Prototyping, Production, Assembly, Packaging
NOBLE covers the full journey. Prototyping happens in dedicated Process Development Centers. Production uses new machining and checked processes. Assembly and packaging round out the service. You get fabrication, finishing, testing, assembly, and packaging under one roof. Concurrent Engineering develops product and process side by side. This partnership runs from concept to high-volume production with a focus on quality and speed-to-market.
Choosing the right process and material for medical robot parts depends on a few main things. CNC machining, injection molding, 3D printing, and sheet metal fabrication each fix different problems. Stainless steel, titanium, PEEK, and silicone each bring their own strengths. Precision, biocompatibility, volume, cost, lead time, and rules all shape the final choice. No single answer works for every part.
Use the selection framework from this guide when you design your next medical robot parts. Think about what it needs to do first, then work through the trade-offs. For amr robot parts or surgical systems, the same logic applies. When you need expert help, reach out to NOBLE. Their team gives detailed analysis and consultation for your specific manufacturing needs.
FAQ of Medical Robot Parts
What tolerances can CNC machining hold for medical robot parts?
CNC machining can hold tolerances as tight as ±0.002 mm for important moving parts like actuator shafts. This precision stops loose movement and keeps surgical motions exact.
When should I choose injection molding for medical robot parts?
Injection molding works well for high-volume plastic parts like housings and covers. Tooling costs $1,000 to $100,000, so it makes sense above 500 units. The cost for each part drops a lot at high volumes.
Which materials pass ISO 10993 for patient contact?
Titanium Grade 5, PEEK, and silicone pass these body safety tests. They fight rust and survive repeated sterilization. Many medical robot parts makers trust them for safety.
Can I use off-the-shelf parts for amr robot parts?
Yes. Standard gearboxes, bearings, and fasteners cut down custom work. You save manufacturing for parts that really need it. That mix keeps costs low and speeds up delivery.
Does 3D printing replace CNC machining in production?
Not fully. DMLS builds internal channels that cutters cannot reach. But CNC machining gives smoother surface finishes and lower cost per unit at higher volumes. Choose based on shape.
What certifications should a medical parts manufacturer have?
ISO 13485:2016 is the main standard for medical device manufacturing. FDA rules under 21 CFR Part 820 also apply. Both need full traceability and process records.
How does sterilization affect material selection?
Autoclave heat harms some plastics. EtO gas needs aeration time. Gamma radiation can break down polymers. Test your material under the real cycle it will face during use