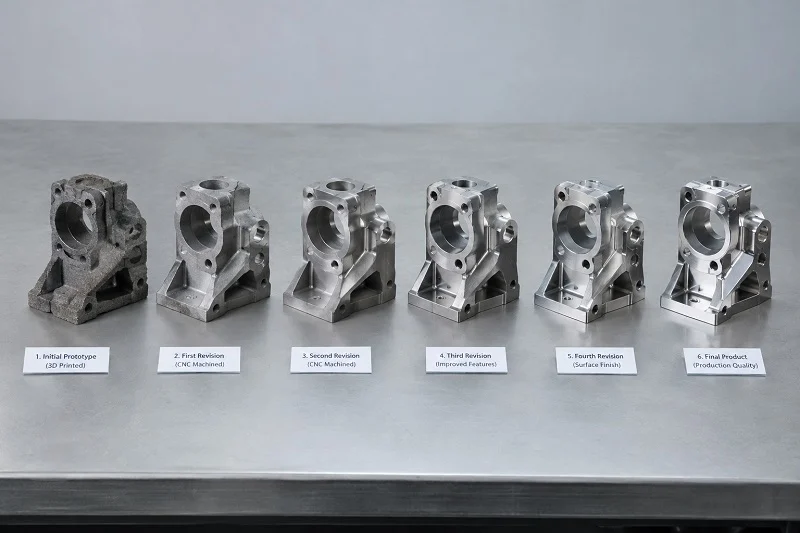
Manufacturing a motion stage base CNC requires careful planning. Five steps include design for manufacturing, material selection, CNC machining strategy, cost optimization, and partnering with a capable shop. CNC machining gives micron-level precision. This accuracy comes from controlled programming, stable tooling, and disciplined inspection. Computer numerical control allows complex machining features like T-slots and lightening pockets. CNC milling machines hold +/- 0.004″ tolerance with a 125 microinch finish. Internal corners need a radius of 1/4 depth. The right machining approach keeps your motion system working reliably. Understanding CNC machining systems matters for quality. CNC machining requires machine setup, machine tools, and linear motion. Good CNC machining design supports successful results. This approach ensures consistent results across batches.
Design for Manufacturing a Motion Stage Base CNC
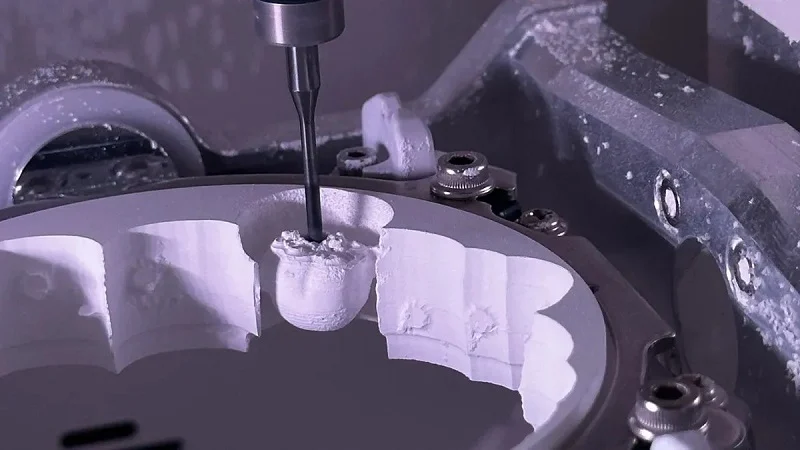
Design for manufacturing is not just about making parts easier to cut. For a CNC motion stage base, DFM is about ensuring the part can meet its functional needs after machining. Flatness, parallelism, and dimensional accuracy all depend on how well you design for the CNC process. Good DFM turns a challenging design into a reliable part. The right choices reduce machining time and improve quality.
Critical Design Rules for Machinability
Designing for Internal Corners and Radii
Internal corners cause trouble if you don’t plan them right. A CNC end mill cuts in a circle. If you design a sharp corner, the tool can’t reach it. You need extra steps or a different tool. The rule is simple. Make your vertical internal corner radius at least one-third the cavity depth. Better yet, use a radius that’s 130% of the tool radius. For example, a 10 mm end mill needs a minimum corner radius of 6.5 mm. This keeps the tool moving smoothly. It reduces tool wear and improves surface finish.
The floor radius matters too. Specify a floor radius between 0.5 mm and 1 mm. This lets the machine use standard end mills. Non-standard radii force the shop to use ball end mills, which adds cost. Sharp internal corners also create stress concentrations. A proper radius spreads the load and keeps the base strong.
Here’s a quick reference:
| Feature | Recommended Value | Common Mistake |
| Vertical corner radius | At least 1/3 cavity depth (130% of tool radius) | Too small a radius forces a 90° toolpath, degrading the finish |
| Floor radius | 0.5 mm to 1 mm | Non-standard radii require ball end mills, adding cost |
| Wall thickness (metals) | Minimum 0.8 mm | Thin walls cause vibration, reducing accuracy |
| Wall thickness (plastics) | Minimum 1.5 mm | Thin walls lead to warping from heat and stress |
Managing Wall Thickness and Structural Rigidity
Wall thickness affects rigidity directly. For metal bases, keep walls at least 0.8 mm thick. Below that, the material vibrates during cutting. Vibration kills accuracy. For plastic bases, use 1.5 mm minimum. Plastics soften under heat.
The chart shows minimum wall thickness for common materials. Aluminum 6061 sits at 0.8 mm. Stainless steel works at 0.75 mm. ABS needs 1.5 mm. Polycarbonate can go to 1.0 mm, and PEEK also at 1.0 mm. These numbers prevent deformation and keep the base rigid under load.
Specifying Tolerances and Surface Finishes
Geometric Dimensioning and Tolerancing (GD&T) Basics
A CNC motion stage base needs more than size tolerances. It needs geometric control. Flatness tells the CNC how flat a surface must be. Parallelism ensures two surfaces stay aligned. These callouts control how the base performs. Without GD&T, the shop might hit all the sizes but miss the functional geometry.
The mounting surfaces for linear rails must be machined in the same setup. This guarantees parallelism between the two rail seats. If you machine them separately, thermal changes and fixturing errors can throw off alignment. The result is a binding linear motion system.
Selecting the Right Surface Finish for Bearing Surfaces
Surface roughness affects friction and wear. Higher Ra values mean rougher surfaces. For bearing surfaces, roughness increases friction between rolling elements. More friction means more wear and shorter service life.
The dynamic friction between moving parts is proportional to the surface finish. That’s why polishing steps often follow CNC machining. A good target for bearing surfaces on a CNC motion stage base is a smooth finish to reduce friction and extend bearing life.
Incorporating Features for Assembly and Alignment
Designing Precision Dowel Pin Holes
Dowel pins line up components during assembly. They ensure repeatable alignment every time. The design of these holes matters for accuracy.
| Design Parameter | Recommended Practice | Why It Matters |
| Drilling | Use correct drill size; peck drill for deep holes | Ensures accurate hole size for tight fit |
| Reaming | Use finishing reamer at slow speed, consistent feed | Achieves tight tolerance for precise alignment |
| Edge distance | Keep 2-3 times pin diameter from edge | Prevents hole breakout under load |
| Spacing between pins | Space 3-5 times pin diameter apart | Even load distribution, prevents weakening |
| Chamfers | Add chamfers to hole edges | Eases pin insertion, prevents damage |
These rules keep the base structurally sound. A broken edge or misaligned pin ruins the entire assembly.
Creating T-Slots and Mounting Patterns for Linear Rails
Linear rails need flat, clean mounting surfaces. Before you bolt anything down, make sure the surface is flat and clean. Use one reference rail and one driven rail. Tighten bolts gradually in the right sequence. Check parallelism along the full stroke, not just at the ends.
Match the preload level with the mounting accuracy you can achieve. Higher preload makes alignment errors worse. A good design makes the linear motion system work smoothly from the start.
Selecting Materials for Your Motion Stage Base CNC
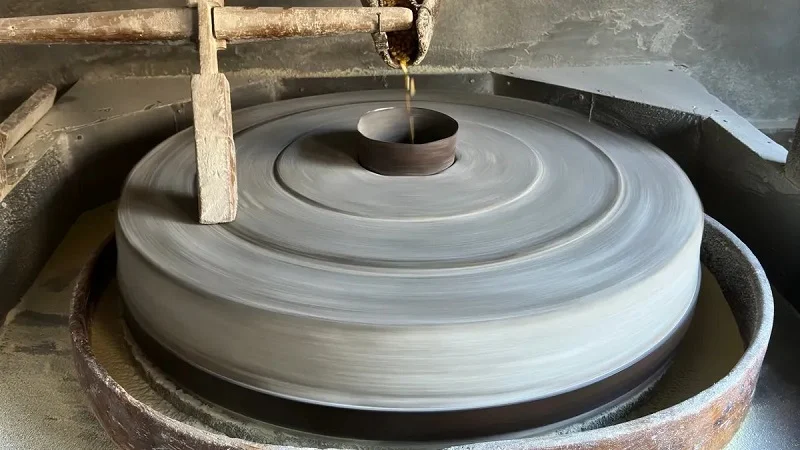
The material you pick for your motion stage base CNC sets its performance, cost, and lifespan. Each option has different pros and cons. Some materials absorb vibration well. Others are light or simple to machine. Your speed, load, and environment should guide your choice.
Metals for High-Performance Bases
Aluminum 6061-T6: The Industry Standard for Weight and Cost
Aluminum 6061-T6 leads CNC machining for motion stage bases. It cuts fast, weighs about one-third of steel, and costs less than most options. This alloy gives good strength for its weight and resists rust naturally. For most lab and light-industrial stages, this material balances performance and price well.
The downside shows up with heat changes. Aluminum grows about 23 ppm per degree Celsius. A steel leadscrew grows only about 12 ppm. When the shop warms up, the base expands more than the screw. That gap creates position errors. A 3°C shift can cause about 7 micrometers of error over 200 mm of travel. For many uses, that is fine. For sub-micron work, you need another option.
Cast Iron and Steel for Maximum Damping and Stability
Cast iron gives a special edge to high-precision stages. Its graphite structure turns mechanical vibration into heat. So vibrations fade fast instead of echoing through the base. This damping keeps the cutting tool or probe steady during work.
Cast iron also offers several useful benefits for CNC machining:
- Great vibration damping from its graphite structure, key for stability
- Strong compressive strength for holding heavy loads without bending
- Excellent wear resistance that keeps surfaces good for years
- Natural graphite lubrication that lowers friction in sliding parts
- Stable size over time, with little creep or stress relaxation
The downside is weight. Cast iron bases are heavy and slow to machine. But when stability matters more than speed, this material wins. Steel gives similar stiffness with even more strength, though it lacks cast iron’s natural damping.
Plastics and Composites for Specialized Applications
Using Acetal (POM) for Low-Friction, Light-Duty Stages
Acetal, also called POM, fits light-duty stages where metal is too much. This plastic cuts easily on any CNC. It has natural slipperiness, so sliding parts move smoothly without extra grease. Acetal resists moisture and most solvents. For prototypes or school setups, it keeps costs low while giving decent accuracy.
The limit is stiffness. Acetal bends more than aluminum under load. It also expands more with heat. Keep acetal bases small and lightly loaded. For heavier jobs, move up to metal.
Carbon Fiber-Filled Polymers for High Stiffness-to-Weight Ratios
Carbon fiber composites change the weight game completely. Carbon fiber has a density around 1.6–1.8 g/cm³, about one-quarter of steel and two-thirds of aluminum. Its Young’s modulus ranges from 230 GPa to over 500 GPa, matching or beating steel at about 200 GPa. That mix gives a stiffness-to-weight ratio significantly higher than aluminum alloys.
For moving gantries or robot arms, this weight saving matters a lot. Less mass means faster acceleration and lower motor torque needs. The material also absorbs vibration well. The catch is cost and build complexity. Carbon fiber parts need special CNC machining materials and tools. But for aerospace or high-speed automation, the performance is worth the price.
Material Selection Guide Based on Application Needs
Matching Material Properties to Load and Speed Requirements
Start with your load. Heavy loads need metals. Light loads allow plastics. Then think about speed. High-speed motion boosts vibration, so damping becomes vital. Cast iron handles this best. For moderate speeds and loads, aluminum 6061-T6 stays the practical choice.
Considering Environmental Factors (e.g., Thermal Expansion, Corrosion)
Temperature changes affect every material differently. The table below shows how thermal expansion impacts precision:
| Material / Component | CTE (ppm/°C) | Impact on Precision |
| Aluminum stage body | 23 | Expands more, causing stress mismatch with leadscrew |
| Steel leadscrew | 12 | Expands less; 3°C change → 36 ppm → ~7 µm error per 200 mm travel |
| Linear encoder glass scale | ~10 | Lower expansion; cuts thermal error with closed-loop control |
| Invar (low-expansion alloy) | Much lower than steel/aluminum | Reduces thermal error but pricey and hard to make |
A 1-meter steel leadscrew grows 36 micrometers for a 3°C change. Friction at high speeds adds more heat. At 3000 rpm, that friction can raise temperature by 8°C, causing 10 micrometers of growth per 100 mm of screw length. Closed-loop control with a glass scale encoder fixes much of this error. For wet or corrosive areas, aluminum’s natural oxide layer protects it. Steel needs coatings or plating. Plastics resist most chemicals but soften at high heat.
Cost Optimization Strategies for CNC Machining

The price of a motion stage base CNC depends on three main things: machining time, material cost, and setup complexity. Knowing how these parts work together helps you make smart choices that save money without losing quality. Let’s look at where your budget really goes and how to make it go further.
Simplifying the Design to Reduce Machining Time
Minimizing Deep Pockets and Complex 3D Contours
Deep pockets cause real issues for CNC machining. Long tools bend more, remove material more slowly, and often leave rougher surfaces. The machine needs lighter cuts and extra passes to control shaking. Chips also get stuck in deep holes, which can harm surfaces and speed up tool wear. This raises cycle time and may require extra checks or manual cleaning. If a pocket’s depth isn’t needed, making it shallower or changing its shape can cut cost without hurting quality.
Complex 3D shapes need similar trade-offs. Every curved surface requires slower speeds and more toolpath planning. A flat surface with simple shapes machines in much less time. Ask yourself if that fancy shape really matters. Often, a simpler design gives the same strength at a much lower cost.
Standardizing Hole Sizes and Thread Depths
Standard sizes match available tools. Use common drill sizes like 1/8″, 1/4″, or 3/8″, or whole millimeters. Avoid odd sizes like 0.492″. Thread sizes should follow common standards such as 4-40, 6-32, or 1/4-20. Keep threaded hole depth appropriate for the application.
| Design Approach | Cost Impact | Recommended Action |
| Custom feature sizes | Needs special tools, unique fixtures, or extra programming | Use standard hole sizes and thread standards |
| Standardized features | Lowers supply risk and production cost | Standardize whenever possible |
A standard drill makes a hole in seconds. Milling that same hole to a custom size takes several times longer. The savings add up fast across many holes.
Choosing the Right Batch Size and Supplier
Prototyping vs. Production: How Volume Affects Unit Cost
Setup costs stay the same no matter the batch size. That means making one motion stage base CNC carries a heavy setup cost per part. Production runs spread that fixed cost across many parts, dropping the per-unit price a lot. The table below shows the typical cost breakdown:
| Cost Component | Typical Percentage of Total Cost | Key Drivers |
| Machining time | varies | Material hardness, feature count, setup complexity |
| Material | varies | Bar stock vs. plate, material type |
| Setup | Varies with quantity | Fixed cost spread across batch size |
| Finishing | varies | Anodising, powder coating, plating, polishing |
Plan your prototyping phase with production in mind. Design for manufacturing from the start so you don’t pay for costly redesigns later.
The Benefits of a Manufacturing Partner for DFM Feedback
A good manufacturing partner checks your design before you start production. They catch problems early. A reliable manufacturing partner helps clients get cost-effective prototyping and mass production. Their team gives design for manufacturing feedback that finds issues while changes are still cheap. This teamwork prevents costly mistakes and makes the whole process smoother.
Material Cost vs. Machining Cost Trade-offs
When to Choose a More Expensive, Easier-to-Machine Material
Sometimes a pricier material actually saves money overall. Aluminum 6061-T6 machines fast and reliably. A harder alloy might cost less per pound but takes longer to cut, raising machining time. Since machining time makes up a major portion of total cost, faster cutting often beats cheaper material. The math favors materials that keep the spindle moving.
Optimizing Stock Size to Reduce Waste
Order stock close to your final part size. Oversized blocks need more material removal, which adds machining time and creates waste. Standard stock sizes lower supply risk and simplify the CNC machining process. Talk to your supplier about available bar and plate sizes before finalizing your design. A small change to your part’s size could let you use standard stock, cutting both material cost and machining time.
Step-by-Step Guide to Your Motion Stage Base CNC Project
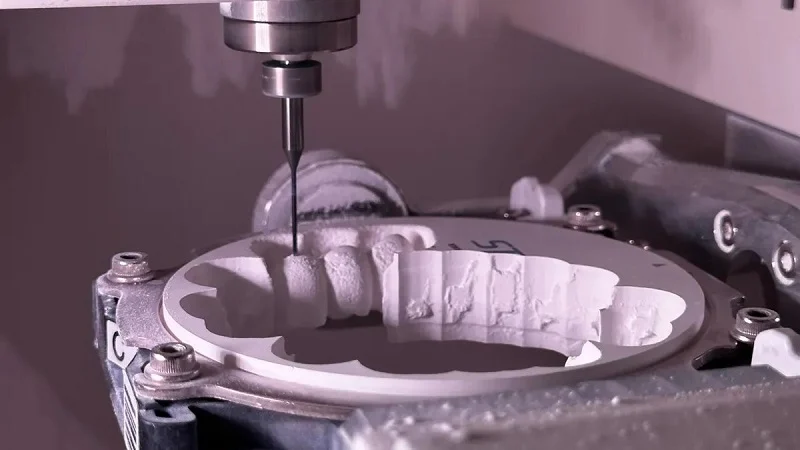
Getting a motion stage base CNC project right means following a clear process. Each step builds on the last. Rushing through the design phase leads to problems. A methodical approach saves time and money. It ensures the final part meets your precision needs.
Step 1: Finalizing Your CAD Model for Motion Stage Base CNC
The design is the foundation of your CNC machining project. Before you send the CAD model to a machine shop, check every detail. A clean model prevents delays. It helps the machining setup go smoothly. This design phase is key for accuracy.
Exporting the Correct File Format (STEP, IGES)
Use a neutral file format like STEP or IGES. These solid model formats transfer geometry cleanly. They preserve the design intent for CNC machining. An incorrect file format stalls the quoting process. It delays the whole machining schedule. Using an inappropriate format causes delays in the CNC project. This is a basic rule for CNC machining.
| Pitfall | Avoidance Strategy |
| Overly tight tolerances (e.g., ±0.005 mm) | Use ±0.1 mm for general features; reserve tighter tolerances only for precision fits like bearing seats or mating surfaces. |
| Sharp internal corners (90°) | Add fillets with a radius at least 130% of the tool radius to allow standard milling tools to cut the geometry. |
| Deep pockets | Avoid deep pockets to prevent tool deflection and chatter. |
| Unsupported thin walls or tall features | Keep wall thickness above 0.8 mm (aluminum) or 0.8 mm (steel); avoid excessive aspect ratios; add ribs or gussets for reinforcement. |
| Ignoring tool entry/exit paths | Provide entry chamfers or lead-in areas; add exit relief zones to prevent burrs and surface gouging. |
Checking for Watertight Geometry and Scale
Check your model for gaps. A surface gap confuses the CNC machine software. Scale errors are another major pitfall. An incorrectly scaled design directly impacts manufacturing accuracy. The linear motion system will fail if the base is the wrong size. This is a fundamental check before machining begins. This machining step is critical for success.
Step 2: Preparing a Detailed Technical Drawing
The technical drawing communicates design intent to the machine shop. GD&T annotations are a core part of this communication. A drawing with GD&T reduces errors. It ensures the machining operator understands the functional requirements. This directly supports the goal of precision in the linear motion assembly. The GD&T design standard is well understood by experienced shops.
With a GD&T approach that controls positions and orientations, this aspect of error accumulation is less likely to cause assembly problems. On the contrary, it considers the complete set of tolerances so the model’s manufacturing is repeatable, with replaceable parts. By explicitly stating all design requirements, a thorough GD&T process guarantees the accurate fulfillment of all dimensional and tolerance specifications.
How to Annotate Critical Tolerances and Finishes
Surface finish is another critical annotation. For bearing surfaces, specify a smooth surface finish. This improves the linear motion quality. The machining process benefits from clear annotations. Tolerances should be clear. Use bilateral (±0.1 mm) or engineering fit formats. The machining setup requires this level of detail. A good design drawing prevents guesswork.
| Critical Annotation | Standard/Value | Application Guidance |
| Surface Finish | Standard surface finishes available; finer finishes on request | Annotate directly on the surface if only one surface requires a specific finish; otherwise, place in general notes. |
| Tolerances | Standard tolerances per ISO 2768 or as specified | Only required when tighter than the standard; use bilateral (±0.1 mm), unilateral, or engineering fit (e.g., 6H) formats. |
| GD&T (Geometric Dimensioning & Tolerancing) | GD&T symbols as required | Use for functional requirements; allows looser tolerances on non-critical features, improving quality and reducing cost. |
The Importance of a Clear Bill of Materials (BOM)
A clear BOM prevents confusion during assembly. It defines the materials and hardware. This saves time and reduces waste. Good design for manufacturing includes a clear BOM. It helps the machine shop prepare the CNC efficiently. The BOM is a shared reference point for everyone. It makes the assembly process smoother.
- Cost reduction: GD&T enhances design accuracy, allowing for appropriate tolerances that optimize production, thereby reducing manufacturing costs.
- Optimized functionality: Explicitly stating all design requirements guarantees the accurate fulfillment of dimensional and tolerance specifications related to a part’s functionality, ensuring the motion stage base CNC meets its functional requirements.
- Uniformity and convenience: GD&T is a consistent language among manufacturers, reducing guesswork and misinterpretation of designs, which ensures consistent geometries and minimizes manufacturing errors.
- Accurate communication: Translating intricate designs into physical parts requires accurate and reliable communication. GD&T enables designers, manufacturers, and quality teams to communicate clearly, saving time and money and preventing errors.
Step 3: Getting an Instant Quote and DFM Analysis
Getting a quote is the next step. Look for a breakdown of machining time and material. The machining time is a major cost driver. The CNC program is also a factor. A reliable partner like a manufacturer offers professional expertise. They understand the nuances of CNC machining for bases. Their feedback helps optimize the design for the CNC machining process.
What to Look for in a Motion Stage Base CNC Quote
Look for a detailed breakdown. Check the machining time and material cost. The manufacturing partner should offer clear pricing. This helps you manage the budget. A good quote shows the design for manufacturing analysis. It highlights potential issues.
Scale-related errors can cause significant manufacturing problems. Improper scaling directly impacts manufacturing accuracy and efficiency, meaning a motion stage base CNC machined from an incorrectly scaled file will fail to meet its required tolerances, leading to functional issues in motion control and potential rejection of the finished part.
How to Interpret a DFM Report and Revise Your Design
The DFM report will flag issues like deep pockets, thin walls, and sharp corners. For example, avoid deep pockets to prevent tool deflection. Add fillets to internal corners with a radius at least 130% of the tool radius. This keeps the cutting process stable. The report helps you revise the design for better machining. This collaboration improves the final linear motion assembly. It ensures the CNC machine can produce the part with high precision. This review is a critical part of the project lifecycle. It saves money and improves the final linear motion system. The machining process benefits greatly from a thorough DFM analysis. Good CNC machining relies on good design. The CNC machine shop can then set up the job efficiently. This partnership is key for a successful project.
Partnering with a Manufacturer for Your Motion Stage Base CNC Needs

You have designed your motion stage base CNC, chosen the right material, and cut costs. Now you need a partner who can build it. A reliable manufacturer brings everything you need together in one place. Their team handles the whole process from your first CAD file to a finished, tested base ready for use.
Our Full-Service Manufacturing Capabilities
From Design Help to Post-Machining Assembly
A good manufacturer does not just wait for your files and start cutting. Their engineers check your design before any machining starts. They look for problems with tool access, wall thickness, and tolerance stack-ups. This design review catches issues while changes are still low-cost. You get feedback that makes the part easier to make without losing performance.
The support continues after the CNC milling machines finish their work. The manufacturer offers post-machining services that save you time and trouble. They handle deburring, surface finishing, and anodizing. They also put together parts like linear rails, bearings, and leadscrews onto your base. This means you get a motion stage base CNC that is ready to fit into your system, not just a box of machined parts.
Their team coordinates every step of the manufacturing process. You work with one point of contact instead of juggling many vendors. This simple approach cuts lead times and removes confusion. For complex projects, this single-source convenience makes a real difference.
Skill in Both Metal and Plastic Precision Machining
Many shops focus on either metals or plastics. A skilled manufacturer handles both with equal skill. Their machinists know how aluminum 6061-T6 acts differently from acetal or carbon fiber-filled polymers. They adjust feeds, speeds, and tooling for each material to get the best surface finish and dimensional accuracy.
This flexibility matters when your motion stage base CNC uses mixed materials. You might have an aluminum base plate with plastic bearing pads or guide blocks. The manufacturer machines all of these parts in-house, so they fit together perfectly. Their experience with many materials also means they can suggest alternatives if your first choice creates extra machining challenges.
Certifications and Quality Assurance
Our Promise of Quality with a Certified Quality Management System
A quality management system certification is not just a plaque on the wall. It shows a clear approach to quality that touches every part of the work. A certified manufacturer follows written steps for everything from quoting to final inspection. They track quality numbers and use that data to keep improving their processes.
For you, this means steady results batch after batch. The same precision you get on your prototype carries through to production runs of hundreds or thousands of units. Their quality system makes sure that every motion stage base CNC meets the same high standards. You can trust the parts you get, even when you are not there to watch the machining.
Meeting Strict Medical Standards with a Certified Medical Device Quality Management System
Medical devices demand even higher standards. A medical device quality management system certification shows the manufacturer meets those needs. This standard focuses on risk management, traceability, and process checks. It is vital for any part that goes into diagnostic equipment, surgical robots, or lab automation.
If your motion stage base CNC will be part of a medical device, this certification matters a lot. It means the manufacturer keeps detailed records of every manufacturing step. They can trace materials back to their source and record every inspection result. This traceability makes your regulatory filings easier and gives you confidence that your parts meet the strictest quality rules.
When you work with a certified manufacturer, you are not just buying machined parts. You are buying peace of mind that comes from knowing your supplier follows proven quality systems.
Building a motion stage base CNC comes down to three things. Smart design makes CNC machining easier and cheaper. The right material keeps your motion system stable under load. A good partner handles the CNC machining with real skill and precision.
Start with your design. Check for sharp corners and thin walls. These cause trouble during CNC machining. Pick a material that fits your needs. Aluminum works for most jobs. Steel or cast iron handles heavy loads better. This choice affects accuracy and long-term performance.
Find a shop that knows CNC machining for motion bases. They should offer design feedback and quality checks. This saves time and money during assembly. Good linear motion depends on proper machine setup. A skilled machine operator makes all the difference. The right machining approach prevents costly rework.
Your next step is simple. Refine your CAD model. Or reach out to a partner like a manufacturer for help. Good CNC starts with good planning. The right machine shop delivers consistent results.
FAQs Of Motion Stage Base CNC
What tolerance can I expect for a motion stage base CNC?
Standard CNC machining holds ±0.004″ for most features. For critical bearing surfaces, you can specify tighter tolerances. The key is reserving tight tolerances only where they matter. This keeps machining time and cost under control.
Which material should I choose for my first prototype?
Aluminum 6061-T6 is the safest starting point for CNC machining. It machines quickly, costs less, and handles most loads well. If your stage needs extra vibration damping, consider cast iron. For light-duty applications, acetal keeps costs low. Match the material to your speed and load requirements.
How can I reduce the cost of my motion stage base?
Simplify your design. Avoid deep pockets and complex 3D contours. Use standard hole sizes and thread depths. Order stock close to your final part size. These choices reduce CNC machining time, which drives a major portion of total cost. A good manufacturing partner can also spot machining shortcuts.
What surface finish do bearing surfaces need?
Aim for a smooth surface finish on bearing surfaces. This smooth finish reduces friction between rolling elements. It extends bearing life and keeps linear motion consistent. Specify this finish only on functional surfaces. Other areas can use a standard finish to save CNC machining time.
How do I know if my design is ready for CNC machining?
Check for sharp internal corners, thin walls, and deep pockets. Add fillets with a radius at least 130% of the tool radius. Keep wall thickness above 0.8 mm for aluminum. This prevents vibration during machining. Export your CAD model as STEP or IGES. A DFM analysis from your machine shop will catch remaining issues.
What makes a good manufacturing partner for motion stage base CNC projects?
Look for a shop with experience in both metals and plastics. They should offer design feedback before production starts. Certifications show a commitment to quality. A partner who handles assembly and finishing saves you time on your machine setup. This single-source approach reduces lead times and confusion.