A pacemaker lead fails mid-procedure. An insulin pump housing cracks during sterilization. These aren’t just manufacturing glitches—they’re life-or-death moments. From 2010 to 2012, part or material failures caused 28% of recalls, says the FDA. What separates reliable medical device components from dangerous ones? The answer rests on three pillars: choosing the right materials, smart medical device manufacturing, and thoughtful design. Each decision affects regulatory approval, patient safety, and quality. One wrong move during development can trigger costly redesigns or harm patients. This guide gives you practical insights for the development of medical products, with a focus on the critical role that medical device components play in every stage of the process.
Material Selection for Medical Device Components
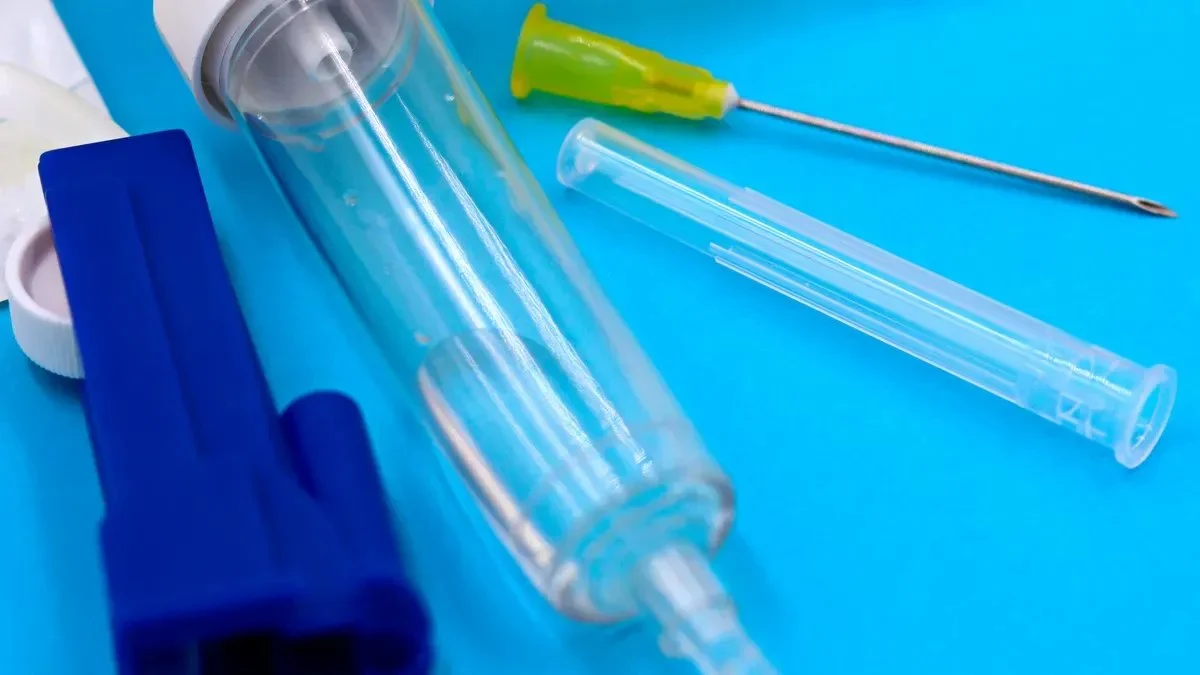
Material choice forms the foundation of medical device safety and performance. The right pick can make a product succeed. The wrong one can cause costly delays. Metals appear in about 80% of all medical device components. Common options include stainless steel 316L, titanium alloys, and ceramics. For plastics, engineers often reach for polypropylene, polycarbonate, PEEK, or PPSU. Each material brings its own strengths. The trick is matching those properties to the device’s needs. This is where medical device materials start to matter most.
Biocompatibility and Medical Device Safety
ISO 10993 Standards
ISO 10993 sets the benchmark for testing medical device safety. These standards guide how manufacturers evaluate material interactions with the body. The goal is simple: make sure the device won’t cause harm. For medical device manufacturing, following these standards isn’t optional. It’s a requirement for regulatory approval. Every material used in a medical device needs to pass these tests. The testing scope depends on how and where the device touches the body. Some tests check for short-term effects. Others look at long-term exposure.
Cytotoxicity, Sensitization, and Irritation Testing
Cytotoxicity testing checks if a material kills cells. Sensitization tests look for allergic reactions. Irritation tests check for redness or swelling. These are the first steps in proving biocompatibility. They apply to most medical device materials. Even common materials used in medical equipment need these tests. Results help engineers decide if a material is safe for its intended use. Passing these tests is a key milestone in the development process.
Implantable vs. Non-Implantable Requirements
The rules change based on how long a device touches the body. Surface devices have the least strict rules. Implantable devices have the most. A medical device that stays in the body for years needs more testing than one used for a few minutes. This affects which medical device materials you can choose. Implantable devices often use PEEK, titanium alloys, or ceramics. These materials have a long track record of safety. Non-implantable devices can use a wider range of commonly used biocompatible materials. The testing requirements guide the selection process. Biocompatibility testing is the foundation of this work.
Sterilization Compatibility
Ethylene Oxide, Gamma, and Steam Methods
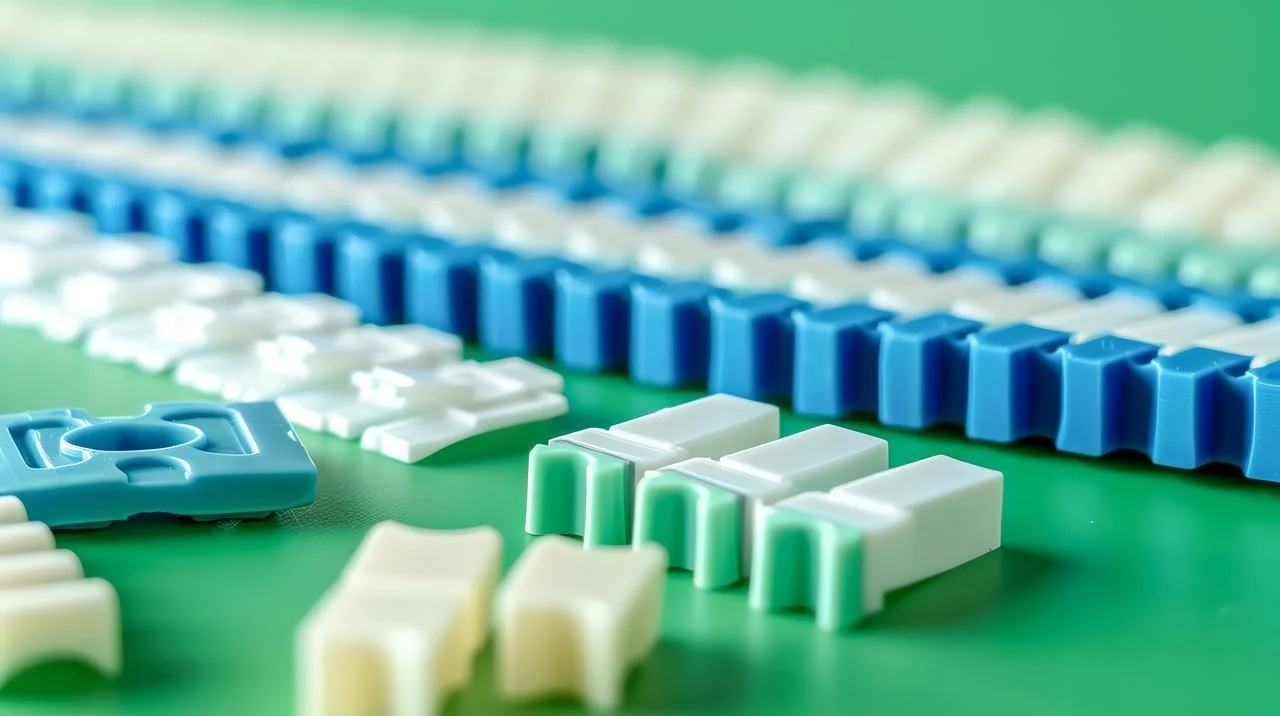
Sterilization is a must for any medical device. The method you choose depends on your material. Steam works for durable items like metal tools. But it destroys heat-sensitive plastics. Ethylene oxide (EtO) penetrates complex assemblies well. It works with most materials. Gamma radiation suits single-use disposables. But it can degrade some plastics. Hydrogen peroxide gas plasma works for heat-sensitive items like scopes and electronics. Each method has its own material compatibility profile. Testing early helps you avoid surprises.
Single-use devices typically get sterilized by the manufacturer. They use ethylene oxide, gamma radiation, or electron beam radiation. Multiple-use devices get sterilized by the end-user. They often go through a steam autoclave. This difference affects material choice. Key polymer properties affected by sterilization include tensile strength, impact resistance, temperature resilience, and color retention. Materials like polycarbonate, PMMA, and thermoplastic elastomers are engineered to minimize changes after sterilization.
Material Degradation After Sterilization
Sterilization can change material properties. For example, gamma sterilization at doses of 25–50 kGy does not cause mechanical property degradation in PEEK. Tensile strength and modulus stay largely unchanged. Charpy impact strength drops by about 15–25% after very high doses of 1000 Mrad (10,000 kGy). But it stays above 6 kJ/m² (notched). That’s enough for structural applications. Steam sterilization can cause more noticeable changes in some materials. Testing after sterilization is crucial. It confirms the material still performs as expected. Material compatibility testing helps you choose the right sterilization method.
| Sterilization Method | Material Compatibility Notes |
| Steam | Works with durable materials; not for heat-sensitive plastics or electronics |
| Flash | Only for devices that handle rapid high-temperature steam |
| Hydrogen Peroxide Gas Plasma | Ideal for heat- and moisture-sensitive devices; not for cellulose-based materials |
| Peracetic Acid | Works for some plastics and metals; limited material compatibility |
| Ethylene Oxide (EtO) | Works with most materials; great for complex assemblies |
| Radiation | Good for single-use disposables; can degrade some plastics |
| Dry Heat | Only for heat-resistant items like glassware |
| Ozone | Works for some plastics but has challenges |
Packaging and Shelf-Life Considerations
Sterilization doesn’t end with the device. The packaging must keep it sterile. Material compatibility extends to packaging too. Shelf-life testing confirms the device stays sterile over time. The packaging material must not react with the sterilization method. It also needs to protect the device from contamination. This is part of the overall medical device manufacturing process. Getting it right prevents recalls and protects the patient. Quality comes from attention to detail.
Mechanical Properties for Medical Device Components Performance
Tensile Strength, Flexibility, and Fatigue Resistance
Mechanical properties determine how a device performs under stress. Tensile strength measures how much pull a material can handle. Flexibility shows how much it can bend without breaking. Fatigue resistance tells you how long it lasts under repeated use. These properties matter for medical device performance. A catheter needs flexibility. A bone screw needs tensile strength. A heart valve needs fatigue resistance. The right balance depends on the application. Design choices affect these properties.
Environmental Factors: Temperature, Chemicals, UV Exposure
Devices face different environments. Some go through high heat during sterilization. Others touch harsh chemicals. Some see UV light during storage. These conditions affect materials over time. Temperature can soften plastics. Chemicals can cause swelling or cracking. UV can cause discoloration or brittleness. Testing under real-world conditions is essential. It helps you pick the right material for each application. Hygiene requirements also affect material choice.
Balancing Performance with Cost and Availability
The best material doesn’t matter if you can’t get it. Engineers must balance performance with cost and supply. Sometimes a slightly weaker material works better because it’s easier to source. Other times, you need the best performance regardless of cost. This is where medical-grade material selection gets tricky. You need to meet all safety and performance requirements. But you also need to stay within budget. And your supply chain must be reliable. This balancing act is part of every successful development project. Quality comes from careful planning and testing. The right partner with regulatory experience can help you navigate these choices. Compliance with standards is non-negotiable.
Supporting patient safety means making smart choices at every step. From material selection through final testing, each decision affects the outcome. Commonly used biocompatible materials like PEEK and titanium offer proven performance. Understanding these commonly used biocompatible materials is key to making good decisions. Medical device materials must meet strict standards. Commonly used biocompatible materials include many options. Medical device materials need to balance many factors. Design choices also play a big role. Materials selection is the foundation of everything.
Manufacturing Processes for Medical Device Components

Once you’ve picked your materials, the next big question is: how do you actually make the part? The manufacturing processes you choose must match your material selection and how many units you need. A part made for millions of units needs a different approach than a custom implant for one patient. Let’s look at the three main paths in medical device components manufacturing.
Injection Molding for Medical Device Components Manufacturing
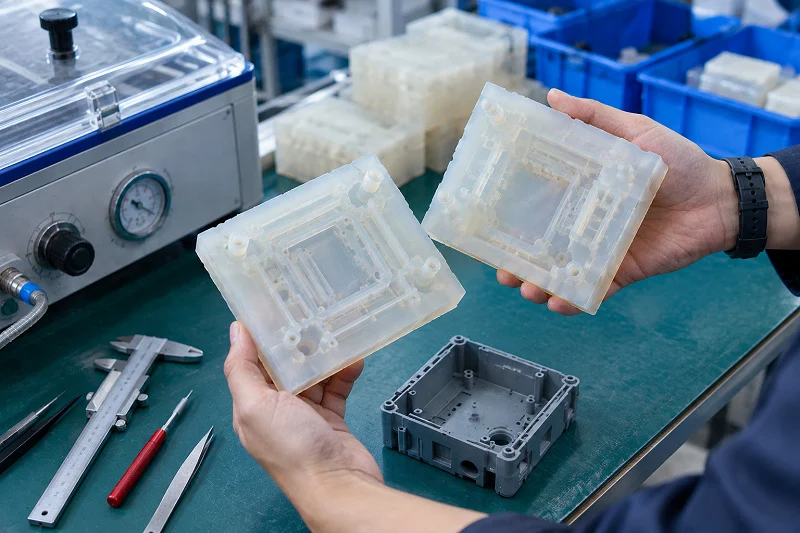
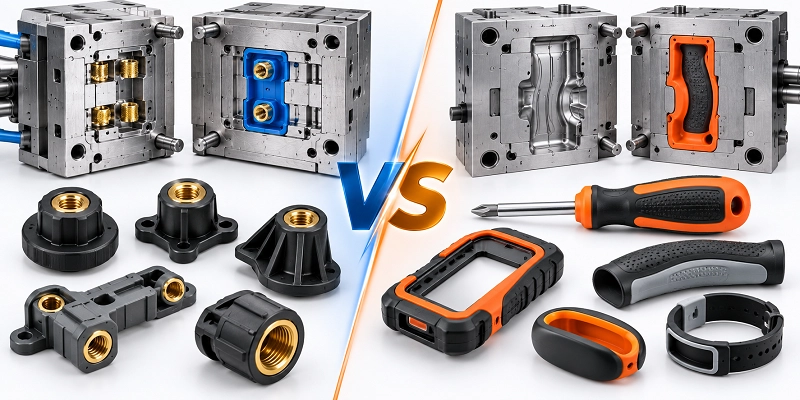
Injection molding leads the way for high-volume production. The process melts plastic pellets, pushes them into a steel mold under pressure, and cools them into finished parts. Cycle times run in seconds once the mold exists. That speed makes it perfect for mass production.
High-Volume vs. Low-Volume Production
The costs change a lot based on volume. Injection molding needs a big upfront investment in mold design and creation. Tooling alone can take 2-6 weeks to produce. But once that mold exists, per-part costs drop sharply. For high-volume runs, nothing beats it. Low-volume production tells a different story. The mold cost becomes hard to justify for just a few hundred parts. In those cases, CNC machining or additive manufacturing often makes more sense. The table below shows the key trade-offs.
| Factor | Injection Molding | CNC Machining |
| Cycle Time | Fast (seconds) after mold creation | Longer, each part machined individually |
| Upfront Investment | High (mold design and creation) | Low (machine setup and material) |
| Volume | Best for high-volume production | Best for low-to-medium volume, custom parts |
| Design Flexibility | Limited once mold is made | High flexibility, easy to modify CAD |
| Lead Time | 2-6 weeks (mold creation) | 1-2 weeks (no tooling) |
| Cost per Part | Low at scale | Higher per part |
Tooling Design and Mold Flow Analysis
Mold design can make or break your project. This is where mold flow analysis becomes your best friend. This simulation tool predicts how plastic will flow through the mold before you cut any steel. It catches problems early, saving you from expensive rework. The benefits are concrete:
- Prevents costly tooling rework by identifying flow issues before cutting steel
- Optimizes gate and runner placement for uniform filling, reducing scrap
- Reduces cycle times by simulating and optimizing the cooling phase
- Improves part strength and dimensional stability through even pressure distribution
- Enhances surface finish by pinpointing defect-prone areas
One medical device company learned this lesson the hard way. They used nylon for injection-molded parts but hit warpage issues that failed flatness testing. After design changes and tooling modifications failed, they ran a mold flow analysis comparing nylon to PC/ABS. The simulation predicted PC/ABS would show less deflection without sacrificing strength. They switched materials, built new tooling, and produced the precision parts they needed. That’s the power of simulation guiding material selection.
Process Validation and Quality Control
Injection molding for medical device components demands rigorous process validation. You can’t just set up a machine and hope for the best. Every parameter needs documentation. Temperature, pressure, cooling time, and cycle time all get locked down. This process validation ensures every part comes out identical to the last one. Quality control extends beyond the machine itself. Dedicated dryers for each medical polymer prevent cross-contamination. Contained material handling systems minimize airborne particulate contamination. All-electric injection molding machines eliminate hydraulic fluid contamination risks. Post-production tear-down and cleaning avoid residue from prior runs. An in-house analytical lab with CT scans and DSC supports quality management throughout.
CNC Machining for Complex Components
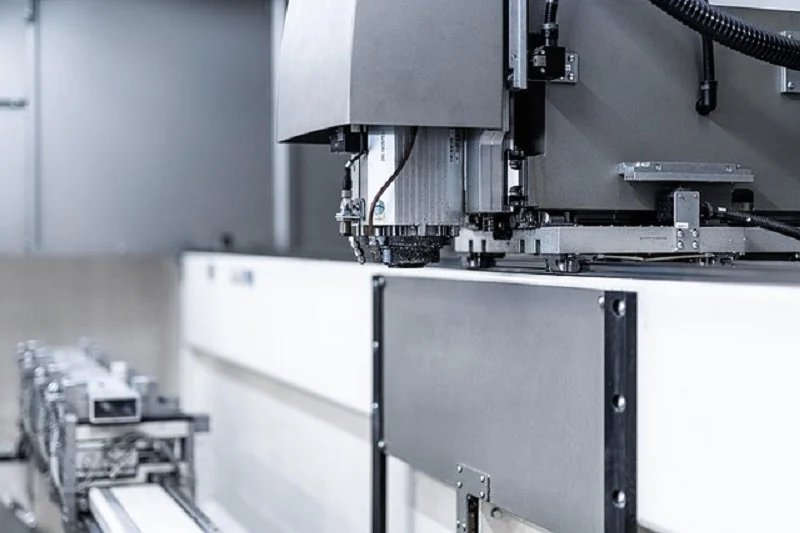
CNC machining removes material from a solid block to create the final shape. It offers unmatched precision and material flexibility. For intricate parts with tight tolerances, this method often wins.
Suitable Materials and Tight Tolerances
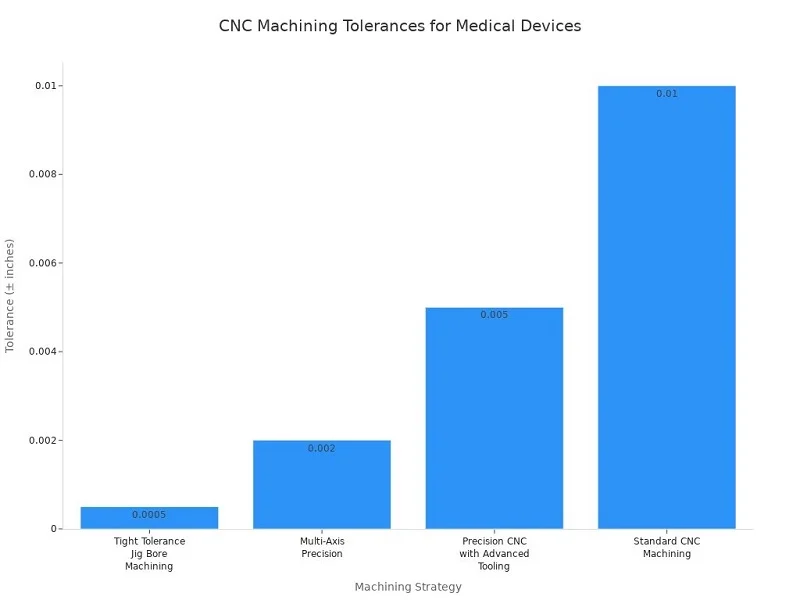
CNC machining works with a wide range of materials. Metals like stainless steel 316L and titanium alloys machine beautifully. Plastics like PEEK and polycarbonate also work well. The real advantage lies in dimensional accuracy. Standard CNC machining achieves ±0.010 inches. Precision setups with advanced tooling hit ±0.005 inches. Multi-axis machines reach ±0.002 inches. For the most demanding applications, tight-tolerance jig bore machining achieves ±0.0005 inches.
Surface Finish and Secondary Operations
Surface finish matters more than most people realize. Rough surfaces can harbor bacteria and compromise sterilization. Research shows surfaces rougher than Ra 0.8 µm act as biofilm reservoirs. The recommended range for surgical instruments sits between Ra 0.4–0.8 µm. Electropolishing offers a powerful solution for metal parts.
Electropolishing smooths microscopic peaks, improves corrosion resistance, and can enhance cleanability. This finishing operation is specifically applied to stainless steel cannulas, minimally invasive instruments, and fluid-contact components, where surface finish directly impacts the ability to remove organic soil and microbial load during cleaning.
Electropolishing reduces surface roughness by about 50% while adding a corrosion-resistant passive oxide layer. That combination enhances cleanability and sterilization durability across repeated autoclave cycles.
Prototyping vs. Production Machining
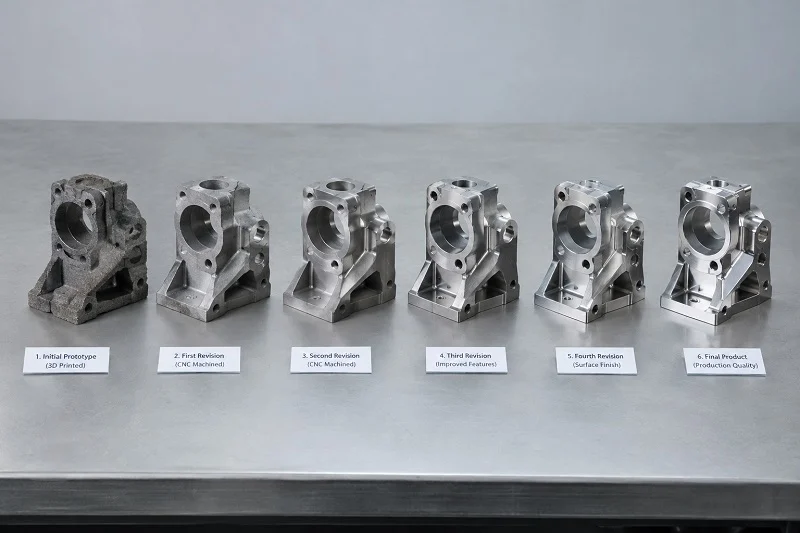
CNC machining services both prototyping and production roles. For prototypes, it offers quick turnaround and easy design changes. You can iterate rapidly without committing to expensive tooling. In-house CNC machining enables quick prototyping and the addition of complex features to injection-molded parts. For production, CNC handles low-to-medium volumes efficiently. It also works well for custom parts that don’t justify a mold. The flexibility to modify CAD files and reprogram machines makes it ideal for evolving designs.
Additive Manufacturing for Custom Parts
Additive manufacturing, or 3D printing, builds parts layer by layer. It excels at creating geometries that traditional methods can’t achieve.
FDM, SLA, and SLS Technologies
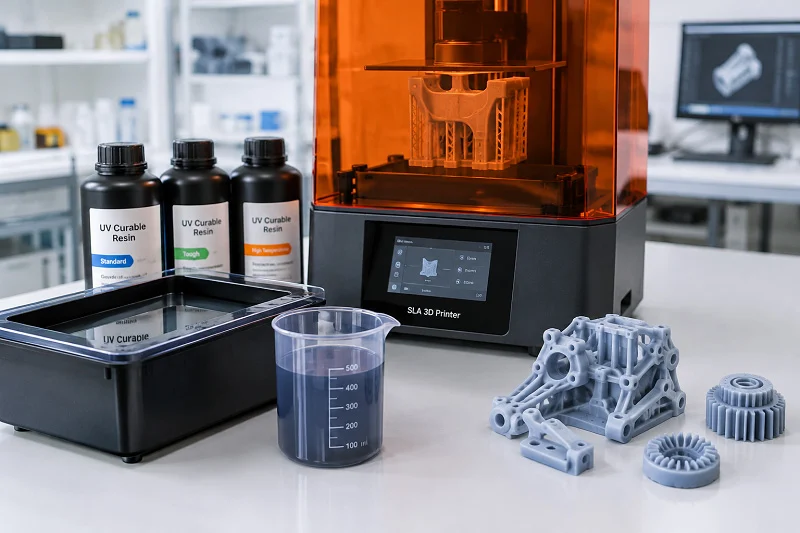
Three main technologies dominate medical 3D printing. FDM (Fused Deposition Modeling) extrudes melted plastic filament in layers. It’s affordable and great for prototypes. SLA (Stereolithography) uses UV light to cure liquid resin. It produces smoother surfaces and finer details. SLS (Selective Laser Sintering) fuses powder particles with a laser. It creates strong, functional parts without support structures. Each technology suits different needs and materials.
Patient-Specific and Complex Geometries
Additive manufacturing shines for patient-specific devices. Custom implants, surgical guides, and anatomical models all benefit from this approach. The technology handles complex internal channels and lattice structures that machining can’t produce. For unique or low-volume parts, 3D printing often beats traditional methods. Part geometry plays a key role in this decision. Injection molding and additive manufacturing typically handle complex geometries better. CNC machining offers a wider range of materials and higher dimensional accuracy for final products.
Post-Processing and Regulatory Considerations
3D-printed parts rarely come out ready to use. Post-processing steps like support removal, surface smoothing, and sterilization add time and cost. Regulatory considerations also differ. The FDA treats 3D-printed medical device components with extra scrutiny. Process validation becomes critical because layer-by-layer construction can introduce variability. Each print run needs documentation and quality checks. For medical device manufacturing, this means extra attention to consistency and traceability.
The choice between these manufacturing processes depends on your specific needs. Volume, complexity, material, and budget all factor into the decision. Many companies combine methods. They use 3D printing for prototypes, CNC for custom parts, and injection molding for mass production. This hybrid approach maximizes efficiency at every stage of development.
Partners like NOBLE bring expertise across all these manufacturing processes. As a leading manufacturing partner in China, NOBLE helps with prototyping and mass production. Their capabilities span CNC machining, injection molding, and finishing operations. This full-service approach streamlines the journey from concept to production. Working with one partner who understands both metal and plastic processing simplifies your supply chain and ensures consistent quality across every component.
Design Considerations for Medical Device Components
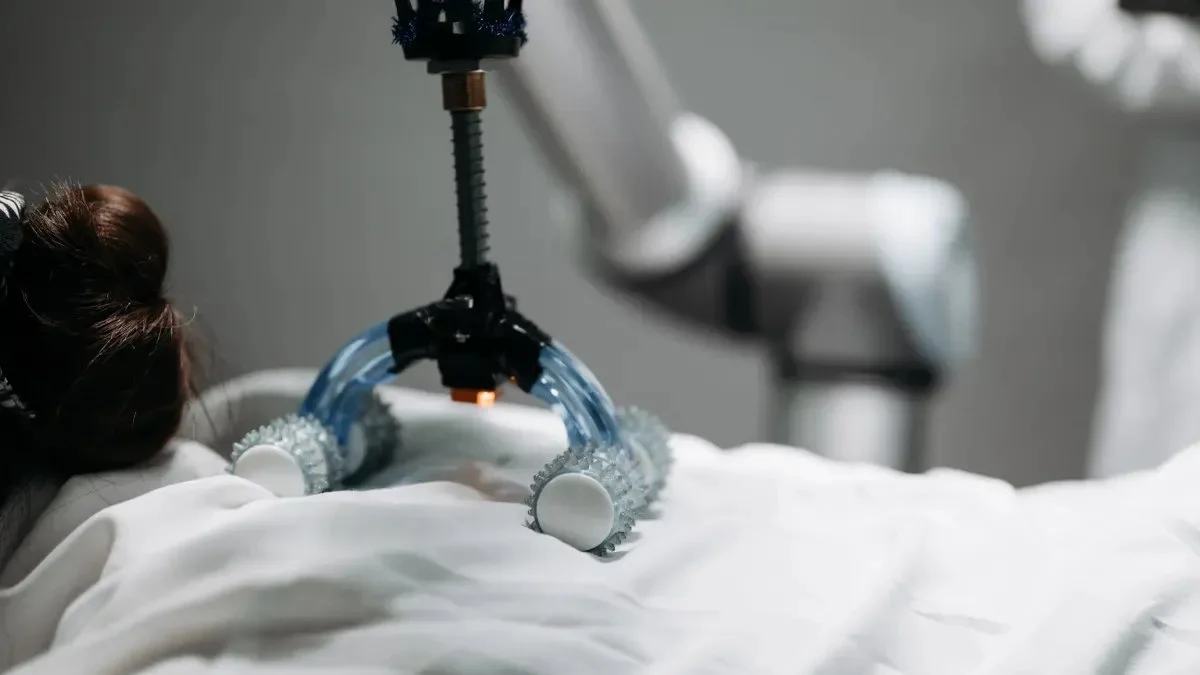
Design ties everything together. You can pick the perfect material and choose the right manufacturing process, but a poor design can still sink your project. The shape of a part, its surface finish, and how it feels in a surgeon’s hand all affect the outcome. Good design makes production easier, keeps devices clean, and helps users operate them safely. This is where medical equipment design truly comes to life.
Design for Manufacturability (DFM)
Design for manufacturability means creating parts that are easy to produce without sacrificing function. It’s a philosophy that shapes every decision, from the initial sketch to the final production run. When you design with manufacturing in mind, you save time, money, and frustration down the line. DFM eliminates non-essential design elements, which lowers material and labor costs. It also simplifies tooling and improves throughput, directly cutting manufacturing expenses. The goal is simple: make the part work perfectly while being as easy to produce as possible.
Simplifying Geometry for Production Efficiency
Complex shapes look impressive, but they cost more to make. Every curve, hole, and feature adds machining time or mold complexity. Simplifying geometry reduces production costs and speeds up cycle times. Standardizing components and manufacturing processes across product lines simplifies operations and reduces production variability. This strategic approach drives down per-unit costs while improving consistency. In medical device manufacturing, regulatory compliance adds fixed costs that benefit from higher volume. So simpler designs that scale well make good business sense.
Consider a housing for a handheld diagnostic tool. A rectangular box with rounded corners costs less to mold than an organic shape with compound curves. The simpler version still functions perfectly. It just costs less to produce. That difference matters when you’re making thousands of units. Designing out hard-to-build assemblies also reduces scrap and rework costs. Every simplification adds up.
Draft Angles, Wall Thickness, and Rib Design
Injection molding has its own set of rules. Follow them, and your parts come out clean. Ignore them, and you’ll deal with warping, sink marks, and stuck parts. Here are the key guidelines for injection-molded medical device components:
- Verify that wall thickness is uniform and adequate, and use ribs or gussets for structural support.
- Ensure radii are large enough to prevent voids and warping.
- Round all sharp corners with fillets to aid mold release.
- Add sufficient draft angle to avoid damage during part ejection.
- Confirm that the surface finish follows SPI (Society of the Plastics Industry) guidelines.
- Review and adjust part tolerances to suit the injection molding process.
Draft angles are small tapers on vertical walls that let the part release from the mold. Without them, the part sticks or gets damaged during ejection. Wall thickness affects cooling time and structural integrity. Uniform walls prevent sink marks and internal stresses. Ribs add strength without increasing wall thickness. These details seem minor, but they make or break a production run. A partner like NOBLE provides DFM feedback early in the process, catching these issues before tooling begins.
Minimizing Assembly Steps and Component Count
Fewer parts mean fewer problems. That’s a simple truth in medical device manufacturing. During concept generation, simplicity and reliability often go hand in hand. Reducing component count directly supports reliability. DFMAI (Design for Manufacture, Assembly, and Inspection) optimization is pivotal for achieving and demonstrating medical device reliability. Minimizing components is a core DFMAI strategy, as fewer parts simplify assembly, inspection, and quality control.
Combining multiple functions into a single component reduces validation requirements and assembly steps. It also simplifies inventory management. One molded part that serves three functions beats three separate parts that need assembly. Fewer parts also mean fewer potential failure points. For a medical device, that translates directly to improved patient safety. Tolerance rationalization helps too. Specifying only the precision actually required for function minimizes machining and inspection costs. Material standardization across projects leverages existing documentation and avoids re-qualification expenses.
Cleanability and Surface Finish
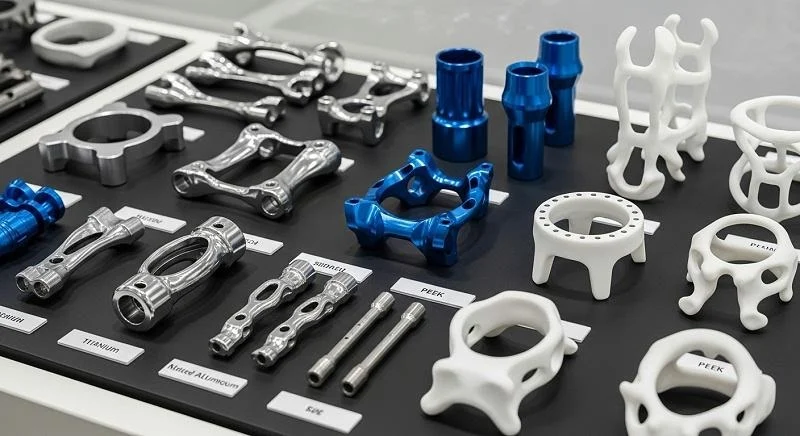
Hospitals demand clean devices. That’s non-negotiable. The surface finish of your medical device components directly affects how well they can be cleaned and sterilized. Rough surfaces trap bacteria and resist cleaning. Smooth surfaces wipe clean easily. This connection between surface texture and hygiene is critical in medical equipment design. The materials you choose also influence cleanability and compliance in hospital settings. Some materials resist chemical cleaners better than others. Some withstand repeated sterilization without degrading.
Surface Roughness and Bacterial Adhesion
Bacteria love rough surfaces. Microscopic grooves and pits give them places to hide from cleaning agents. Research shows that surface roughness directly correlates with bacterial adhesion. The table below shows recommended values for minimizing bacterial attachment.
| Surface Roughness Parameter | Recommended Value | Clinical Effect |
| Sa (average roughness) | Below 0.2 μm | Effectively inhibits bacterial attachment; pathogenic cells (0.5–2.0 μm) cannot anchor |
| Sa (controlled range) | 0.2–0.5 μm | Dual optimal performance: antibacterial + promotes osseointegration |
| Ra (ultra-precision finishing) | Consistently below 0.4 μm | Eliminates micro-cavities; minimizes bacterial adhesion for high-cleanliness implants |
| Ra (high-risk range) | 0.8–1.5 μm | Creates ideal microenvironments for S. aureus and P. aeruginosa biofilm formation |
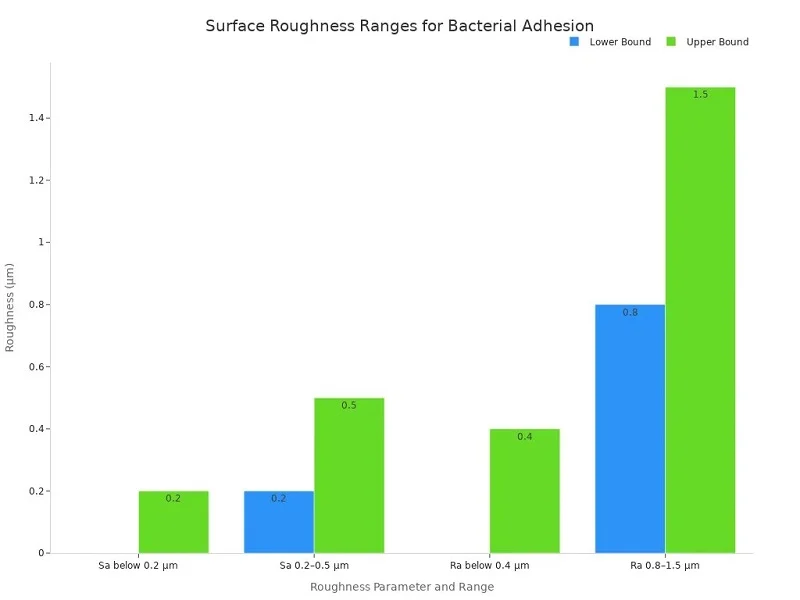
The message is clear. If your device touches patients or body fluids, keep the surface smooth. That means paying attention to both the manufacturing process and the finishing steps. A rough surface doesn’t just look bad. It creates a hygiene risk that could harm patients.
Electropolishing and Passivation for Metals
Metal parts need special treatment to reach the right surface finish. Electropolishing is one of the most effective methods. This electrochemical process removes a thin layer of metal from the surface, smoothing out microscopic peaks and valleys. The result is a surface that resists bacterial adhesion and cleans more easily. Electropolishing also improves corrosion resistance by adding a passive oxide layer. That combination enhances cleanability and sterilization durability across repeated autoclave cycles.
Passivation is another key step for stainless steel. This process uses an acid bath to remove free iron from the surface, leaving a chromium-rich layer that resists corrosion. Together, electropolishing and passivation create surfaces that meet the strict hygiene requirements of medical settings. For surgical instruments and implantable devices, these finishing steps are essential. They’re not optional extras. They’re part of what makes a device safe for patient use.
Texture and Finish for Polymers
Plastics need different treatment than metals. You can’t electropolish a polymer. But you can control its surface texture through mold design and processing parameters. Mold texture directly transfers to the finished part. A polished mold cavity produces a smooth part. A textured cavity produces a matte finish. The choice depends on the application. Smooth surfaces work best for fluid contact and easy cleaning. Textured surfaces can improve grip on handles and control surfaces. The key is matching the finish to the function. SPI guidelines help engineers specify the right surface finish for injection-molded parts. These standards range from mirror-polished to coarse textures, giving designers a clear vocabulary for communicating their needs.
Ergonomics and Human Factors
A device can work perfectly in the lab but fail in the field if it’s awkward to use. Ergonomics matters. Surgeons hold instruments for hours. Nurses operate devices while multitasking. Patients use home devices without training. Good medical equipment design accounts for all these users. The goal is to make the device intuitive, comfortable, and safe to operate. This is where human factors engineering comes into play.
User-Centered Design Principles
User-centered design puts the person first. You start by understanding who will use the device, how they’ll use it, and in what environment. Then you design around those needs. This approach reduces errors and improves outcomes. Usability testing measures how well a device meets user needs. Key metrics include satisfaction, efficiency, effectiveness, learnability, memorability, errors, and usefulness. Each metric tells you something different about the user experience. Satisfaction comes from questionnaires and user trials. Efficiency shows up in time to complete tasks. Effectiveness measures how many tasks users complete successfully. Learnability tracks how quickly users master the device. Errors reveal problem areas. Usefulness captures whether the device actually helps users achieve their goals.
Grip, Weight, and Tactile Feedback
Handheld medical device components present unique ergonomic challenges. The device must feel balanced in the hand. It must be light enough to use for extended periods. And it must provide clear tactile feedback so users know when they’ve activated a function. Research on handheld device design offers specific guidance:
- Grip types: Power grip works for sustained force and stability. Precision grip suits dexterity. A hybrid approach works best for handheld medical device components.
- Control surface design: Fingertip landing areas should match the size and curvature of the thumb, index, and middle fingers. They must work for both left- and right-handed users.
- Texture and traction: Textures on control surfaces should match the direction and amount of force required. This lets fingertips “bite in” for traction.
- Dynamic grip security: Users must hold the instrument securely while operating fingertip controls with the same hand.
- “Super finger” concept: Combining the ring and baby finger into a coordinated grip frees the thumb, index, and middle fingers for precise control.
The Medtronic Hydrodebrider handpiece shows this balance in action. It assigns specific fingers to different controls, letting the user operate the device with one hand while maintaining a secure grip. That level of thoughtful design prevents fatigue and reduces the risk of accidental activation.
Usability Testing and Iterative Refinement
Design is never finished. It evolves through testing and feedback. Usability testing should happen early and often. Prototypes go to real users. They try the device in realistic scenarios. Their feedback drives design changes. Then you test again. This iterative process catches problems before they reach the market. It’s far cheaper to fix a design flaw during development than after launch. Design verification testing confirms that the device meets its specified requirements. This formal process documents that the design works as intended. Combined with usability testing, it gives you confidence that your device will perform in the real world.
The regulatory landscape rewards this approach. Agencies expect to see evidence of user-centered design and usability testing. They want documentation that you considered human factors throughout development. A thorough design verification testing process provides that evidence. It also reduces the risk of costly redesigns after regulatory submission. Quality comes from this attention to detail at every stage.
Working with a manufacturing partner who understands these design principles makes a difference. NOBLE brings expertise in both metal and plastic processing, with a collaborative approach that includes design review and DFM feedback. Their team helps you refine your design for manufacturability while maintaining the ergonomic and cleanability features your device needs. This partnership streamlines the journey from concept to production, ensuring your medical device components meet the highest standards of safety and performance.
NOBLE: Your Partner for Medical Device Components
Choosing the right manufacturing partner can make or break your project. NOBLE isn’t just a production house. We’re a full-service partner that walks with you from the first sketch to the final assembled product. Our team handles both metal and plastic processing under one roof. That means fewer handoffs, fewer miscommunications, and a smoother path to market. For medical device components, this integrated approach delivers real value.
Metal and Plastic Processing Capabilities
CNC Machining, Stamping, and Finishing
Our metal capabilities cover the full spectrum. CNC machining handles complex geometries with tight tolerances down to ±0.0005 inches when needed. Stamping produces high-volume parts quickly and consistently. Finishing operations like electropolishing and passivation create surfaces that resist bacterial adhesion and meet hospital hygiene standards. These processes work together to produce surgical instruments, implantable device housings, and fluid-contact components that perform reliably.
Injection Molding and Extrusion
On the plastic side, injection molding delivers precision parts at scale. Our team runs mold flow analysis before cutting steel, catching warpage and flow issues early. Extrusion produces continuous profiles for tubing and catheters. We work with medical device materials like PEEK, polycarbonate, and PPSU, matching each polymer to the application’s demands. Process validation locks in every parameter so each part matches the last.
Assembly and Packaging Services
Production doesn’t end at the component level. NOBLE offers assembly services that combine multiple parts into finished devices. Packaging services ensure your product stays sterile through its entire shelf life. This end-to-end capability means you manage one partner instead of juggling multiple vendors. The benefits add up quickly:
- Cost savings: No capital investment in equipment, lower labor costs, and faster scaling without facility expansion
- Faster time to market: End-to-end support from concept and prototyping to full-scale production streamlines the process
- Risk management: Expertise in regulatory compliance, quality control, and supply chain stability minimizes production and recall risks
- Access to cutting-edge technology: Advanced manufacturing equipment improves precision, efficiency, and scalability
Quality Certifications and Compliance
ISO 9001:2015 and ISO 13485:2016 Certified
Quality isn’t a buzzword at NOBLE. It’s a documented commitment. Our facility holds ISO 9001:2015 and ISO 13485:2016 certifications. These standards govern every aspect of medical device manufacturing, from design controls to traceability. The FDA plans to harmonize its Quality System Regulation with EN ISO 13485:2016 through the new QMSR. Having this certification positions you ahead of that shift. It also demonstrates a risk-based approach to quality management compliance that regulators recognize worldwide.
FDA Registered Facility
Our facility is registered with the FDA. That registration means we understand the documentation, inspection, and reporting requirements that come with producing medical device components for the U.S. market. We maintain the records you need for regulatory approvals, so your submission package is ready when you are.
Commitment to Continuous Improvement
Certifications aren’t static achievements. They require ongoing effort. NOBLE invests in continuous improvement across every department. We track defect rates, cycle times, and customer feedback. We audit our processes regularly. This commitment reduces recall risk and builds customer confidence. It also creates a culture where quality improvement is everyone’s job.
Collaborative Approach from Design to Production
Design Review and DFM Feedback
The best time to catch manufacturing problems is before they exist. NOBLE’s engineers review your design early, offering Design for Manufacturability feedback that prevents costly rework. Late-discovered manufacturability issues trigger CAD revisions, tool modifications, and additional testing. For medical device components, these delays postpone verification, validation, and regulatory submissions. Our collaborative design reviews surface tooling and material constraints before you commit to expensive tooling.
Prototyping and Validation Support
We build prototypes using materials and processes that match final production. This production-equivalent approach prevents failures during verification testing or scale-up. Testing prototype configurations before design freeze prevents late-stage changes that would otherwise add weeks or months to the schedule. Each prototype generates evidence for design verification, validation, and human factors work.
Scalable Production and Supply Chain Management
Scaling from prototype to commercial production requires complete redesign for manufacturability. Components that work in prototypes may fail at scale. Assembly processes must shrink dramatically. NOBLE manages this transition smoothly. We optimize supply chains for cost and reliability, manage single-source risks, and handle component obsolescence. Open communication channels with a designated point of contact keep feedback loops fast. The result? A partner who helps you navigate every phase of development, from proof of concept through regulatory clearance and commercial scale.
Material selection, manufacturing processes, and design don’t work alone. They form one connected system. Each choice affects the next, and every decision impacts patient safety. Regulatory compliance isn’t a final checkbox—it’s a constant thread through the entire development process. MDCG 2020-3 guidance helps you judge whether a component change is significant or not, keeping your medical device on track.
Emerging tools like 3D printing, AI, and robotics are reshaping medical device manufacturing. These technologies enable personalized implants and smarter production lines. Partnering with an experienced manufacturer like NOBLE streamlines this journey from concept to production. Evaluate your current processes. Look for weak points in your design, materials, or quality systems. The future rewards those who adapt early and stay curious about what’s next.
FAQs of Medical Device Components
What’s the most common mistake in material selection?
Picking a material only because it’s cheap or easy to get often causes problems. Engineers sometimes skip biocompatibility or sterilization checks. That leads to redesigns, delays, or recalls. Always test your material against every requirement before you start production.
How do I choose between injection molding and CNC machining?
Think about how many parts you need and how complex they are. Injection molding works best for large runs, where each part costs less. CNC machining suits small batches, custom parts, or tight tolerances. For quick changes, CNC wins. For mass production, injection molding takes over.
Does 3D printing work for production medical device components?
Yes, but with some limits. Additive manufacturing is great for patient-specific implants and complex shapes. Post-processing adds time and cost. Regulators look closer because layer-by-layer builds can vary. For prototypes, 3D printing is hard to beat. For production, think carefully about the trade-offs.
What surface finish prevents bacterial growth?
Keep surfaces smooth. Studies show roughness below Ra 0.4 µm reduces bacterial sticking. Surfaces between Ra 0.8–1.5 µm give biofilms a good place to grow. Electropolishing metals and polishing mold cavities for plastics help you hit those targets every time.
How does sterilization method affect material choice?
Each method stresses materials in different ways. Steam ruins heat-sensitive plastics. Gamma radiation can break down some polymers. Ethylene oxide works with most materials but needs aeration. Test your material with your chosen method early. Polycarbonate, PEEK, and thermoplastic elastomers are made to handle sterilization with little change.
What is Design for Manufacturability and why does it matter?
DFM means designing parts that are easy to make without losing function. It involves simplifying shapes, adding proper draft angles, and keeping wall thickness even. Good DFM cuts costs, speeds up production, and prevents defects. A manufacturing partner can review your design early and spot issues before you spend on tooling.
How long does it take to get a medical device component into production?
Timelines vary a lot. Injection molding tooling takes 2-6 weeks. CNC machining can start within 1-2 weeks with no tooling. Additive manufacturing gives the fastest turnaround for prototypes. Add time for validation, sterilization testing, and regulatory paperwork. A full-service partner like NOBLE makes this whole process smoother.
What certifications should a medical device manufacturing partner hold?
Look for ISO 13485:2016, the global standard for medical device quality. ISO 9001:2015 covers general quality systems. FDA registration matters for selling in the U.S. These certifications show a commitment to traceability, risk management, and ongoing improvement. They also make your regulatory submissions easier.