A POCT device housing does more than hold parts together. It builds user trust, earns regulatory approval, and shapes how people see your brand. Every medical device design faces the same challenge: how do you balance a clean look with real engineering limits like draft angles and wall thickness?
This guide walks you through the whole development process. From first sketches to large-scale production, you’ll learn how to make smart design choices that save time and money. Every step matters for medical quality and safety. The right approach makes a big difference in your device’s success. Good planning leads to better results for your project.
Defining POCT Device Housing Requirements

A POCT device housing must work for people who aren’t lab technicians. Nurses, doctors, and paramedics use these devices daily. They don’t have time for complicated controls. The enclosure should guide them naturally. Good design makes the unit feel familiar right away. The development process starts with understanding these real-world needs.
Design for Non-Laboratorians
Most POCT users have clinical training, not lab training. They need a device that works without extra steps. The enclosure should have clear visual cues. Buttons need to be easy to find and press. The display should show results without confusion. This is where medical device design really matters. A well-thought-out housing keeps operators focused on the patient.
Portability and Handling in Clinical Settings
These units move around a lot. They go from exam rooms to ICU beds to ambulances. The enclosure must be easy to hold and carry. Sharp corners make a unit hard to grip. Rubber overmolds or textured surfaces help. Weight matters too. A heavy unit gets left behind. The shape should fit in tight spaces without tipping over.
Sealing Against Moisture and Contaminants
POCT devices face tough conditions. Spills happen. Dust gets everywhere. Blood and other fluids can get inside if the enclosure isn’t sealed. IP ratings tell you how well a unit keeps these things out. For most POCT devices, you want at least IP54 or IP65. Good sealing keeps internal electronics safe from moisture damage.
Resistance to Cleaning Agents and Disinfectants
This is where housing material selection really matters. POCT devices get cleaned between every patient. That means repeated exposure to harsh chemicals. Standard plastic blends can’t always handle that. In testing, PC/ABS plastic blends failed after just three days of exposure to Sani-Cloth AF3 wipes. The material showed brittle fracture. PC/PBT plastic blends also didn’t meet the compatibility requirements for elongation at break.
Advanced PC plastic copolymers perform much better. The LNP ELCRES CRX family showed broader compatibility with 12 leading disinfectants. These include quaternary ammonium compounds, bleach, hydrogen peroxide, and ethanol. The ASTM D543 test requires over 90% tensile stress retention and 80 to 139% elongation at break. The amorphous PC copolymer exhibited ductile fracture instead of brittle fracture. That means it can take more force before cracking. For medical device design, this kind of durability is essential.
Key Standards: IEC 60601-1 and IP Ratings
Every medical device needs to meet compliance standards. IEC 60601-1 covers basic safety and performance for medical electrical equipment. The enclosure keeps users safe from internal components. IP ratings tell regulators how well the unit resists dust and water. Meeting these standards is part of regulatory compliance. Quality testing throughout development helps ensure these standards are met. FDA regulations guide this process.
Biocompatibility and Material Certifications
The enclosure touches people. Materials need to be biocompatible for their intended use. ISO 10993 tests cover this. The FDA reviews these results during device approval. The FDA also requires clear documentation of all choices. The FDA regulations demand thorough testing records. Plastic selection needs to account for these requirements. Some plastics have built-in biocompatibility certifications. Quality control during production catches issues early.
A good unit starts with understanding these requirements. Every choice affects usability, safety, and regulatory success.
Medical Device Design for Manufacturing (DFM)
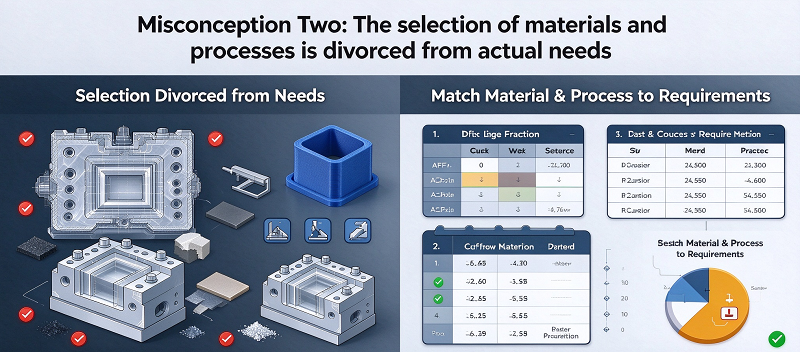
Design for manufacturing turns an idea into something you can produce in large numbers. For a POCT device housing, this means planning for injection molding from the very start. The choices you make in CAD affect cost, quality, and speed. Getting DFM right saves thousands of dollars in tooling changes later.
DFM Principles for Injection Molding
Draft Angles, Wall Thickness, and Rib Design
Injection molding needs draft angles on every vertical surface. Without them, the part sticks to the mold. Your POCT device housing needs at least 2° of draft on outside walls. Inside walls need 3° minimum. If you add texture to the surface, you need more. Each 0.001 inch of texture depth adds 1–2° of required draft. Most POCT housings have light texture, so plan for 2.5–3.5° per side. This stops scratching during ejection and keeps the cosmetic finish clean.
| Factor | Guideline |
| Exterior walls | 2° minimum |
| Interior walls | 3° minimum |
| Texture depth | Add 1–2° per 0.001 inch |
| Deep cavities | Increase draft with depth |
Wall thickness matters just as much. Uneven walls cause sink marks and warpage. The rule is simple: nearby walls should stay within 40–60 percent of each other’s thickness. When you must change thickness, make the change gradual. The transition length needs to be at least three times the thickness difference. Going from 2 mm to 3 mm means a 3 mm minimum transition zone. Sudden changes create stress points that lead to cracks.
Ribs add strength without adding wall thickness. Keep rib thickness around 50–60 percent of the main wall. This stops sink marks on the visible surface. Your medical device design should use ribs wisely. Place them behind snap-fits and bosses where stress builds up.
Minimizing Sink Marks and Warpage
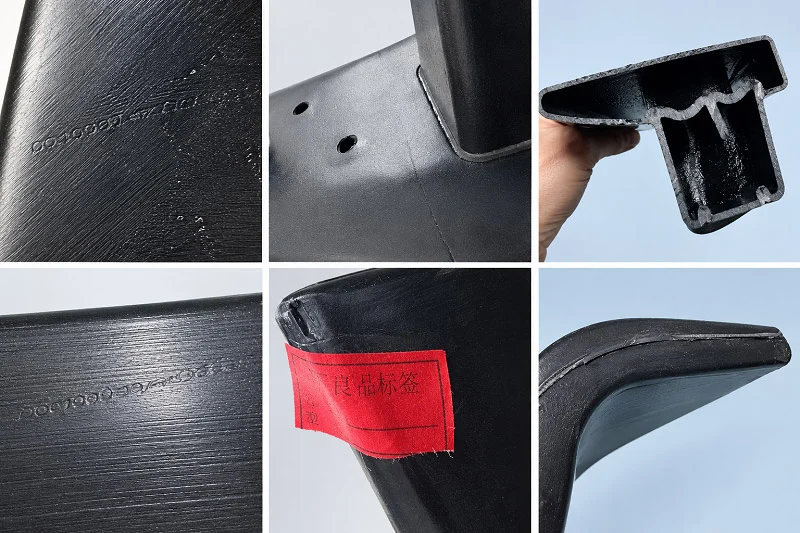
Sink marks appear where thick sections cool slower than thin ones. The surface above a thick boss or rib pulls inward. Warpage happens when uneven shrinkage bends the whole part. Both problems come from uneven wall thickness. Your design should aim for uniform walls throughout the housing. When you need a thicker section for a snap-fit, blend it slowly into the normal wall. Avoid sharp corners entirely. Inside corners need radiuses to spread stress. A sharp internal corner acts like a crack starter under impact or temperature changes.
Rapid Prototyping for Iterative Design
3D Printing for Form and Fit Checks
Before you cut steel, build a plastic housing prototype. 3D printing gives you a physical part in days. You can check the overall shape, button placement, and how it feels in hand. This early prototype won’t have the same material properties as molded plastic. But it tells you if the design works ergonomically. Print multiple versions cheaply. Each round of feedback improves the design before you commit to tooling.
CNC Machining for Functional Prototypes
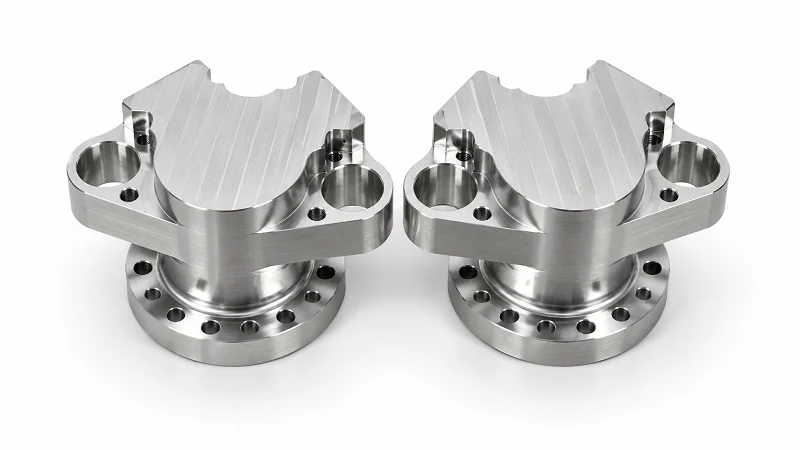
When you need parts that act like production units, CNC machining delivers. Machined prototypes use actual production plastics. You can test snap-fits, hinges, and sealing surfaces with real material properties. This matters for functional testing of the complete device. A CNC-machined plastic housing prototype lets you verify that internal components fit correctly. You can also check that the assembly process works as planned. NOBLE, a leading manufacturing company in China, excels at this stage. Their machining expertise produces accurate prototypes quickly. They help clients refine designs before mass production begins.
Prototype Testing and Design Refinement
User Feedback Integration
A prototype only helps if you test it with real users. Hand the plastic housing prototype to nurses and technicians. Watch how they hold it. Ask them to insert a test strip or change a battery. Their feedback shows usability issues you never noticed. Maybe the latch is hard to open. Perhaps the surface feels slippery with gloves on. This input shapes the next design version. Medical device design improves through this cycle of build, test, and refine.
Iterative Design Cycles
Each cycle brings the housing closer to production-ready. You might find that a wall needs more thickness for durability. Or that a rib placement causes an ugly sink mark. Fix these issues now, not after the mold is cut. Iterative design cycles cost less than tooling changes. A typical development process runs three to five prototype rounds. Each round checks a specific part of the design. The final prototype should pass all functional testing and meet quality standards. Only then do you move to production tooling.
This DFM approach keeps your development on track. It stops costly surprises during manufacturing. And it ensures your POCT device housing meets both user needs and production realities.
Testing and Validation for POCT Device Housing

Your POCT device housing must keep sensitive parts safe from moisture, dust, and bumps. This protection is key for patient safety. A cracked case can let fluids reach electronics. A broken seal can let dirt get to important parts. Testing shows your housing works in real conditions. This step tells the difference between a good device and one that breaks.
Managing the Design History File
The Design History File, or DHF, keeps track of every choice you make. The FDA needs this paperwork for medical device approval. Your DHF shows regulators how your design changed over time. It lists material choices, test results, and design changes. Each entry connects to a specific need. This file is your proof of careful work.
Start building your DHF early. Do not wait until testing starts. Every prototype version belongs in the file. Every material datasheet gets saved. Every test report gets recorded with dates and signatures. The FDA rules require traceability. Your DHF should tell a clear story from idea to final check. A messy file causes delays during review. A clean file makes the whole process faster.
Submitting Test Reports for FDA and CE Submissions
Test reports are the main part of your regulatory submission. The FDA checks these papers to make sure your housing meets safety rules. CE marking needs similar proof for European markets. Both groups want evidence that your device can handle real use. Your reports must show clear test methods, pass/fail rules, and results.
Plan your testing around rules from the start. The FDA expects tests that match your device’s intended use. If your housing says IP65 protection, prove it with a certified test. If your materials say chemical resistance, show the test data. Each claim needs proof. Regulatory paperwork should match your design goals. This match makes your submission stronger and easier to check.
Temperature and Humidity Cycling
Point-of-care settings change a lot. A device might sit in a warm ambulance, then move to a cold storage room. Humidity changes all the time. Temperature cycling tests copy these changes. Your housing must protect internal parts through all of them.
Run your housing through repeated temperature cycles. Common tests go from -20°C to 60°C over several days. Watch for water inside the case. Check for warping or cracks in the plastic. Humidity testing adds moisture at high temperatures. These tests show weak seals and material limits. The results guide design changes before production.
Durability and impact testing are also important. Devices get dropped. They get knocked off counters. Your housing should survive a drop from usual working heights. Test with fully assembled units, including batteries and reagents. Functional testing after each drop makes sure the device still works. Cleaning agent exposure tests also belong here. Spray your housing with approved disinfectants many times. Check for color change, cracks, or surface damage. These tests copy months of real use in weeks.
Final validation brings everything together. Your housing passes environmental, chemical, and impact tests. Your DHF records every step. Your test reports back up your regulatory submission. This full package moves your medical device design toward approval. The FDA rules need this careful approach. Compliance comes from evidence, not promises. A well-tested housing keeps patients safe and builds trust in your brand.
Scaling Up: Production and Assembly of POCT Device Housing

Moving from prototype to mass production is a big step. The right manufacturing partner makes all the difference. You need someone who understands the healthcare industry. Strong project management keeps the transition smooth.
Selecting the Right Manufacturing Partner
Evaluating Capabilities for Molding and Finishing
Look for a partner with cleanroom space. Class 7 cleanrooms work for most non-sterile equipment. They keep particles away from your unit during assembly. Class 8 cleanrooms serve general assembly where contamination control matters. The partner should handle engineered thermoplastics. These materials offer the strength and sterilization resistance a POCT device housing needs. A plastic housing prototype helps verify the mold early.
Importance of Quality Management Systems (QMS)
A contract manufacturer must be certified and demonstrate a strong understanding of FDA, ISO, and other industry norms. A robust Quality Management System (QMS) — including quality control, testing, and continuous improvement procedures — must be regularly audited to comply with industry standards and industry requirements. A manufacturer with a good regulatory compliance history minimizes risks and simplifies the approval process.
This is where FDA regulations really matter. Your partner needs documented procedures for everything. They should carry ISO 13485 certification. Regular audits prove their quality stays reliable and ensure compliance.
Cost Optimization for High-Volume Production
Tooling Strategies and Mold Design
Multi-cavity molds cut your cost per part dramatically. A single cavity makes one part per cycle. A 2-cavity mold cuts the piece cost by about 43%. A 4-cavity mold reduces it by 68%. An 8-cavity mold brings it down by 82%. A 16-cavity mold saves 90% per part. A 32-cavity mold saves 94%. These savings come from spreading machine time across more parts. Allow these mold configurations. Medical device design pays off here. A plastic housing prototype tested during development confirms it works at high volumes.
Supply Chain Management for Raw Materials
Medical-grade plastic needs reliable supply chains. A good partner stocks approved materials. They know which grades meet rules and ISO standards. They plan for lead times. The partner should have relationships with multiple suppliers. Safety in the supply chain means your housing never runs out of material.
Transitioning from Prototype to Production
Process Validation and First Article Inspection
The process proves your housing comes out right every time. The FDA requires this for medical device approval. First article inspection checks parts from the production mold. You measure every critical dimension against your medical device design specs. Testing includes drop checks, seal tests, and safety verification. Final validation of the whole process comes next. This stage confirms your design is complete.
Establishing Incoming Quality Control (IQC)
IQC checks every batch of incoming plastic parts. You measure dimensions, check surface finish, and verify material properties. Bad parts get caught early. The quality team sets acceptable limits for each spec based on established standards. They track results over time. Safety comes from consistent quality checks throughout production. Good testing habits during development prevent problems later.
Partnering with NOBLE for POCT Device Housing

Full-Service Capabilities: From Design to Assembly
In-House Metal and Plastic Processing
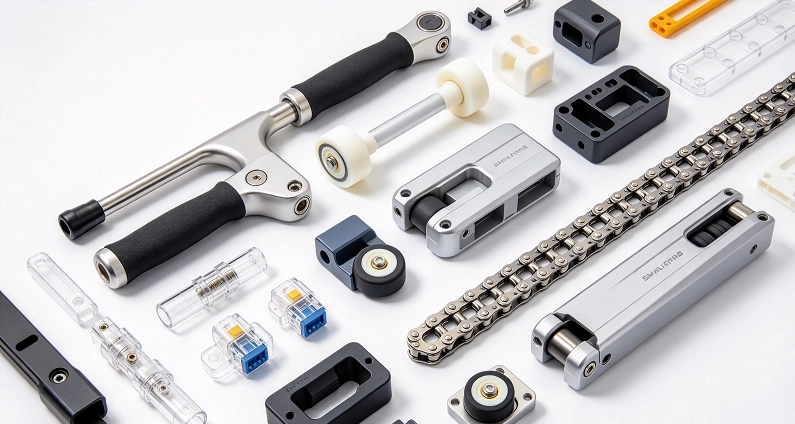
NOBLE handles all manufacturing steps in one place. That means fewer calls and less waiting for you. The team works with metal and plastic parts. They can cut a precise aluminum bracket in the morning and shape a POCT device housing in the afternoon. The plastic comes from the same building. This setup cuts shipping delays between vendors. It also means one team owns the whole build. If a change is needed, the part makers talk directly to the assembly crew. No middlemen. No blame games. For a medical device, this control matters. The housing must fit the internal parts exactly. When NOBLE makes both, that fit happens naturally. The plastic material meets strict specs.
Integrated Project Management
A dedicated project manager guides your POCT device housing from start to finish. They handle the timeline, the budget, and the communication. You get regular updates without asking. The project manager knows medical device design well. They understand what it takes to meet FDA rules and ISO standards. When a problem comes up, they fix it quickly. The FDA sees this standard as a strong base for quality. This single contact keeps your project moving. You don’t have to track down five people for a status update. The whole process runs more smoothly. For a product that must reach the market fast, this matters a lot. The development process stays on schedule.
Certifications and Quality Assurance
ISO 9001:2015 for Quality Management
ISO 9001:2015 is the top standard for quality management. NOBLE holds this certification. It means every step follows a written system. From the time raw material arrives to the day your housing ships, quality gets checked. The certification requires regular audits. An outside team comes in to confirm everything stays on track. This certification focuses on safety and quality. It gives you confidence that your housing meets the same high standards every time. Quality isn’t just a goal. It’s built into the system.
ISO 13485:2016 for Medical Devices
This certification goes further. ISO 13485:2016 is specific to this field. It covers everything from design to production to final testing. The standard demands strict tracking. Every batch of plastic gets logged. Every test result gets recorded. FDA submissions need this level of tracking. The FDA wants proof that your product meets safety and performance rules. NOBLE’s ISO 13485 certification gives you that proof. Meeting these compliance standards helps with approval in other markets too. Many countries accept ISO 13485 as proof of a quality system. For a product that needs to sell worldwide, this certification opens doors. Safety comes first. NOBLE’s certifications back that up with real, audited systems. This approach speeds up development time.
A successful POCT device housing emerges from careful planning, smart material choices, and thorough testing. Every early decision shapes your final product’s cost, usability, and regulatory path. The housing isn’t just a shell—it’s central to your device’s value. It protects users, ensures safety, and builds trust in your brand. Good medical device design treats the enclosure as a critical component from day one. That mindset drives better quality throughout development. You don’t have to navigate this journey alone. An experienced manufacturing partner like NOBLE brings certified processes and full-service capabilities to simplify production. Their ISO 13485 quality system supports your compliance goals. With the right team, your concept becomes a reliable medical device ready for real-world clinical settings.
FAQs of POCT Device Housing
How long does it take to develop a POCT device housing?
Most projects take 12 to 18 months from start to production. Prototyping uses 8 to 12 weeks. Tooling adds another 10 to 14 weeks. Testing and validation fill the rest of the time. Your timeline depends on how complex the device is and how many design rounds you need.
What is the most common mistake in POCT housing design?
Uneven wall thickness causes most issues. It creates sink marks and warpage. Many teams skip early DFM reviews. They pay more later with costly mold changes. Have a manufacturing expert check your CAD model before cutting steel.
Can I use the same plastic for every POCT device?
No single material works for all devices. Your choice depends on chemical exposure, sterilization methods, and mechanical needs. Some devices need advanced copolymers to resist disinfectants. Others work fine with standard medical-grade plastics. Test your material against your actual cleaning agents.
How many prototype rounds should I plan for?
Plan for three to five rounds. The first round checks basic form and ergonomics. Later rounds verify snap-fits, sealing, and drop performance. Each round costs less than one tooling change. Budget for enough cycles to get the design right.
What IP rating does my POCT device housing need?
Most point-of-care devices need IP54 or IP65. IP54 protects against dust and splashing water. IP65 handles low-pressure water jets. Your actual need depends on where clinicians use the device. Check your product specification and intended environment before finalizing the seal design.
How does NOBLE support regulatory submissions?
NOBLE maintains ISO 13485 certification and full documentation systems. They provide complete traceability for every batch. Test reports and inspection records support your FDA or CE filing. Their quality management system matches regulatory expectations, so your submission package stays complete and audit-ready.
What causes delays in POCT device production?
Material shortages and unclear specifications cause most delays. Poor communication between design teams and manufacturers creates rework. Late engineering changes push back tooling schedules. A single project manager who understands both sides keeps everything moving. Clear documentation prevents costly surprises.