Choosing a manufacturing process and material for a hospital robot enclosure is really a balancing act. You need low cost, ISO 13485 compliance, and real-world performance — all at the same time. These goals often pull in different directions. A cheap resin may crack after repeated bleach wipe-downs. A rugged metal frame may blow the budget at low volumes.
This guide compares processes by production volume, materials by sterilization and durability, and design details that shape certification and total cost. It speaks to engineers and procurement teams weighing low-to-medium volume production, where tooling decisions and supplier documentation matter just as much as the part itself.
Critical Requirements for a Hospital Robot Enclosure
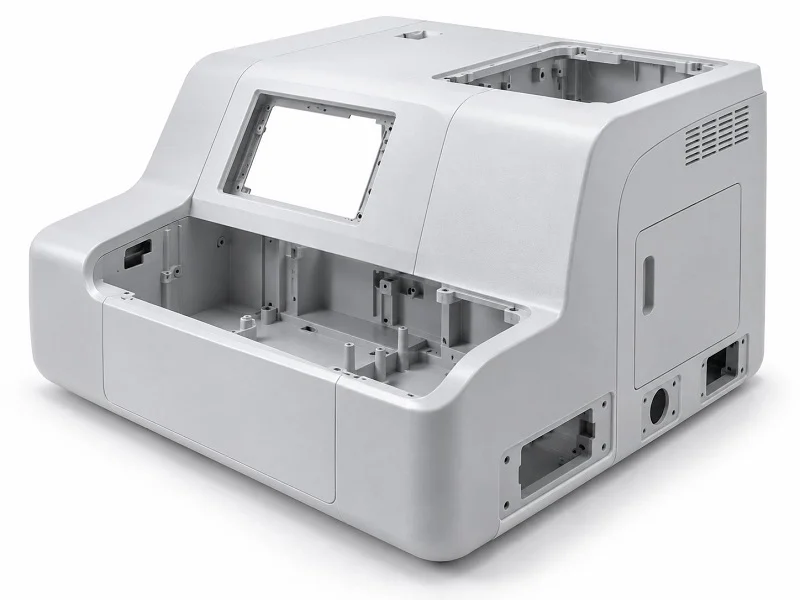
Designing a hospital robot enclosure means balancing many demands. The part must handle harsh cleaning chemicals. It must resist flames and survive bumps. And it must meet strict medical standards. Getting these requirements right from the start saves time and money.
Sterilization and Chemical Resistance
Disinfectant Wipe-Down Cycles
Hospital staff clean robot enclosures between every patient. They use alcohol wipes, bleach solutions, and hydrogen peroxide sprays. Each material reacts differently to these chemicals. Some plastics crack or swell after just a few wipe-downs. Others hold up for thousands of cycles.
A portable medical device enclosure needs to handle these chemicals without changing shape or color. Surface finish matters too. Rough surfaces trap germs. Smooth surfaces clean easier. The choice of resin directly affects how long the enclosure lasts in daily hospital use.
Autoclave Heat and Moisture
Some hospital robots go through autoclave sterilization. That process uses steam at 134°C under pressure. Not every plastic can take that heat. Even metals need the right coating to avoid corrosion.
A portable medical device enclosure meant for autoclave use demands heat-resistant materials. Polycarbonate or stainless steel often work here. But you need to check the supplier’s data sheets. The material must stay stable through hundreds of sterilization cycles without warping.
Flame Retardancy and Impact Durability
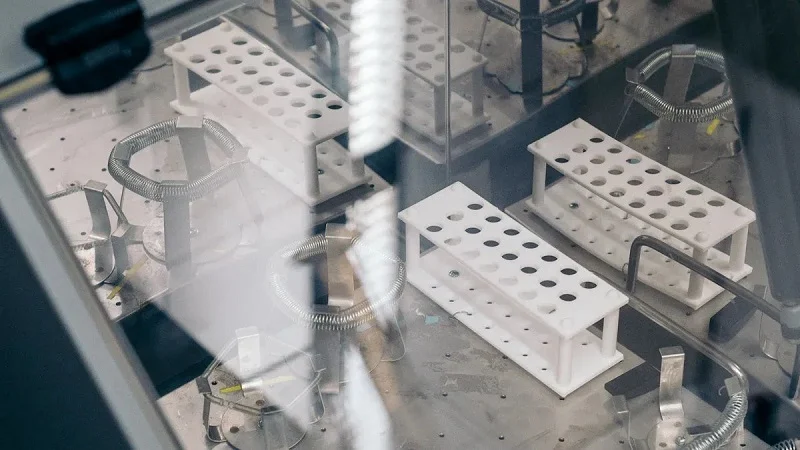
UL94 V-0 Resin Selection
Hospitals require flame retardant materials. UL94 V-0 is the common standard. It means the material stops burning within ten seconds after a flame is removed. No burning drips are allowed.
Many medical-grade plastics carry this rating. But not all UL94 V-0 grades handle sterilization the same way. You need to pick a resin that passes both flame and chemical tests at the same time.
Drop, Bump, and Cart Collision Loads
Robots get moved around hospitals every day. They fall off carts. They bump into walls. The enclosure must protect the electronics inside. IEC 60601 sets minimum drop heights for medical equipment. Here is a breakdown:
| Equipment Type | Minimum Drop Height | Notes |
| Portable ME equipment (hand-held) | 1 meter | Free fall from 1 meter |
| Portable parts of ME equipment | 2 to 5 cm | Depends on mass of the part |
A portable medical device enclosure must survive a one-meter drop if it is hand-held. Larger parts may only need to handle a few centimeters. But in practice, you should test beyond the minimum. Hospital carts crash into door frames. Staff drop tools. Your design should handle real-world abuse, not just the standard test.
Regulatory Certifications and Traceability
ISO 13485 Supply Chain Records
Regulatory compliance starts with your supplier. ISO 13485 is the quality standard for medical device manufacturing. It requires full traceability. Every batch of resin must have records. Every process step must be documented.
If something fails later, you can trace it back to the root cause. ISO 13485 also covers supplier management. Your enclosure vendor needs this certification, not just your final assembly line.
Cleanability and Biocompatibility
Cleaning alone is not enough. The design must let cleaning fluids reach every surface. No hidden gaps. No sharp corners. Biological and electrical safety go hand in hand.
A clean enclosure reduces infection risk. Biocompatibility testing confirms the material is safe for skin contact. Certifications like FDA device registration may also apply depending on the robot’s role. Your portable medical device enclosure should follow FDA guidance for materials and cleaning methods.
Medical Robot Enclosure Manufacturing Processes
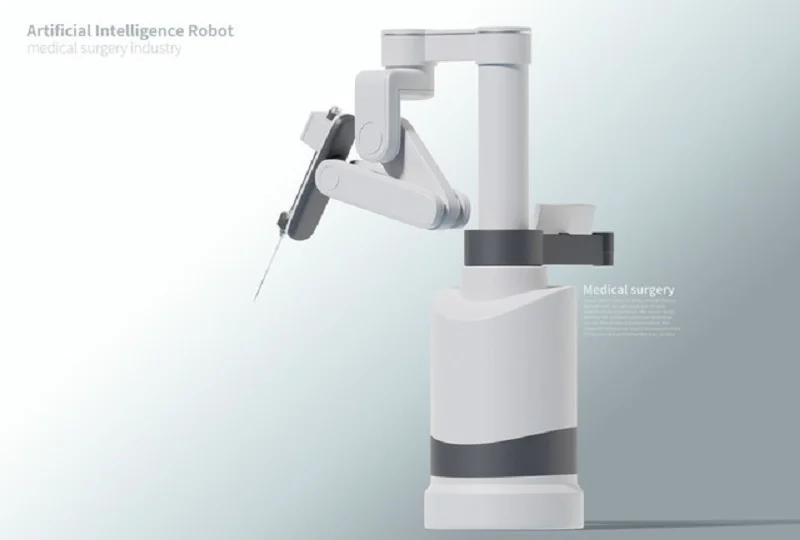
Picking a process comes down to volume, tooling budget, and lead time. Each method has a sweet spot. Let’s walk through the main options for a hospital robot enclosure.
Injection Molding for High Volumes
Tooling Cost and Cycle Time
Injection molding delivers speed and repeatability at scale. Molten resin shoots into a hardened steel mold under high pressure. The part cools, the mold opens, and out comes a finished piece. Cycle times run 10–60 seconds. That speed adds up fast.
Tooling costs for injection molding range from $30,000 to $150,000. That’s a big upfront check. But the per-part cost drops sharply once you spread that tooling across thousands of units. Mold life exceeds 100,000 shots, so the tool pays for itself over a long production run.
Volume Break-Even Points
When does injection molding beat other processes? The break-even sits above 5,000 units. Below 2,000 units, RIM is cheaper. Between 2,000 and 5,000 units, it’s a gray zone. You need to run the numbers for your specific part. From a practical perspective, injection molding makes sense when you know demand will stay high for years.
Thermoforming and RIM for Low-to-Mid Volumes
Vacuum and Pressure Forming
Thermoforming heats a plastic sheet until it sags, then pulls it over a mold. Vacuum forming uses suction. Pressure forming adds air pressure on top. Both work well for large panels and covers. Tooling costs stay low compared to injection molding. Lead times are short. But the process limits geometry. You can’t mold deep ribs or complex internal features.
Large-Part RIM Advantages
Reaction injection molding, or RIM, fills a different niche. It mixes two liquid components and injects them into a mold at low pressure. That low pressure matters. It prevents damage to embedded wiring and sensors. It is worth noting that RIM is used in medical robot enclosure manufacturing to meet ISO standards.
Here’s how RIM stacks up against traditional injection molding:
| Benchmark Factor | RIM | Traditional Injection Molding |
| Typical Tooling Cost | $5,000–$25,000 | $30,000–$150,000 |
| Injection Pressure | 50–200 psi | 5,000–20,000 psi |
| Cycle Time | 2–10 minutes | 10–60 seconds |
| Mold Life | 5,000–20,000 shots | 100,000+ shots |
| Volume Sweet Spot | 50–5,000 units/year | 1,000–1,000,000+ units/year |
Large equipment housings for MRI machines, CT scanners, and surgical robot enclosures are prime RIM candidates. These parts are typically large (over 300 mm), required in low volumes (100–500 units/year), and need to encapsulate electronic components. The low injection pressure prevents damage to embedded wiring and sensors.
Sheet Metal Enclosure Fabrication
DFM, Finishing, and Inspection
A sheet metal enclosure starts with design for manufacturability. You need to answer key questions early. Which cleaning agents will contact the part? Are visible panels cosmetic or structural? Must a surface stay conductive? Are there crevices that trap fluid? Will panels be removed during service?
Finish selection drives both cost and cleanability. Here’s a quick comparison:
| Finish | Best For | Trade-off |
| Mill Finish (2B) | General industrial parts | Plain matte look |
| Brushed (No. 4) | Customer-facing trim | Grain direction must be consistent |
| Mirror (No. 8) | Premium aesthetic panels | Shows every scratch |
| Bead Blasted | Medical equipment, hand-contact panels | Texture catches contaminants if not specified properly |
| Electropolished | Pharmaceutical, medical, semiconductor | Higher cost, longer lead time |
Stainless steel is only truly “stainless” when its surface chemistry is balanced. The tools used to shape the part—steel end mills and tungsten carbide cutters—can leave behind free iron contamination that triggers corrosion. Passivation removes that free iron and lets the chromium-rich passive layer reform. For medical enclosures, this final step is essential to prevent contamination traps and ensure the surface stays pristine in aggressive cleaning environments.
Frames, Panels, and Base Mounts
Sheet metal shines for frames, panels, and base mounts. It handles structural loads well. It also provides natural EMI shielding when grounded properly. A portable medical device enclosure often combines sheet metal internal frames with plastic outer covers. That hybrid approach balances weight, cost, and durability.
CNC machining is widely used in surgical robot parts for high precision and complex geometries. It works well for prototypes and low-volume metal components. Fiber-reinforced elastomeric materials are an emerging option for on-demand production in hospitals. These materials allow rapid replacement of worn covers without waiting for traditional manufacturing lead times.
Materials for a Hospital Robot Enclosure
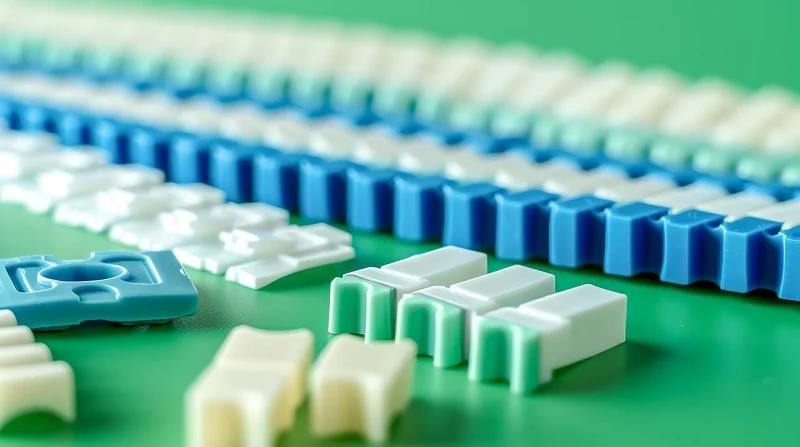
The materials you choose shape everything about a hospital robot enclosure. They affect weight, durability, cost, and how well the part holds up after years of harsh cleaning. Choose the wrong resin, and you may see stress cracks within months. Choose the wrong metal, and corrosion pits can harbor bacteria. The right mix keeps a portable medical device enclosure light enough to move and strong enough to last.
Thermoplastics for Housings and Covers
Polycarbonate for Impact and Clarity
Polycarbonate has earned its name as the go-to clear plastic for guards and covers. It offers excellent impact resistance and stands up well to accidental drops. Notched Izod values for polycarbonate fall in the 12–16 ft·lb/in range, with elongation at break around 90–100%. That ductility means the part bends instead of shattering.
Transparent panels benefit most from this material. You can see internal components without giving up protection. The trade-off? Polycarbonate costs more than common resins, and it can cloud after repeated contact with certain solvents. Check sterilization compatibility with your chosen cleaning agents before you commit.
ABS and Kydex for Formability
ABS is the workhorse of enclosure manufacturing. It thermoforms easily, takes paint well, and costs less than polycarbonate. But its impact strength falls behind. Kydex T beats ABS by a wide margin. It reaches 15 ft·lb/in on the notched Izod test (ASTM D256) and stretches to 110% elongation at break (ASTM D638). That makes Kydex less brittle than ABS, HIPS, PETG, and PVC.
Here is how the two leading thermoplastics compare:
| Material | Notched Izod Impact | Elongation at Break | Impact Behavior Notes |
| Polycarbonate (PC) | 12–16 ft·lb/in | ~90–100% | Very tough and ductile; standard “unbreakable” choice for guards and covers |
| KYDEX T | 15 ft·lb/in (ASTM D256) | 110% (ASTM D638) | Extremely tough and extensible; less brittle than ABS, HIPS, PETG, and PVC |
In SI units, Kydex 100/510 reaches 961 J/m while polycarbonate (Lexan) measures 600–800 J/m. Both materials work for a portable medical device enclosure. Your choice depends on clarity needs, budget, and chemical exposure.
Metals for Structural Parts
Stainless Steel for Sterilization
Stainless steel handles autoclave cycles better than any plastic. It will not warp at 134°C. It resists corrosion when properly passivated. Grade 304 and 316 are common picks for medical hardware. Grade 316 offers better chloride resistance, which matters when bleach is the daily cleaner.
The downside is weight. A stainless frame adds mass fast. Use it for base mounts, hinges, and load-bearing brackets rather than full covers.
Aluminum for Weight Reduction
Aluminum cuts weight dramatically compared to steel. A 6061-T6 frame weighs roughly one-third of an equivalent stainless part. That matters for a portable medical device enclosure that nurses push through hallways all day.
Aluminum needs a protective finish. Anodizing adds a hard oxide layer that resists scratches and chemicals. Without it, bare aluminum pits quickly in a bleach-rich environment.
Coatings and 2K Paints
Antimicrobial and Chemical-Resistant Finishes
Two-component (2K) polyurethane paints give the best chemical resistance for medical robot enclosure manufacturing. They cure into a hard, crosslinked film that shrugs off alcohol, hydrogen peroxide, and quaternary ammonium disinfectants. Powder coatings offer similar protection with zero solvents.
Antimicrobial additives go one step further. Silver-ion additives in the coating kill bacteria on contact. These finishes help reduce infection risk in patient rooms.
Color, Texture, and Wear
Color coding helps staff identify robot functions at a glance. But bright colors show scratches and scuffs. Textured finishes hide wear better than gloss. They also improve grip on handles and edges.
From a practical perspective, specify a matte or fine-texture finish for high-contact areas. Reserve gloss for panels that rarely get touched. This simple choice extends the visual life of the enclosure by years.
It is worth noting that injection molding and thermoforming both accept these coatings without issue. Injection molding gives you tighter tolerances for snap-fit joints. Thermoforming keeps tooling costs low for large covers. Either way, the coating step comes last and determines the final look and chemical resistance.
Design Considerations for a Hospital Robot Enclosure
Good design considerations start with the plastic itself. Wall thickness drives stiffness, weight, and moldability all at once. Thin walls save weight but flex under load. Thick walls add strength but invite sink marks and long cooling times. Most hospital robot enclosure covers land between 2 mm and 4 mm, with ribs doing the heavy lifting where stiffness matters.
Wall Thickness, Ribs, and Draft
Stiffness Versus Weight
Ribs add stiffness without adding much mass. But rib geometry has limits. A rib that is too thick pulls material from the main wall as it cools. That creates sink marks on the visible surface. Keep the rib base between 0.5 and 0.75 times the primary wall thickness. For standard injection molding, the base should not exceed 60% of the nominal wall. This ratio is critical for preventing sink marks.
Demolding and Moldability
Draft angles let the part slide out of the mold. The general rule is about 1° of draft per 1 inch of cavity depth. Shallow features need less. Deep features need more.
| Feature Depth | Minimum Draft Angle |
| 0.25 in. | 0.5° |
| 0.5 in. | 1° |
| 0.75 in. | 2° |
| 1 in. | 2° |
| 1.5 in. | 2° |
| 2 in. | 2° |
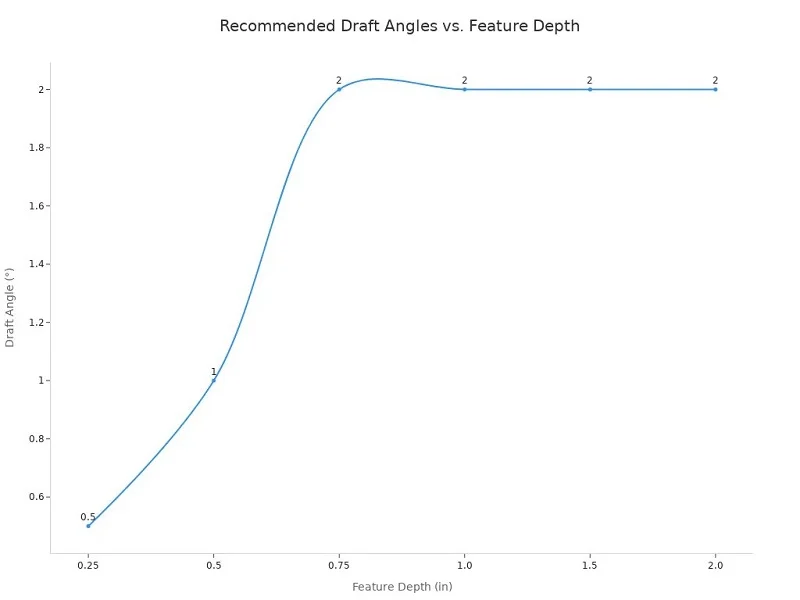
Textured surfaces need extra draft. A heavy texture can push the angle to 2–5°. For tall walls over 100 mm, calculate the angle instead of guessing. The formula is draft angle = arctan(h/L), where h is the desired undercut clearance and L is the feature height. Material choice shifts the base too. Polycarbonate needs about 1.2 times the draft of ABS.
Assembly, Sealing, and Fastening
Snap-Fits, Screws, and Adhesives
Snap-fits speed up assembly and cut part count. They work best on small covers that flex without stress cracking. Screws suit serviceable panels and load-bearing joints. Adhesives bond dissimilar materials, like a plastic cover to a metal frame. Each method affects how easily a portable medical device enclosure comes apart for repair.
IP-Rated Gaskets and Seals
Hospitals wash everything. Gaskets keep fluids out of electronics. Silicone and EPDM seals hold up to repeated disinfectant exposure. Choose an IP rating that matches the cleaning method. A sealed portable medical device enclosure also traps heat, so plan for airflow or thermal paths.
EMI Shielding and Cable Routing
Conductive Coatings and Shielding
Motors and pumps inside a hospital robot enclosure generate electrical noise. That noise can disrupt sensors and wireless links. Conductive coatings, metalized films, and wire mesh gaskets block it. The shielding must connect to ground at multiple points to work.
Grounding and Service Access
Grounding paths need low resistance and short runs. Route cables away from high-current lines. Leave service loops so technicians can open panels without cutting ties. Cargo module parts deserve the same care. Clean covers, automatic locks, motor-driven doors, and strong base mounts all need room for wiring and tool access. A portable medical device enclosure that hides its fasteners looks clean, but it must still come apart in the field.
Matching Process and Material to Volume for a Hospital Robot Enclosure
Volume decides everything. The right process for 500 units is the wrong one for 50,000. Here is how to match your production plan to the right tooling and materials.
Low-Volume and Prototype Strategies
CNC, 3D Printing, and Sheet Metal
Prototypes and early builds rarely pay for expensive tooling. CNC machining cuts precise parts from solid blocks. It can make complex shapes and tight fits without a mold. 3D printing speeds up fit testing. Sheet metal covers frames and brackets at low cost. A portable medical device enclosure made this way costs more per part, but you avoid the tooling cost entirely.
When to Invest in Soft Tooling
Soft tooling fills the gap between prototype and production. Aluminum molds and thermoform tools cost much less than hardened steel. They last enough cycles for pilot runs and clinical trials. Invest in soft tooling when your design is set and demand is still unknown. NOBLE, a top manufacturing company in China, helps clients move from prototype to mass production with expert machining and full-service support.
Mid-Volume Strategies
Thermoforming and RIM Economics
Thermoforming and RIM work well in the mid-volume range. Tooling stays affordable, and lead times stay short. For large plastic parts, thermoforming costs less below about 3,000 to 5,000 parts. Above that, injection molding costs less per part. The reason is simple: tooling cost differences matter most at low volumes.
| Annual Volume | More Cost-Effective Process | Reason |
| Below 3,000 units | Thermoforming | Lower tooling cost makes up for higher per-part cost |
| 3,000–5,000 units | Transition range | Break-even point based on industry data |
| Above 5,000 units | Injection molding | Lower per-part cost covers higher tooling cost |
Hybrid Metal-and-Plastic Assemblies
Hybrid designs use sheet metal frames with molded plastic covers. This approach balances weight, cost, and durability. A portable medical device enclosure often uses this mix. Metal holds the weight. Plastic handles look and cleaning. Cost factors include number of fasteners, assembly work, and extra finishing steps.
High-Volume Strategies
Injection Molding Break-Even
Injection molding pays off at high numbers. Above 5,000 units, the cost per part drops a lot. Multi-cavity molds cut time per piece. Buying material in bulk gives another 5–15% off. Injection molding also gives tighter fits for snap-fits and seals. That matters for a portable medical device enclosure that must pass IP-rated washdown tests.
Tooling Amortization and Unit Cost
Tooling amortization is the key number. Divide the total mold cost by total number of parts you expect to make. At 10,000 parts, a $32,000 mold adds $0.80 per part. At 100,000 parts, that drops to $0.08. Injection molding gets much cheaper as volume goes up.
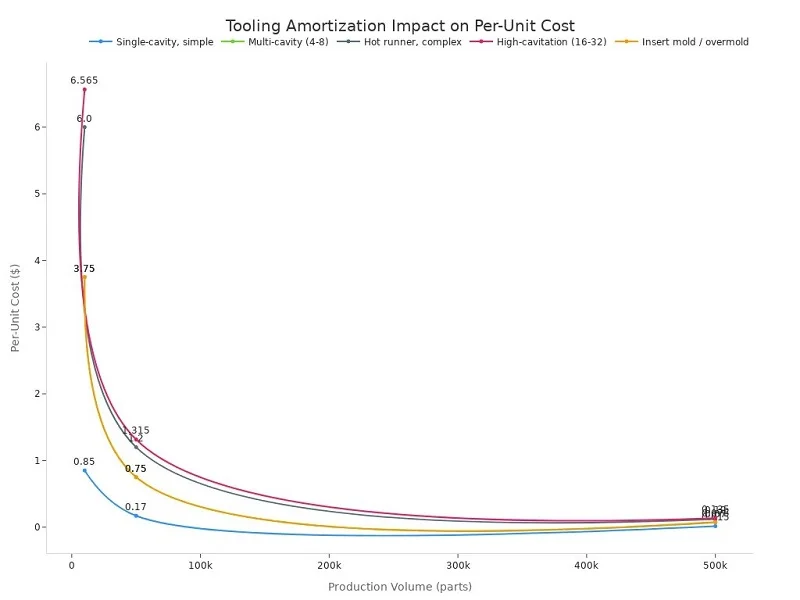
When comparing tooling quotes for a high volume program, look at total cost per part for the whole expected volume, not just the tooling price.
Resin choice also affects cost. Material cost makes up 35–55% of total part cost in typical medical robot enclosure manufacturing. Pick a resin that survives cleaning without paying extra for features you don’t need.
Why NOBLE Builds Your Hospital Robot Enclosure
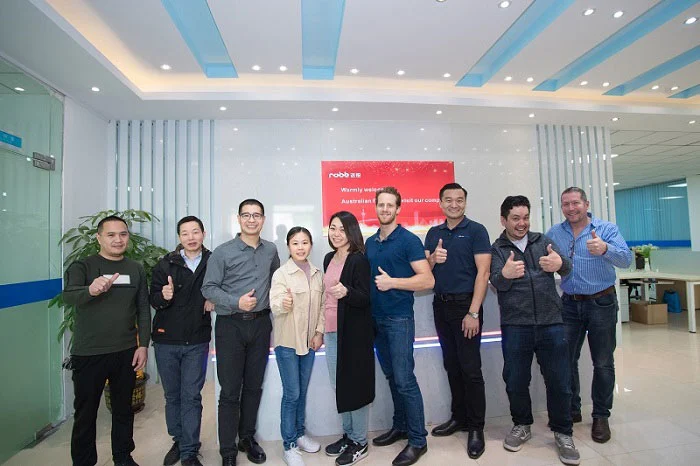
A manufacturing partner needs more than just cutting tools. They need experience with metal and plastic, medical compliance credentials, and full-service support from design to assembly. That’s what NOBLE brings.
Metal and Plastic Processing
Sheet Metal, CNC, and Plastic Fabrication
NOBLE does both metal and plastic work in one place. For metal, we make sheet metal frames and mounts. CNC machines cut exact surgical robot parts. For plastic, we offer thermoforming, RIM, and injection molding for larger runs. From small prototype runs to full injection molding, we pick the method that fits your volume. The right process is always ready.
These processes come together in a portable medical device enclosure. The metal frame gives it structure. The plastic cover keeps it clean and looking good. Both parts are designed together so they fit perfectly.
Design, Prototyping, and Assembly
Our engineers check your design for manufacturability early on. We find draft angle issues, thin walls, and hard features before tooling begins. Prototypes use the same materials as production for accurate testing. This lowers risk and speeds up the path to production. Once the design is final, we handle all assembly — wiring, seals, gaskets, and testing. You get a finished unit, not loose parts.
Certifications for Medical Compliance
ISO 9001:2015 Quality Management
ISO 9001:2015 is built into every process in our shop. Every step is written down. Every procedure is documented and traceable. This quality system catches problems before they reach your assembly line. It also makes audits easier for your own regulatory compliance team.
ISO 13485:2016 Medical Device Manufacturing
This standard adds medical-grade rules to the quality system. Risk management, design control, and strict handling records are all part of it. Our ISO 13485 certification means full traceability in supply chain records. Batch numbers and material certs are always ready. This paperwork supports your FDA device registration for a portable medical device enclosure by proving controlled processes from start to finish.
Full-Service Design to Assembly
Engineering Collaboration and DFM
Our engineers join your team early to help pick materials for a portable medical device enclosure. We choose plastics that resist bleach and impact without adding extra cost. We adjust wall thicknesses to stop sink marks. We improve the design for injection molding or thermoforming based on your target volume. This DFM process cuts tooling changes and shortens your timeline.
Production, Testing, and Final Assembly
Production covers the full range. Sheet metal gets cut and welded. Plastic gets molded. Final assembly brings it all together with seals, cables, and electronics. Every unit passes drop tests, IP checks, and visual inspection. For a portable medical device enclosure, these tests prove it can handle hospital use. You receive a product that is ready to ship, not a box of pieces.
The decision framework comes down to three steps. Match the process to your volume — injection molding works best above 5,000 units. Match the material to sterilization and impact needs. Design for compliance from the start.
For hospital environments, ISO 13485 alignment, UL94 V-0 flame retardancy, and disinfectant resistance are non-negotiable. Your supplier must document every step.
Below 5,000 units, injection molding may not make sense. Thermoforming or RIM fits better. But as volume grows, injection molding lowers unit cost fast. Resin choice also shifts injection molding economics. Your part geometry affects injection molding.
When choosing a partner, look past unit price. Evaluate certifications, design support, and full-service assembly. The right partner saves you time and risk.
FAQs of Hospital Robot Enclosure
What sterilization methods can a hospital robot enclosure survive?
Most enclosures can handle alcohol and bleach wipe-downs without cracking. Some can go through autoclave steam at 134°C. Polycarbonate works for both. Not all plastics can take that heat, so check your material data sheet.
When does injection molding make economic sense for a hospital robot enclosure?
Above 5,000 units per year, injection molding gives the lowest cost per part. Below that, RIM or thermoforming saves money on tooling. Steel molds cost $30,000 to $150,000. That upfront cost only pays off at higher volumes.
What certifications should a hospital robot enclosure supplier hold?
ISO 13485:2016 covers medical device manufacturing. ISO 9001:2015 covers general quality management. Both require full traceability of every material batch and process step. Always ask for paperwork before you order.
Can 3D printing produce hospital robot enclosures at scale?
Not for high volumes. 3D printing works well for prototypes and low-volume parts. The cost per unit stays high, and cycle times are much longer than injection molding or RIM. Use it for testing, not production.
How do you choose between plastic and metal for an enclosure?
Plastic keeps weight down and costs less at volume. Metal handles structural loads and autoclave heat better. In practice, many designs combine a metal frame with plastic covers to get the best of both.
What does UL94 V-0 mean for your hospital robot enclosure?
It means the material stops burning within ten seconds after the flame is removed. No burning drips are allowed. This rating is standard for medical equipment enclosures. Look for it on your resin data sheet.
How do you prevent cracking from disinfectant on a hospital robot enclosure?
Pick a resin with proven chemical resistance. Polycarbonate and Kydex T hold up well to repeated wipe-downs. Avoid ABS for high-wipe areas. Test your specific cleaner on sample parts before full production starts.