Introduction of Sheet Metal Bending
You spend hours lining up a perfect piece of metal. Then you hit the brake. The angle is wrong. The tube looks crushed. The whole profile twists into something useless. It’s frustrating.
Here is the thing. That collapsing and narrowing at the bend has a name: section distortion. It happens every time you bend metal incorrectly. Understanding why it happens is how you stop wasting material.
This guide takes you from the very basics of metal bending to the advanced fixes. We cover sheet metal fabrication for flat stock and precision forming for tubes. The focus is practical. Learn how to control your bend radius, predict bending springback, and eliminate section distortion. You’ll walk away knowing exactly how to get clean, accurate bends every time.
Foundational Knowledge: 3 Core Sheet Metal Bending Methods
You spend hours lining up a perfect piece of metal. You make your bend. Then you look at it. The angle is wrong. The tube looks like someone stepped on it. The whole profile is twisted garbage. Yeah, that’s frustrating.
That crushed, flattened spot where the tube bent? It has a name. Section distortion. It happens to everyone. Understanding why it happens is the difference between scrap bins full of mistakes and parts that actually fit.
Let’s start with the basics. Three ways to bend metal. Pick the right one for your part.
V-Bending
This is what you see in most fab shops. You take a flat sheet, put it over a V-shaped die, and a punch pushes it down. Job done.
But there’s a bit of a twist. Air bending is where the punch stops before the metal hits the bottom. You’ll get less force and more springback, but you can get different angles with the same tool. Bottoming is when you smash it all the way into the die. The corners are more precise, but you’ll need a bigger press to achieve them. The bend radius changes depending on which one you pick.
Rotary Draw Bending
This is for tubes and pipes. The material attaches to a die that rotates, pulling the tube around with it.
Here’s the trick. Have you ever tried bending a tight radius on a hollow tube? It wants to flatten. It wants to buckle. That’s where the mandrel comes in. A steel rod with flexible balls slides inside the tube right where the bend happens. It props the wall up from the inside. No mandrel? You always get section distortion. A good mandrel gives you clean, round bends.
Roll Bending
Need a big curve? A circle? This is your sheet metal-bending method. Three rollers are arranged in a triangle. The metal goes through, bends a little, goes through again, bends a little more.
Just keep running it through until you get the radius you want. It’s slower. It takes feel. But for big arcs and cylinders, nothing else works. Just keep an eye out for springback when you unload it. The metal always tries to relax a little.
Advanced Techniques: How to Bend Different Metal Forms
Let’s get into the real differences of metal bending. Bending a solid bar is not the same as bending sheet metal. And bending a hollow tube is a whole different game. The shape of your material changes everything.
Bending Solid Bars vs. Sheets
A solid bar fights you differently from a thin sheet. With a bar, you have mass. It holds onto heat and stress. Springback is more aggressive. You have to overbend it, sometimes a lot, to get the final angle you want.
Sheets are more forgiving but have their own quirks. The grain direction matters. Bend across the grain, and the metal is stronger, less likely to crack. Bend with the grain, and you risk fractures on the outside of the bend. Also, every material has a minimum bend radius. Go tighter than that, and the metal tears. No exceptions.

The Unique Challenges of Tube Bending
Hollow stuff is where things get complicated.
Think about the difference. A solid bar has material everywhere. A tube is empty inside. When you bend it, the outside wall stretches thin, and the inside wall wants to buckle. That’s why you get section distortion. The tube flattens into an oval or collapses completely.
The fix is internal support. That means mandrel bending. Without a mandrel, you are guessing. With one, you control the distortion. You also have to watch the wall thickness. Thin walls wrinkle. Thick walls need more force. It’s a balance every time.
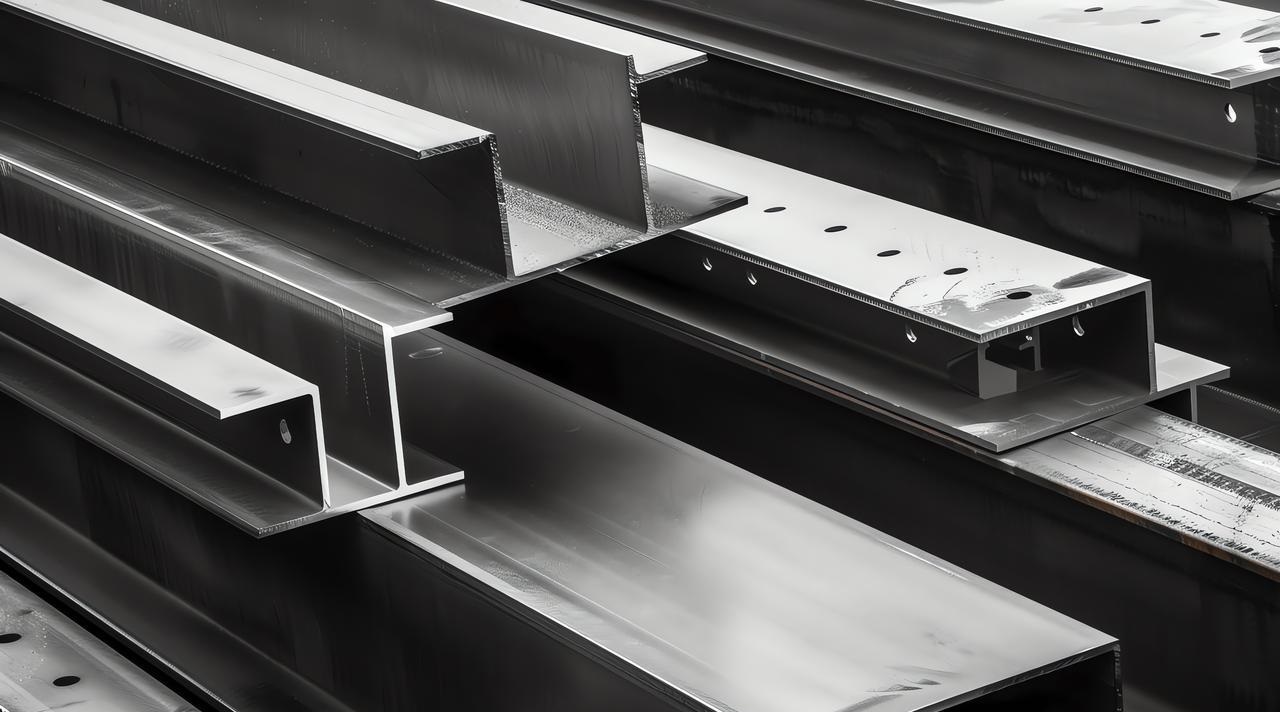
Sheet Metal Bending Irregular Shapes (Profiles)
Now we get to profiles. Angle iron, channels, T-sections. These shapes are not symmetrical. That makes them tricky.
Take an angle iron. Bend it one way, and the legs want to twist. The whole section can buckle sideways before it bends properly. You get local stress concentrations where the bend starts. Sometimes the metal just gives up and wrinkles.
The trick is understanding how the shape distributes force. A channel bent the hard way is strong. Bent the easy way, it wants to collapse. You have to plan your setup around the shape, not against it. Otherwise, you scrap a lot of expensive material.
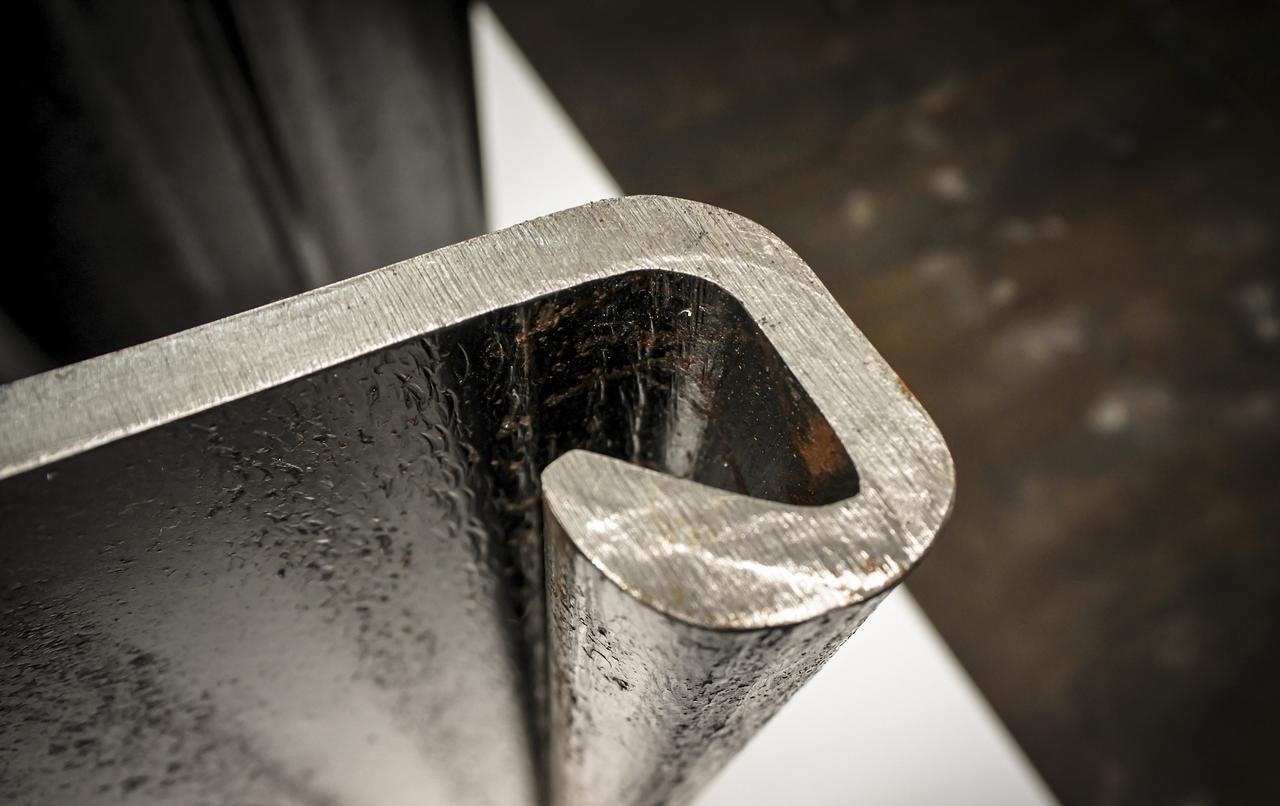
How to Prevent “Narrowing” at the Bend
This is the part where most sheet metal bending jobs go wrong. You make the bend, pull the part, and the tube looks flattened. The round section is now an oval. The profile is ruined. That’s section distortion. It happens when the compressive forces on the inside of the bend collapse the wall, and the tensile forces on the outside stretch it thin. The material gives up and deforms.
Here is how you stop it.
Solution 1: Internal Support (The Most Effective Method)
Using a Mandrel
A mandrel is the professional answer. It’s a steel rod with flexible balls that sits inside the tube exactly where the bend happens. The mandrel supports the wall from collapsing inward. Data shows it can reduce ovalization from 20 percent down to three or five percent. That’s the difference between scrap and a usable part.
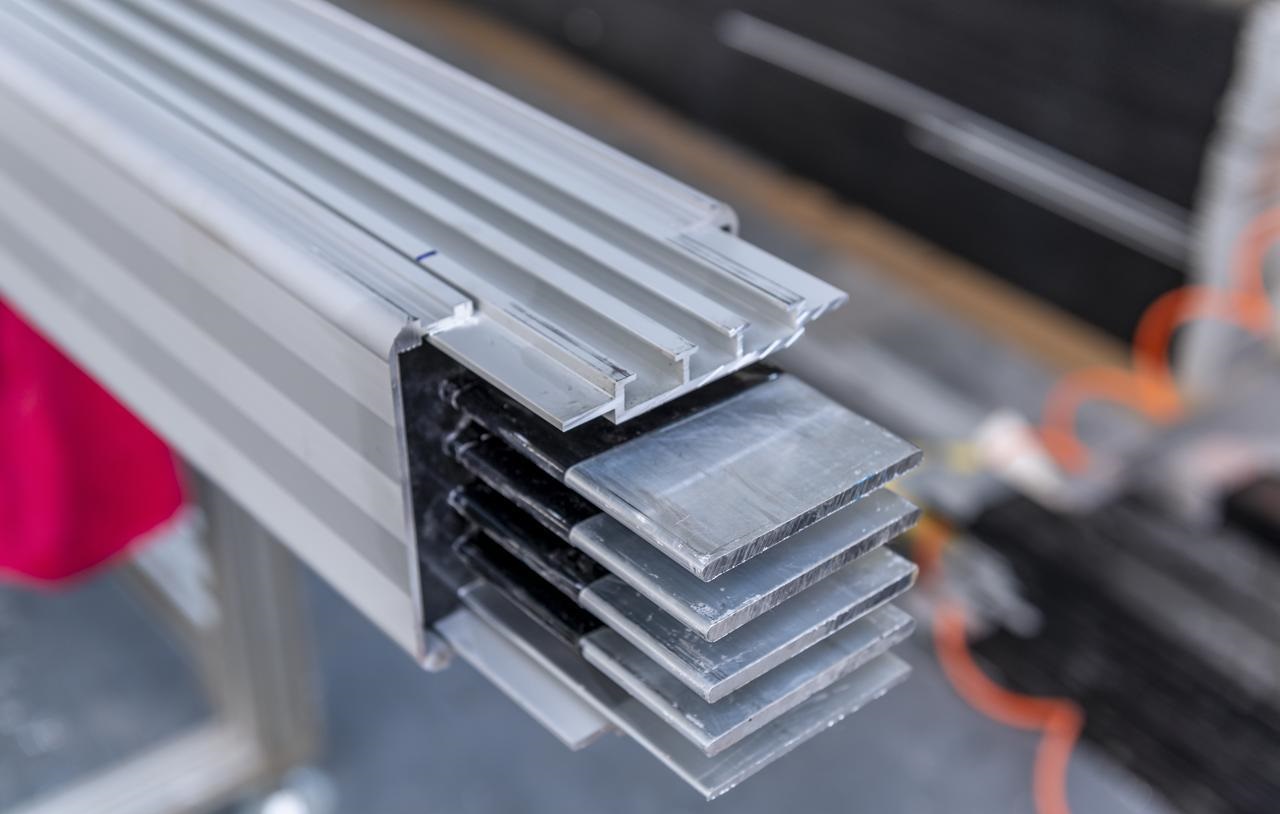
Filling Methods
No mandrel? You still have options. Fill the tube with something solid. Dry sand works. Pack it tight, cap the ends, bend it. The sand compresses but resists total collapse. Rosin works with small copper tubes. For critical bends, low-melt alloys are the secret. Fill the tube with a metal that melts at a low temperature, bend it, then melt it out with hot water. The part comes out perfect.

Solution 2: Optimizing Process & Tooling
Increase your bend radius if you can. A tighter radius creates more stress. Loosen it up, and the material has an easier time.
Look at your dies. A standard die might not be enough. A wiper die sits behind the bend and prevents wrinkling on the inside radius. Fully contoured tooling wraps around the entire tube, supporting it from all sides. This is critical for thin walls.
Check your clearance. Too much space between the tube and the die, and it has room to distort. Tighten it up. For extreme cases, add a bottoming step at the end. A final squeeze can push an oval section back toward a round.
Solution 3: Design Phase Prevention
Sometimes the problem is on the drawing board.
Thicker walls resist distortion. If you keep scrapping thin-wall tubes, specify a heavier gauge.
Watch where you put the bend. Avoid bending right at a weld seam or where the cross-section changes suddenly. Those are weak points. The bend needs consistent material all the way through. Give it that, and you eliminate half the problems before you start.
Stop section distortion before it happens. Support the inside, dial in your tooling, and design smarter. Your scrap bin will thank you.
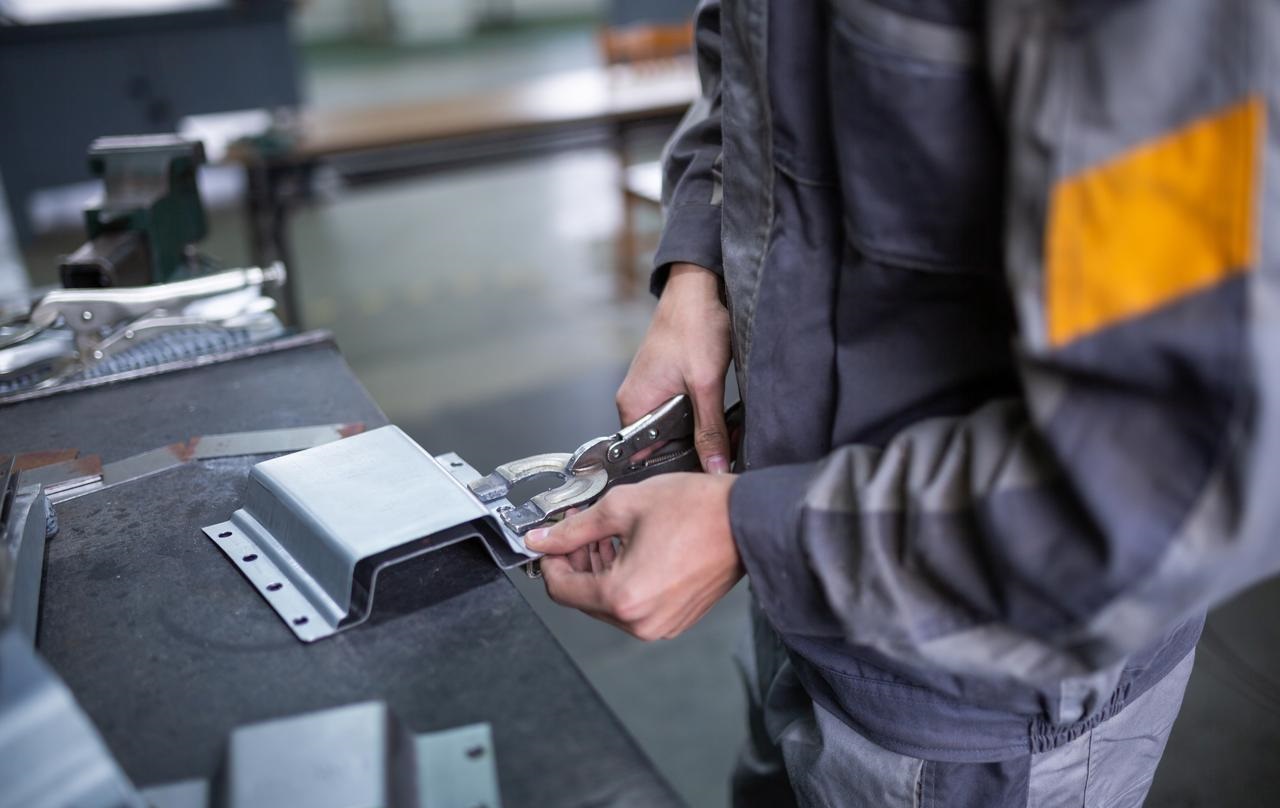
Designer’s Cheat Sheet: Best Practices for Bendable Parts
Here is the practical stuff. The rules you hand to the design team before they model a single part. Follow these, and you save yourself from endless shop floor headaches.
Safe Distances for Holes and Slots
Put a hole too close to the bend, and it stretches into an oval. The metal deforms, and your tolerance is gone.
The rule is simple. Keep holes at least one and a half times the material thickness plus the bend radius away from the bend line. For slots, be even more conservative. Two times the thickness plus the radius is a safe bet.
If a hole absolutely must be closed, punch it after bending. That adds an operation, but it beats scrapping parts.
Designing Relief Notches
Ever seen a tear start at the edge of a bend and run right through the part? That’s what happens when you bend tight to an inside corner.
The fix is a relief notch. A small cut at the intersection where the bend meets the flange. It releases the stress and stops the tear before it starts.
Make the notch at least as wide as the material thickness and deeper than the bend radius. A simple rectangle or a radius works. Just give the stress somewhere to go.
Avoiding Bend Interference
You design a nice part with three bends. Then the press brake operator tells you the punch hits the first bend when trying to make the second.
This is bend interference. The tool collides with the part.
Check this in your model. Simulate the bend sequence. Look at the distance between bends. If the flange is too short, the part won’t fit over the die. If the bend is too close to an existing flange, the punch smashes into it.
The fix is planned. Know your tooling. Know the minimum flange length your brake needs. Leave room for the part to clear the tool through the whole sequence. If you can’t, you have to change the design or accept that you’ll need special tooling.
Design smart now. Bend easily later.

Achieving Flawless Aesthetics: The “Bottom Bending” / “Coining” Technique
Sometimes you need more than a bend. You need a corner so sharp it looks machined. For decorative stainless trim or architectural features visible to every client, standard air bending won’t cut it. That’s when you move to bottom bending or coining.
What is it?
Here is the difference. In air bending, the punch stops short. The metal springs back. You get a radius.
In bottom bending, you drive the punch all the way down until the metal contacts the bottom of the die. You are literally stamping the material into shape. With coining, you apply even more force—enough that the metal actually flows into the die cavity. The punch penetrates the material slightly.
The result is a bend radius that matches the punch tip exactly. No springback guessing. No open angles. Just sharp, crisp corners that look like they came off a mill.
Application Scenarios
This is for jobs where appearance matters more than everything else.
Think stainless steel trim on high-end elevator doors. Or architectural panels in a hotel lobby. Maybe visible brackets on custom furniture. Places where the bend line has to be perfect, and the inside corner has to look sharp.
It also works for parts that need absolute angular consistency. Because you are bottoming out, every part comes off the press with the same angle. No variation.
The Trade-Offs
Nothing is free. Bottom bending needs serious tonnage. You might need a bigger press brake than you think. The forces are higher, and the tooling takes more abuse.
There is also the marking issue. Because you are stamping the metal, the surface can pick up marks from the die. On polished stainless, that’s a problem. You need clean tooling and sometimes protective film.
But for that crisp, machined look? Nothing else gets you there.
Conclusion & Expert Recommendations
Here is the bottom line. There is no single best way to bend metal. The right method depends on three things: what you are bending, what shape it starts as, and how perfect it needs to be at the end.
A thick bar needs different handling than a thin sheet. A hollow tube needs internal support that a solid bar ignores. A visible architectural piece demands coining, where a hidden bracket gets air bends. Match the technique to the job, and you win. Guess, and you scrap parts.
If you have a complex project coming up, do this. Talk to an experienced fabricator before you finalize the design. Not after. They will tell you if your bend radius is too tight, if your hole is too close to the edge, or if your tube needs a mandrel. That conversation costs nothing and saves everything.
Why Choose NOBLE for Sheet Metal Bending
Who We Are
NOBLE is a precision metal fabrication shop. We take raw stock—sheet, tube, bar, profile—and turn it into finished components that actually fit. No excuses. No guessing.
What We Know
We have been CNC machining for over twenty years. That means we have seen every problem. Thin-wall tubes that want to collapse. Springback that refuses to cooperate. Complex multi-bend parts that need five setups. We have figured out the fixes. Hundreds of clients have brought us their toughest designs. We made them real.
What We Offer
Custom fabrication is our core. But we specialize in the tricky stuff. Mandrel bending for clean, round tubes. Precision CNC machining for tight-tolerance sheet metal. Engineering consultation before you ever cut material. If you need a bend that holds a critical radius without distortion, we are the shop.
Ask Us
Struggling with a bending project that keeps failing? Not sure if your design is even possible to make? Contact our engineering team. We offer free consultations for a reason. We would rather fix your design on paper than scrap your parts in the shop. Send us your prints. Let us help.
FAQ
What is the minimum bend radius for sheet metal?
Here is a solid rule of thumb. Keep the inside bend radius at least equal to the material thickness. If you are bending a quarter-inch plate, use at least a quarter-inch radius. Go tighter, and you risk cracking. For harder stuff like high-carbon or spring steel, you need to open that radius up even more. The material will tell you what it can handle.
Why does my metal pipe keep flattening when I bend it?
That flattening has a name. Ovalization. It happens because the tube is hollow. The outside wall stretches. The inside wall collapses. No support inside means the tube gives up. The fix is internal support. Use a mandrel with flexible balls that sits right in the bend zone. Or pack the tube tight with sand. Both methods stop the collapse.
Can you bend stainless steel without it cracking?
Yes, but you have to respect the material. Stainless steel work-hardens fast. The more you work it, the harder and more brittle it gets. It needs more tonnage than mild steel, and it springs back more aggressively. If you are bending something tricky, anneal it first. Heat treatment softens the metal and reduces cracking risk.
What is the difference between air bending and bottoming?
Air bending leaves a gap. The punch pushes the metal into the V-die but stops before the metal hits the bottom. You get flexibility. One tool can make many angles. But you deal with springback.
How do you calculate the flat length for a bent part?
You need the bend allowance. That is the amount of material that actually stretches through the bend. The formula changes with material thickness, bend angle, and radius. For ninety-degree bends in steel, a common estimate is to add half the material thickness per bend. But for precision work, use a bend allowance chart or software. Guessing here leads to parts that don’t fit.