A medical device recall. This is every engineer’s nightmare. A failed optical part caused it. The material could not handle repeated sterilization cycles. Patients had complications. The company faced lawsuits and fines from regulators.
This situation happens too often in the industry. Engineers must balance many different needs. Optical clarity must work well with biocompatibility. Sterilization resistance is very important. Regulatory hurdles are big at every step. Every material choice is very important.
This guide gives a clear plan for success. Engineers get practical steps to pick materials. The structure leads to a method you can use right away. Each section covers key needs for medical optical parts. Comparing materials needs careful data analysis. Manufacturing processes need close attention. Making medical devices needs precise engineering. Different uses need custom solutions. This plan lowers project risk. It speeds up development time.
Core Requirements for Medical Optical Parts
Every medical optical part must meet three key needs: optical clarity, mechanical durability, and biocompatibility. These needs often work against each other. A material that lets light through very well might become brittle under stress. Another material that is tough might turn yellow after many cleaning cycles. Engineers must think about these trade-offs from the start.
Optical Performance Criteria
Transmission, Refractive Index, and Dispersion
Light transmission decides how much light reaches the target tissue. High transmission is important for endoscopes and surgical lasers where every photon matters. Refractive index controls how light bends when it enters the lens. Dispersion affects how accurate colors look across the visible spectrum. For diagnostic imaging, even small dispersion errors can blur the difference between healthy and sick tissue.
The application sets the requirements. A laser delivery window needs exact refractive index matching to avoid beam distortion. An imaging lens for a cystoscope needs great transmission across the whole visible range. Engineers should write down these optical needs early, because they directly limit which materials can work.
Surface Quality and Scratch-Dig Standards
Surface quality means tiny flaws on an optical part. Scratches are long defects; digs are small pits or holes. The scratch-dig spec, written as two numbers like 60-40, sets the allowed limits for both. Tighter standards mean smoother surfaces but higher costs to make.
For medical optical parts, surface quality directly affects patient safety. A scratch on an arthroscope lens scatters light and makes the image worse. A dig on a surgical laser window can create hot spots that harm tissue. These defects also become places where bacteria gather, making cleaning harder. Picking realistic scratch-dig values prevents over-engineering while keeping clinical performance safe.
Mechanical and Environmental Durability
Hardness, Toughness, and Dimensional Stability
Hardness resists scratches and wear. Toughness absorbs impact without cracking. Dimensional stability keeps the part’s shape constant when temperature changes. These three properties rarely line up perfectly. Glass offers great hardness but poor toughness. Polymers bend without breaking but scratch easily.
Think about a dental curing light guide. It faces lots of handling, some drops, and heat from the LED source. The material must hold its optical axis exactly while surviving daily wear. Engineers must match mechanical performance to real-world conditions, not just ideal lab settings.
Chemical and Moisture Resistance
Medical environments expose optical parts to strong chemicals. Cleaning agents, disinfectants, and body fluids all attack material surfaces. Moisture absorption can swell a polymer lens and change its focal length. Chemical attack can cloud a glass window and lower transmission.
Testing should copy the full chemical exposure a device will face. Autoclave cycles mix heat, pressure, and steam. Chemical wipes bring solvents that might soften a polymer surface. Each exposure shows different ways parts can fail, so the testing plan must match actual clinical use.
Biocompatibility and Sterilization Compatibility
ISO 10993 and Cytotoxicity Testing
Biocompatibility confirms that a material won’t harm living tissue. The ISO 10993 series of standards gives the testing framework. Cytotoxicity testing checks whether chemicals leak from the material and kill cells. Other tests check for irritation, sensitization, and systemic toxicity.
These standards are the starting point for regulatory approval. Passing ISO 10993 doesn’t guarantee approval, but failing it guarantees rejection. Engineers should ask for biocompatibility data from material suppliers early in the selection process. Waiting until the prototype stage causes costly delays.
Material Response to Sterilization Methods
Sterilization compatibility decides how a material survives repeated cleaning cycles. Autoclaving uses high-temperature steam. Ethylene oxide (EtO) gas gets through packaging but leaves toxic residues. Gamma radiation can make some polymers brittle over time. Each method stresses materials in different ways.
A material might pass first biocompatibility tests but degrade after repeated sterilization cycles. The choice of medical-grade materials must consider the whole device lifetime. Testing should copy the full number of sterilization cycles the product will face. This validation step protects patient safety and stops expensive recalls.
The choice between optical performance, mechanical durability, and sterilization compatibility defines the selection challenge. Each requirement narrows the list of possible materials. The next section compares the main material categories against these needs.
Material Selection for Medical Optical Parts
Choosing the right material for medical optical parts feels like solving a puzzle with three moving pieces. You need optical clarity, mechanical strength, and biocompatibility all at once. No single material wins every category. Glass gives you superb optics but adds weight. Polymers offer design freedom but scratch easily. Sapphire resists almost everything but costs more. The trick is matching material properties to your specific application without overpaying for performance you don’t need.
Glass: The Benchmark for Precision Optics
Glass remains the gold standard when optical performance matters most. Its dimensional stability under temperature changes makes it ideal for precision aspheres used in surgical microscopes and diagnostic imaging systems. Fused silica stands out for its exceptional thermal stability and machinability. It holds tight tolerances through grinding and polishing processes, which means your lens geometry stays accurate even after extensive manufacturing steps. Borosilicate glass offers similar benefits with better resistance to chemical attack from cleaning agents.
Fused Silica and Borosilicate Glass Advantages
Fused silica transmits light across a broad spectrum, from ultraviolet through infrared. This wide range makes it valuable for laser delivery systems and fluorescence imaging tools. Borosilicate glass costs less than fused silica while still providing excellent optical clarity. Both materials resist moisture absorption, so their refractive index stays stable in humid clinical environments. For applications where image quality cannot be compromised, glass delivers predictable, repeatable performance.
Weight, Fragility, and Cost Trade-offs
Glass has real downsides, though. It weighs more than polymers, which matters for handheld devices like otoscopes or portable diagnostic tools. Glass also fractures under impact. A dropped endoscope lens shatters, and that means device failure in the middle of a procedure. Manufacturing glass optics requires grinding, polishing, and coating steps that drive up cost per part. For low-volume, high-precision applications, glass makes sense. For disposable or high-volume devices, the cost becomes hard to justify.
Polymers: Balancing Cost and Design Flexibility
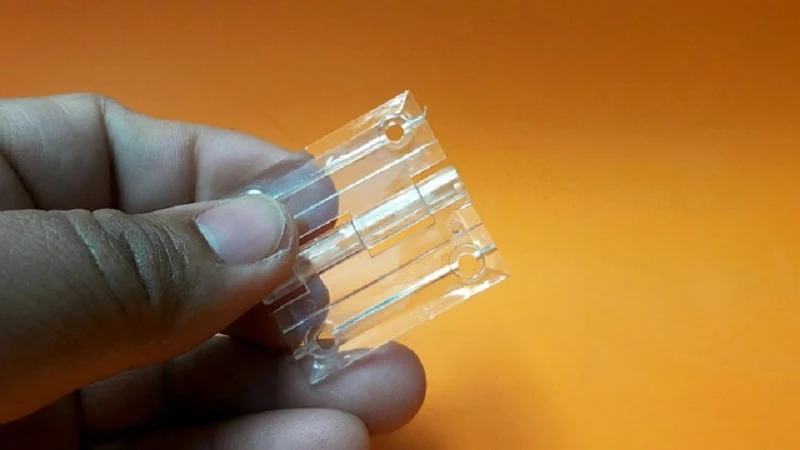
Polymers open up design possibilities that glass cannot match. Injection molding lets you create complex geometries with integrated mounting features, reducing assembly steps. This material selection path works well for devices that need lightweight construction and moderate optical performance. The trade-off comes in surface hardness and thermal limits.
PMMA, Polycarbonate, and Cyclo-Olefin Polymers
PMMA, also known as acrylic, delivers impressive clarity for a polymer. For uncoated PMMA at a standard thickness of 3 mm, the visible light transmittance is measured at 92%. That number approaches glass performance at a fraction of the weight. Polycarbonate offers higher impact resistance but lower light transmission and more color dispersion. Cyclo-olefin polymers strike a balance between clarity and moisture resistance, making them popular for microfluidic optical sensors.
Trade-offs in Scratch Resistance and Thermal Limits
Polymers scratch more easily than glass. A PMMA lens surface can show wear after repeated cleaning with abrasive wipes. Thermal limits also constrain polymer use. Most polymers soften well below the temperatures used in autoclave sterilization. This creates a direct conflict with sterilization compatibility. If your device needs repeated autoclave cycles, you might need to switch to glass or accept shorter product life. For single-use devices sterilized with ethylene oxide, polymers work fine.
Advanced Materials: Sapphire and Ceramics
When standard materials cannot handle the job, advanced materials step in. Sapphire offers extreme hardness that protects surface integrity in demanding environments. Ceramics provide similar benefits for specific applications like surgical cutting windows or implantable sensors.
Exceptional Hardness for High-Wear Applications
Sapphire is second only to diamond in hardness (Mohs 9), making it extremely resistant to scratching and abrasion. This durability advantage over glass is critical for medical optical applications where surface integrity must be maintained.
| Material | Mohs Hardness | Implication for Medical Optics |
| Sapphire | 9 | Virtually unscratchable by sand, debris, or mishandling |
| Glass | ≤ 7 | More susceptible to scratching and surface damage |
This hardness translates directly into longer device life. A sapphire window in a dental curing light survives years of contact with tools and teeth. The same window in glass would show visible scratches within months.
When to Specify Sapphire Over Glass or Polymer
Sapphire makes sense when surface damage causes functional failure. Think about an arthroscope lens that scrapes against bone during surgery. A scratch on that lens scatters light and degrades the image. Sapphire prevents that failure mode entirely. The cost premium is substantial. But for high-value surgical instruments that must last through hundreds of procedures, sapphire pays for itself. For disposable devices or applications with minimal wear risk, glass or polymer remains the smarter choice.
The material selection process ultimately comes down to understanding your device’s real-world conditions. A manufacturer like NOBLE, with experience across glass, polymers, and advanced materials, can help you evaluate these trade-offs early. Their engineering team works with medical-grade materials daily and understands how sterilization methods affect long-term functionality. Partnering with experts who know both material properties and manufacturing processes reduces the risk of costly redesigns later.
Manufacturing Processes for Medical Optical Parts

If you can’t make the part right, the best material choice does not matter. Manufacturing processes turn your design into a real product. Each process has strengths and limits for different materials. The process you pick affects cost, quality, and speed to market.
Precision CNC Grinding, Polishing, and Diamond Turning
Glass and ceramics need special processing to reach optical quality. You can’t cut them like metal. The process starts with grinding to shape the part. Then polishing smooths the surface to optical standards. Diamond turning offers a different path for some materials.
Achieving Tight Tolerances and Surface Finishes
Precision grinding gives you tight control over part dimensions. The table below shows what you can expect.
| Tolerance Parameter | Typical Precision Range | Ultra-Precision Range |
| Diameter | ±2–5 microns | ±0.5 microns |
| Thickness | ±5–10 microns | ±1–2 microns |
| Radius of Curvature | 0.1–0.5% of nominal | Tighter for interferometric use |
| Aspheric Form (PV) | 0.5–2 microns (molded) | 0.1–0.5 microns (ground) |
| Centering/Alignment | 1–5 arc minutes | <30 arc seconds |
These numbers matter for medical device manufacturing. A lens that is out of spec by a few microns can blur an image or misdirect a laser beam. With Strasbaugh grinding and polishing machines, tolerances can be held to ±0.002 inches for parts up to 36 inches wide.
Diamond turning takes surface quality even higher.
The achievable surface roughness is usually in the range of Ra < 5–10 nm. This depends on several factors: how well the material can be machined, tool radius and wear, feed rate and cut depth, and machine dynamics and environmental control.
That is smooth enough for most medical optical uses.
The Role of Metrology in Quality Assurance
You can’t trust what you can’t measure. Metrology tools check that your part meets specs. Interferometers check surface form. Profilometers measure roughness. CMMs confirm dimensions. This check is a must for medical parts. Regulators want proof that your process and material choices give consistent results.
Injection Molding for Polymer Optics
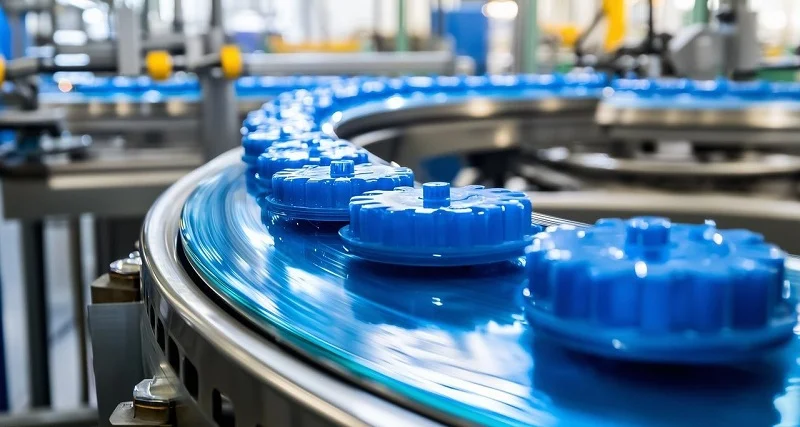
Polymers allow high-volume production at lower cost per part. Injection molding is the main process for plastic optical parts. But you need to design the part with molding in mind.
Design for Moldability: Gates, Walls, and Draft Angles
The mold design and material choice decide if your part comes out right. Gate placement controls how plastic flows into the cavity. Put the gate in the wrong spot, and you get weld lines that scatter light. Wall thickness must stay even. Thick sections cool slower and cause sink marks. Draft angles let the part leave the mold without sticking.
For optical parts, these details matter even more. A tiny flow line becomes a visible defect on a lens surface. Engineers who know both materials and manufacturing processes can design parts that mold well the first time.
Balancing Tooling Costs with Production Volume
Tooling cost is a big decision point. The table below compares aluminum and steel options.
| Cost Metric | Aluminum Tooling | Steel Tooling |
| Upfront tooling cost range | $2,000 – $100,000 | $10,000 – $100,000+ |
| Typical cost for low-to-medium volume molds | $2,000 – $10,000 | Not specified (higher than aluminum) |
| Per-part cost at low volume | Lower, as tooling costs are spread over fewer parts | Higher, tooling costs dominate |
| Per-part cost at high volume | Increases due to tool wear | Very low, amortized over large quantities |
| Mold lifespan (shot count) | 10,000 – 100,000 (alloy dependent) | 200,000 – 1,000,000+ (grade dependent) |
Aluminum tooling works well for low-volume runs and prototyping. Steel tooling costs more upfront but lasts much longer. For high-volume production, steel usually pays off. The choice depends on your expected volume and product lifespan.
CNC Machining and 3D Printing for Prototyping
Before you buy expensive tooling, you need to test your design. CNC machining and 3D printing let you make changes fast.
Rapid Iteration for Design Validation
CNC machining cuts parts from solid material. It works for both metals and plastics. You get prototypes that match the final material properties. 3D printing builds parts layer by layer. It handles complex shapes that machining cannot reach. Both methods let you test form, fit, and function before production.
For medical device manufacturing, quick changes are critical. You might find an optical problem during testing. With CNC or 3D printing, you can change the design and have a new part in days. That speed saves months of development time.
Transitioning from Prototype to Production
The jump from prototype to production is where many projects fail. A part that works fine as a 3D print might not mold well with the same material. A CNC prototype might need a different surface finish than a molded part. Engineers need to plan for production from the start.
NOBLE offers full manufacturing capabilities across all these processes. Their team handles precision grinding and polishing for glass optics. They run injection molding for polymer parts. They do CNC machining for prototypes and low-volume runs. Working with a partner who knows both materials and process options makes the switch smoother. They can spot possible issues before you buy tooling.
The right process depends on your material, volume, and quality needs. Matching the process to the product is the final step in bringing your optical part to life.
A Selection Methodology for Medical Device Development
A clear plan turns hard choices into simple steps. This method uses three easy stages. Each stage builds on the last one. Following this path lowers risk and saves time.
Step 1: Define Application and Prioritize Needs
Creating a Requirements Checklist
Start by listing everything your device must do. This list becomes your guide. The process follows five stages that move from big ideas to exact specs.
Stage 1: User Needs — Ask the people who will use your device. Surgeons, nurses, and patients all share useful feedback. Write their words in plain, clear sentences. Each sentence captures one specific need.
Stage 2: Design Input — Change those user needs into measurable goals. Cover functional needs like setups and compatibility. Add performance targets and safety limits. Do a first risk check using ISO 14971. Find out which rules apply to your device.
Stage 3: Design Process — Use those goals to guide your work. This base stops rework later. It keeps your whole team focused on what counts.
Stage 4: Design Output — Make production specs and pass/fail checks. Put risk controls in place for making the product. Write down everything fully.
Stage 5: Medical Device — Build and test your product. Check it against the user needs from Stage 1.
This list method works because it forces clear thinking early. You cannot skip steps without paying for it later.
Identifying Critical-to-Quality (CTQ) Parameters
Not all needs carry the same weight. Some directly affect patient safety. Others are just nice to have. CTQ parameters are the ones that make or break your device.
For medical optical parts, CTQs often include transmission percentage, surface quality, and sterilization compatibility. A lens that meets transmission requirements might fail after repeated sterilization cycles, which would be a CTQ failure. Write down which parameters are truly critical. This choice guides your material selection later.
Step 2: Shortlist Materials and Processes
Building a Decision Matrix with Weighted Criteria
A decision matrix turns personal judgment into clear scores. List your candidate materials across the top. List your criteria down the side. Give each criterion a weight based on importance.
For example, biocompatibility and optical clarity might be weighted more heavily than cost and manufacturing ease, depending on the application. Score each material against each criterion. Multiply scores by weights. Add them up. The highest total wins.
This matrix forces you to make trade-offs clear. You cannot hide from the fact that sapphire costs more than glass. The matrix shows you whether that cost buys enough performance to matter.
Evaluating Cost, Performance, and Risk
Material selection must consider optical performance, stress sensitivity, moisture uptake, chemical resistance, and sterilization compatibility. These factors often pull in different directions. Make those trade-offs clear early, before rules and tooling choices lock in your risk.
Test your material, coating, and geometry choices in real sterilization settings. Compatibility should be built in, not tested in at the end. Also, tell apart what truly matters optically from what is only cosmetic. Teams sometimes trade real optical performance for looks without knowing it.
From a practical view, higher-quality medical optics may cost more upfront. But their long-term value often beats cheaper options. Longer life, fewer replacements, and lower upkeep add up. Places that invest in durable optical systems see fewer stops and better use of resources. Over the life of the equipment, steady performance creates real savings.
Step 3: Prototype, Test, and Iterate
Validating Against ISO and FDA Standards
Prototyping is where theory meets reality. Build your part using the chosen material and manufacturing process. Then test it against the standards you found in Step 1.
For regulated uses, redesigning optics means meeting strict rules. Key parts include risk checks for material changes and coating updates. You need full records and tracking from raw material to finished part. Validation testing covers optical performance, environmental stress, and biocompatibility checks aligned with ISO standards. Meeting these needs early avoids costly delays.
Your technical records should include system drawings, schematics, and bills of materials. Test reports prove safety and performance. Your risk management file follows ISO 14971. Software records follow ISO 62304 if your device includes software. Usability records follow IEC 60601-1-6. Marking labels and user guides complete the package.
Refining Design Based on Test Results
Test results rarely come back perfect on the first try. That is normal. The key is to adjust quickly. Change one variable at a time. Retest. Compare results. Repeat until your part meets every CTQ.
This adjustment loop is where skilled manufacturing partners earn their keep. A partner who knows both materials and making processes can spot problems before you waste time and money. They know how a material acts under different process conditions. They can suggest changes that keep you on track.
This method works best when you partner with a manufacturer who knows the full picture. NOBLE brings wide skills in metal and plastic processing. Their team knows medical-grade materials and the making processes that shape them. From design for manufacturability to final assembly, they support your medical device development from concept to launch. Their skill in material properties and process selection smooths the whole journey for medical optical parts.
Partnering with NOBLE for Medical Optical Parts Manufacturing
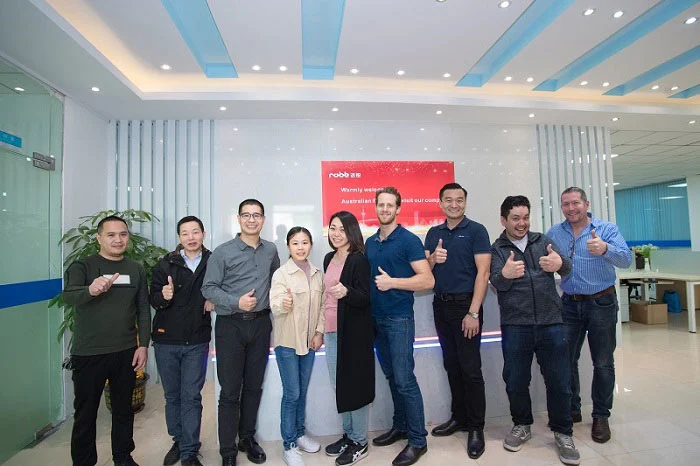
NOBLE is ready to be your full-service manufacturing partner. The company works with both metal and plastic. Their team handles every step from first design to final assembly. This means you do not have to manage many different suppliers. One partner takes care of your whole project.
Comprehensive Capabilities in Metal and Plastic Machining
From Design for Manufacturability (DFM) to Final Assembly
Design for manufacturability saves real money. One medical device startup significantly reduced costs using DFM ideas. NOBLE uses this thinking from the start. Their engineers make designs simpler, use fewer parts, and combine components. Fewer parts mean fewer steps to put things together. Less complexity means less waste. Picking the right material also cuts waste during production.
DFM also finds risky assembly steps early. Multi-step mechanical alignments and manual rework loops are removed from your process. The team checks fixtures and repeatable operations before you buy tooling. This early work reduces defects and shortens cycle times. Your production line runs smoother from the beginning.
Expertise Across Multiple Material Categories
NOBLE works with glass, polymers, and advanced materials. Their team knows how each material acts under different process conditions. They understand that medical-grade materials need special care. This knowledge helps you avoid expensive mistakes when picking materials. Their understanding of material properties guides every suggestion.
The company combines engineering, automation, and post-molding skills. They make high-quality, cost-effective parts for many uses. Whether you need precision-ground glass optics or injection-molded polymer lenses for medical optical parts, NOBLE has the experience.
Certifications and Quality Assurance
Commitment to Quality Management Standards
Certifications show a manufacturer’s promise to quality. NOBLE holds relevant quality management certifications for medical device manufacturing. These certifications demand written procedures, design controls, and risk management throughout production. They require tracking at every step, with Device Master Records, Device History Records, and Design History Files kept current. Complaint handling follows strict rules, and CAPA standards meet regulatory requirements. These systems protect your project.
Ensuring Regulatory Readiness for Your Device
Regulatory readiness means your device passes audits without surprises. NOBLE’s quality systems match FDA expectations. Their purchasing controls include written procedures for supply chain management. Supplier checks and audits keep incoming materials consistent.
The team focuses on upstream quality to reduce issues later. They review designs, training, and quality assurance regularly. This active approach means fewer surprises during FDA inspections. Your path to market stays clear.
A Single Source for Your Project’s Success
Streamlining Supply Chain and Reducing Risk
A single-source partner gets rid of coordination headaches. You avoid switching to a new supplier when you scale up. NOBLE handles manual assembly for low-volume needs and fully automated assembly for high-volume output. Their robotic integration cuts labor costs and removes human handling errors.
In-line vision inspection and functional testing come standard. High-speed leak detection finds defects early. Supply chain expertise gets applied during design, avoiding high-risk components and securing stable sourcing. This approach speeds up product development from concept to reality.
Collaborative Partnership from Concept to Commercialization
Partnership drives new ideas. NOBLE shares new technologies and proprietary research with your team. Faster iterations create cutting-edge devices that meet market needs well. Their regulatory knowledge in FDA and CE marking makes approvals smoother.
Local insights help you handle complex rules and cultural differences. Joint expertise lowers risks and speeds time-to-market. From concept to commercialization, NOBLE walks beside you. Their deep understanding of optics and manufacturing ensures consistent output and high yield in mass production. They think about sterilization compatibility and biocompatibility for every material they suggest.
The selection method described earlier works best with a partner who knows both materials and processes. NOBLE brings that knowledge to every project. Their team helps you judge trade-offs early, lowering the risk of costly redesigns. Contact NOBLE’s engineering team to talk about your specific medical optical parts needs.
Material selection for medical optical parts is a big decision. It touches many areas. You need to balance optical performance, biocompatibility, manufacturability, and regulatory requirements.
The structured method we outlined helps you do this. It lowers risk and speeds up development.
NOBLE is the perfect partner to execute this method. We offer a seamless transition from design to production. Our team knows materials and processes inside out. We handle medical device manufacturing with care. We work with various materials for different applications. We focus on patient safety and sterilization compatibility.
Let’s talk about your project. Contact NOBLE’s engineering team today. We’ll help you choose the right material for your specific needs.
FAQs of Medical Optical Parts
What matters most when choosing a material for medical optical parts?
There is no single winner. You need to balance optical clarity, mechanical strength, and biocompatibility. The right trade-off depends on your sterilization method and device lifetime. Let your application guide the choice.
How do I know if a material passes biocompatibility tests?
Ask your supplier for ISO 10993 data. This standard covers cytotoxicity and other safety checks. Get that information early in your selection process. Waiting until the prototype stage leads to costly delays.
What do scratch-dig numbers like 60-40 mean?
The first number limits scratch width. The second number limits dig diameter. Tighter numbers like 40-20 mean smoother surfaces. They also mean higher manufacturing costs. Pick a realistic spec that matches your clinical needs.
Can I use polymer instead of glass for medical optical parts?
Yes, polymers like PMMA offer good clarity at lower weight and cost. But they scratch more easily and may not survive autoclave temperatures. For single-use devices sterilized with ethylene oxide, polymers work well. For reusable tools, glass often lasts longer.
When should I choose sapphire over glass?
Sapphire (Mohs 9) resists scratches far better than glass (Mohs ≤7). It makes sense for high-wear parts like arthroscope lenses. The cost is higher. For disposable devices, glass or polymer usually works fine.
Which manufacturing process works best for my part?
It depends on your material and volume. Precision grinding suits glass prototypes. Injection molding handles high-volume polymer parts. Many projects combine processes. A partner who knows both can help you decide early.
What certifications should my medical optical parts supplier have?
Look for relevant quality management certifications for medical devices. These certifications show the supplier follows strict procedures for design, production, and risk management.