Introduction: Crafting Excellence from Concept to Completion
In CNC machining, getting it right isn’t optional—it’s everything. At NOBLE, we don’t just offer services; we team up with you to make sure your vision becomes a real, reliable product. Whether you’re sketching your first design or gearing up for mass production, we’re here to guide, support, and deliver. You’ll find careful attention to every detail, and a team that genuinely cares about doing it right. This introduction walks you through what makes NOBLE more than a vendor—we’re your reliable partner through every phase of your manufacturing journey.

Step 1: Design & CAD Modeling
Conceptualization: Visualizing the Product
Every great product starts with an idea, and this is where things get exciting. In this early phase, you’re sketching concepts, tossing around ideas, and thinking through how your product should look and work. Whether it’s scribbled on a notepad or drafted in entry-level 3D software, the goal is to shape a design that meets both user needs and production realities. It’s all about testing possibilities before moving forward.
Detailed CAD Modeling: Precision and Specification
With the core concept established, this phase brings clarity and control. Sophisticated tools like Fusion 360 and SolidWorks allow us to craft highly detailed 3D models that capture the essence of the product down to its smallest dimension. Parametric modeling ensures that every design remains flexible yet consistent, evolving without compromise. It’s a step that bridges creativity and execution, ensuring the vision holds steady as we move toward production.
Design for Manufacturability (DFM): Ensuring Feasibility
At NOBLE, we don’t just design—we design with purpose. Great designs don’t just look good—they work in the real world. During CAD modeling, we apply Design for Manufacturability (DFM) thinking to ensure your concept is as buildable as it is brilliant. This means shaping forms that machines can handle with confidence, avoiding ultra-thin walls, tight internal corners, and long, narrow pockets that strain tools and add cost. Radiused edges and simplified profiles not only boost strength but also keep your timeline on track. Planning for manufacturability early turns good ideas into efficient realities.
Estimated Timeline of Creating Prototypes: Planning for Efficiency
Knowing how long a prototype might take helps you stay on schedule. Depending on the complexity, materials, and methods—like CNC machining or 3D printing—you could have a working prototype in just a few hours or by the next day. That said, more detailed parts or secondary processes can add time. Don’t forget to factor in setup, programming, and revision cycles. A little planning up front keeps things smooth and avoids surprises down the road.
Step 2: Prototype Development
Rapid Prototyping: Accelerating Physical Validation
Rapid prototyping is where your digital designs take shape in the real world—fast. It helps engineers and designers spot issues early and test how things work. There are two main ways to do this quickly and effectively:
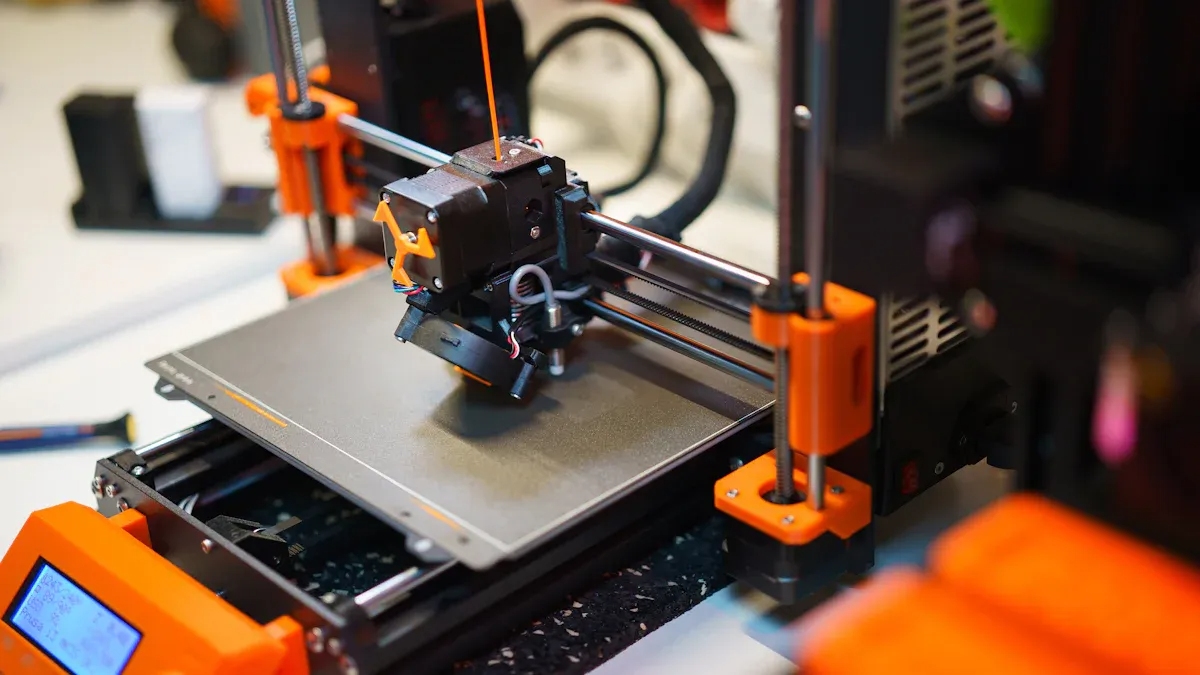
- 3D Printing (Additive Manufacturing): This method builds your part layer by layer, straight from a digital file. It’s great for creating complex shapes and small batches quickly. Common materials include plastics like PLA and ABS, plus special photopolymers. Because it’s cost-effective and fast, 3D printing is perfect for early prototypes and testing how a design feels and fits.
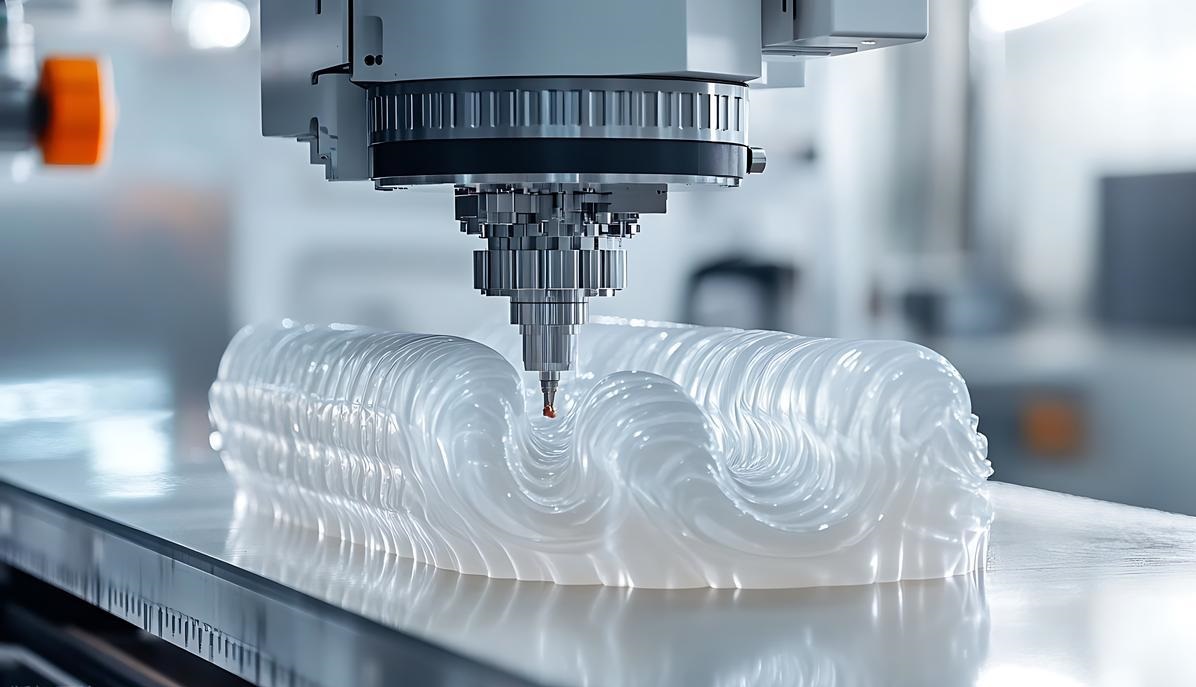
- CNC Machining (Subtractive Manufacturing): CNC machines cut away material from a solid block using computer-controlled tools. This method delivers high precision and smooth finishes, making it ideal for prototypes that need to be strong and durable, especially metal parts. Typical materials include aluminum, steel, and engineering plastics.
Choosing between the two depends on what materials you need, how complex your part is, and what stage your design is in.
Testing and Feedback: Ensuring Design Viability
After your prototype is ready, it’s time to put it through the paces. Rigorous testing is essential to evaluate their form, fit, and function. This phase involves:
- Functional Testing: We put the prototype through real-world conditions to see if it performs as expected and meets all the specs.
- Ergonomic Evaluation: We check how comfortable and user-friendly the prototype is, especially important if real people will be using it every day.
- Stress and Durability Tests: This phase pushes the prototype to its limits, revealing how it stands up under pressure and where improvements can strengthen the final product.
At NOBLE, test feedback drives smarter decisions. It uncovers key opportunities to improve and verifies when a prototype is truly production-ready. Solving issues now means you launch stronger, with no surprises down the line.
Iterative Refinement: Evolving the Design
The iterative design process is a cyclic approach where prototypes are repeatedly tested, analyzed, and refined. Each iteration aims to enhance the product’s performance, usability, and manufacturability. This methodology allows for continuous improvement and adaptation to emerging challenges or feedback. Incorporating iterative refinement ensures that the final product aligns closely with user needs and production capabilities.
Step 3: CAM Programming & CNC Setup
CAM Programming: Translating CAD Models into Machine Instructions
Once the design is done, it’s time to tell the machines what to do. CAM software converts the CAD model into G-code—basically, instructions for the CNC machine. It controls everything from how fast the tool moves to where and how deep it cuts.
Key Elements of CAM Programming:
- Toolpath Generation: Intelligent software maps out the precise movements needed to shape your design with care and accuracy.
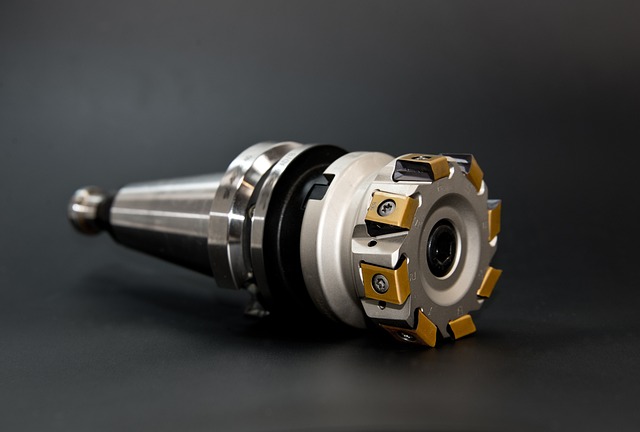
- Tool Selection: The right tool makes all the difference—chosen based on materials, geometry, and finish requirements.
- Cutting Parameters: Fine-tuned settings ensure efficiency, protect the tools, and keep quality high.
- Simulation: A digital dry run that helps us anticipate issues and refine the process before production starts.
From Fusion 360 to Mastercam and SolidCAM, modern CAM platforms offer flexible tools to bring your design to life with confidence.
Machine Setup: Preparing the CNC Machine for Operation
Setting up the machine right is key to getting accurate and smooth machining. Here’s how we do it:
- Fixture Installation: We secure the workpiece firmly with vises or clamps so it won’t move.
- Tool Loading: The right cutting tools go into the tool holder, properly tightened and calibrated.
- G-code Input: The CNC machine gets the G-code instructions, usually via USB or network.
- Coordinate Setting: We set the machine’s coordinate system (like G54) to tell it where to start cutting.
- Coolant Setup: The coolant system is checked and ready to keep things cool and lubricated.
This thorough setup helps avoid mistakes and keeps the machining process running smoothly.
Dry Run: Verifying the Program Without Material
A dry run gives the CNC program a trial run, allowing us to verify its accuracy and spot any issues before the tool ever touches the material. It’s a vital step to ensure flawless execution and protect your investment.
Benefits of Performing a Dry Run:
- Collision Detection: By carefully scanning for potential collisions, we protect both the machine and your prototype, ensuring a smooth, worry-free machining process.
- Program Verification: We carefully review the G-code execution to confirm that every tool path and operation aligns perfectly with the design intent.
- Cycle Time Estimation: Estimating the machining time helps us plan efficiently, ensuring your project stays on track and on schedule.
Dry Run Procedure:
- Load the Program: Upload the G-code into the CNC machine’s control center, preparing it to bring your design to life.
- Set Dry Run Mode: Activate dry run mode to safely simulate the machining process, making sure everything works perfectly before cutting begins.
- Monitor the Simulation: Watch the machine closely during the dry run to spot any unexpected moves or mistakes.
- Adjust as Necessary: Use what you learn from the dry run to refine the program and setup, making sure everything’s perfect for the real run.
Performing a dry run is a critical step in the CNC machining process, ensuring that the program is error-free and that the machine operates safely and efficiently.
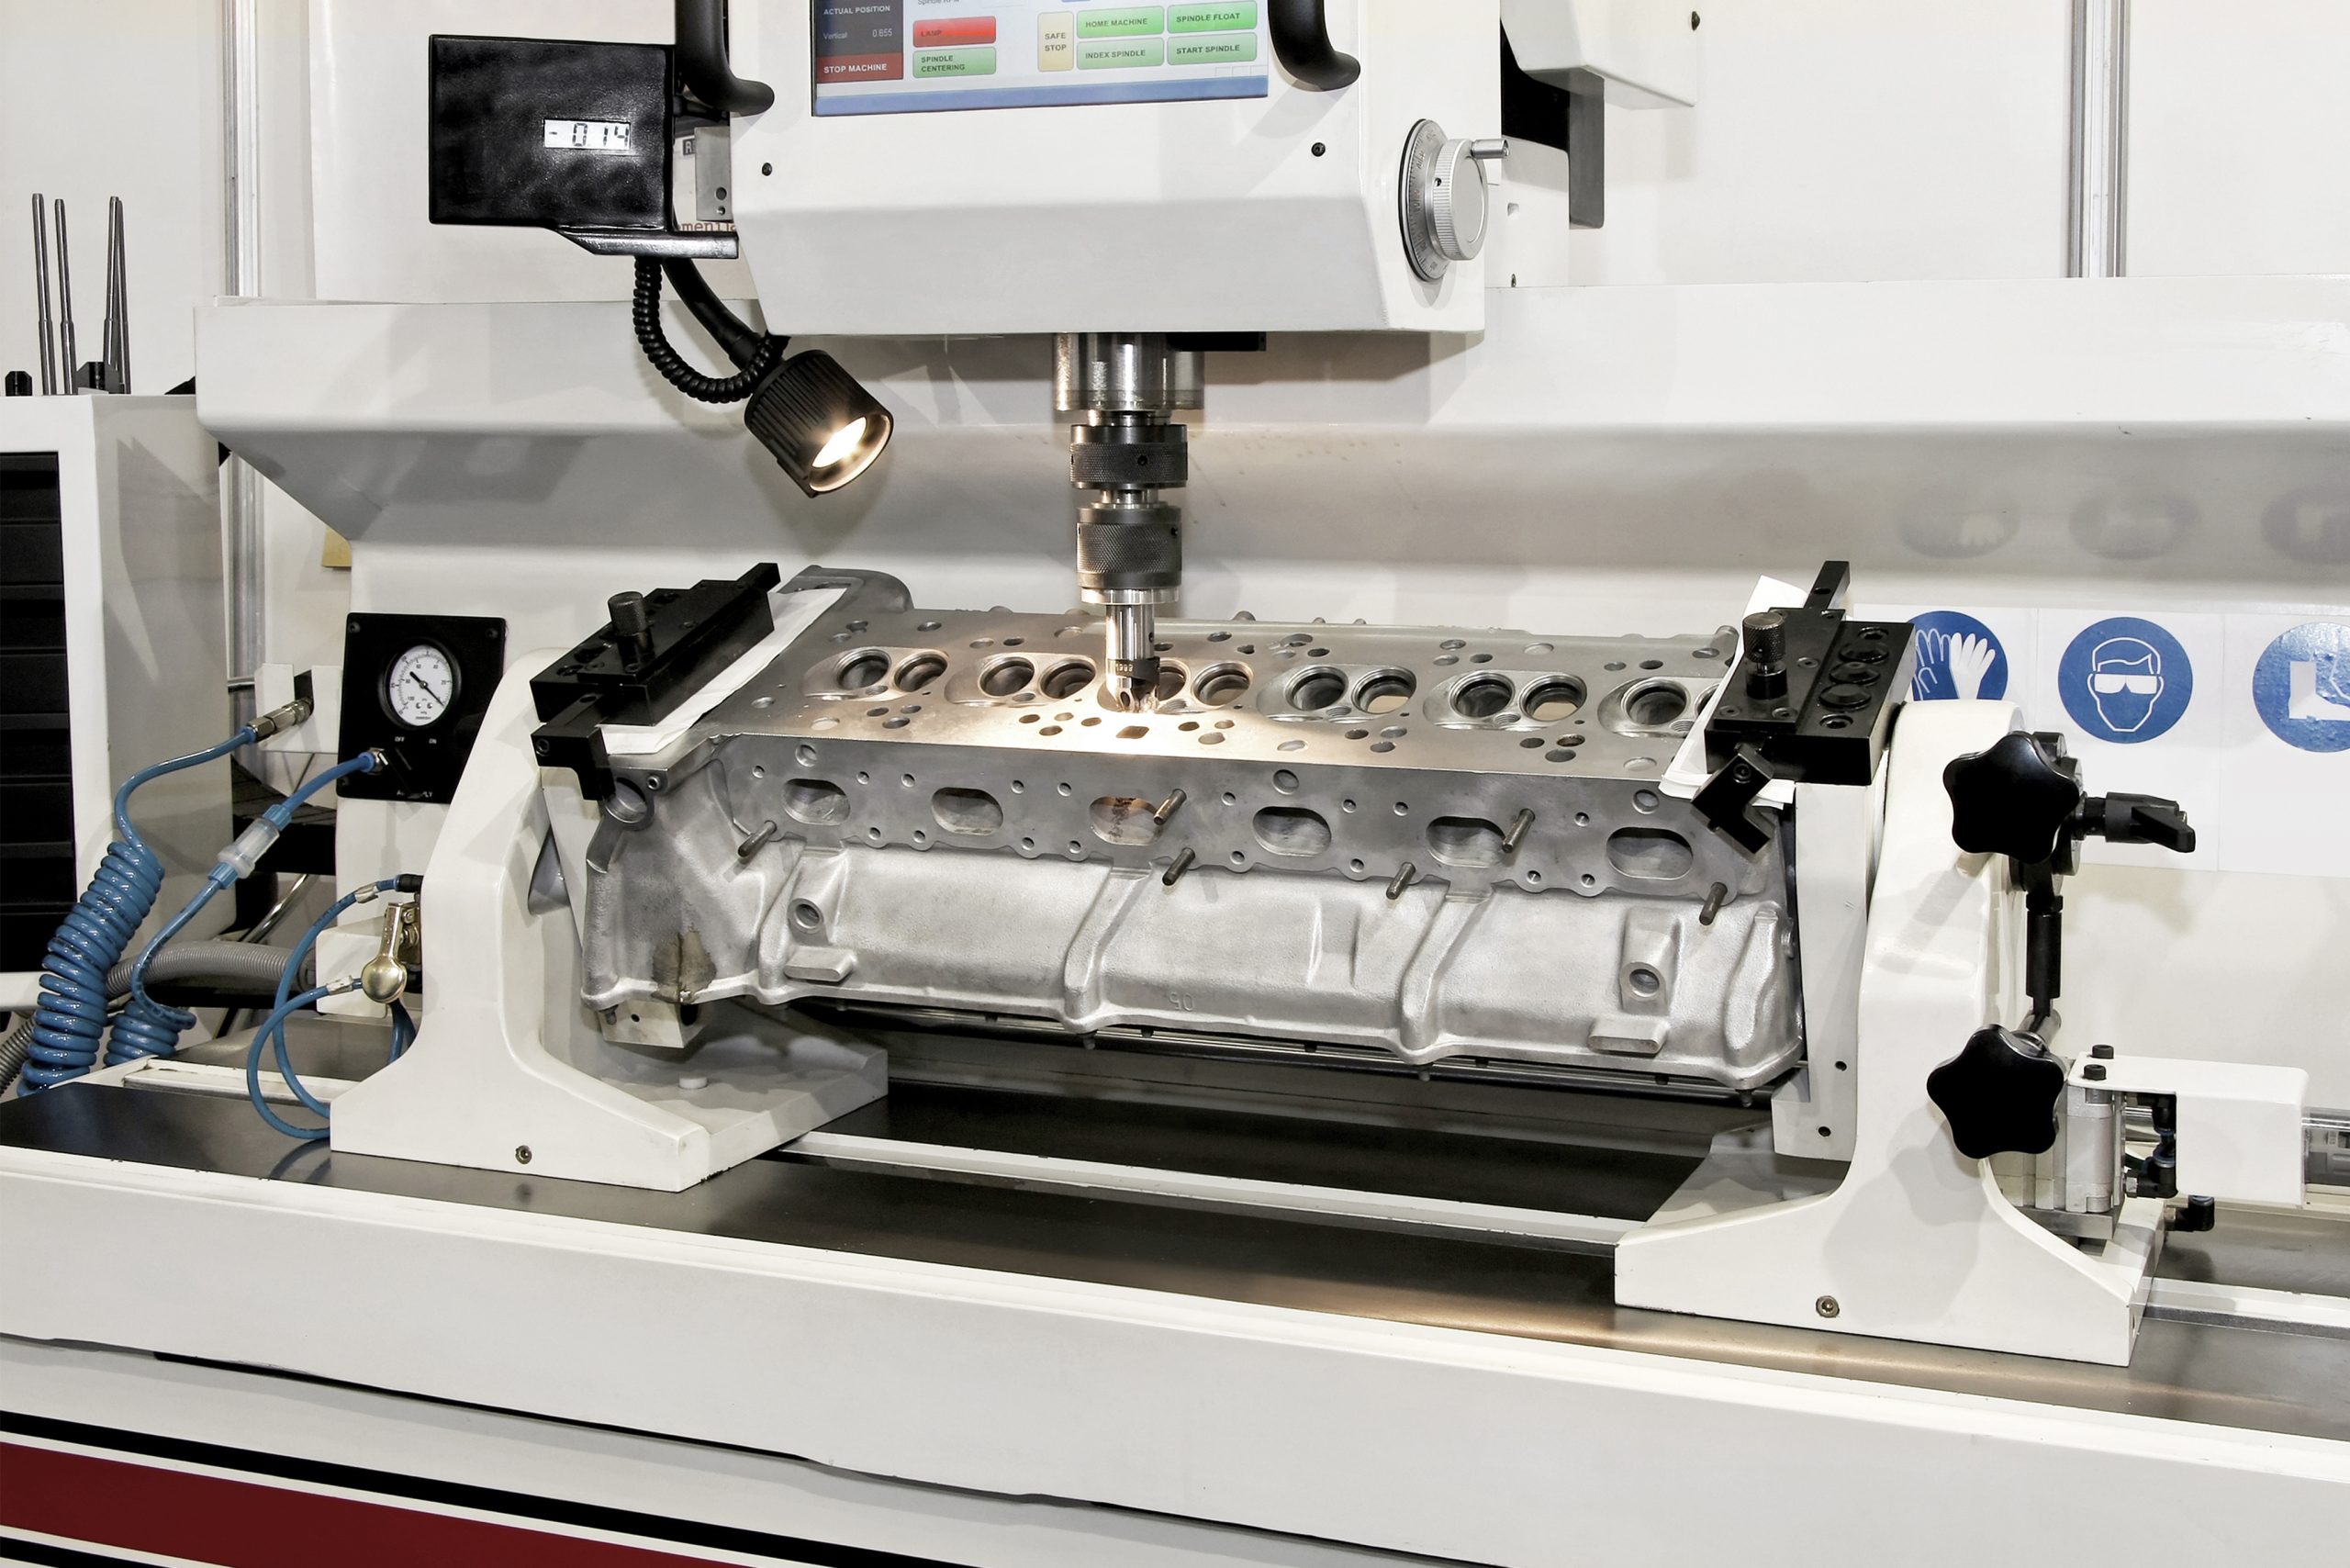
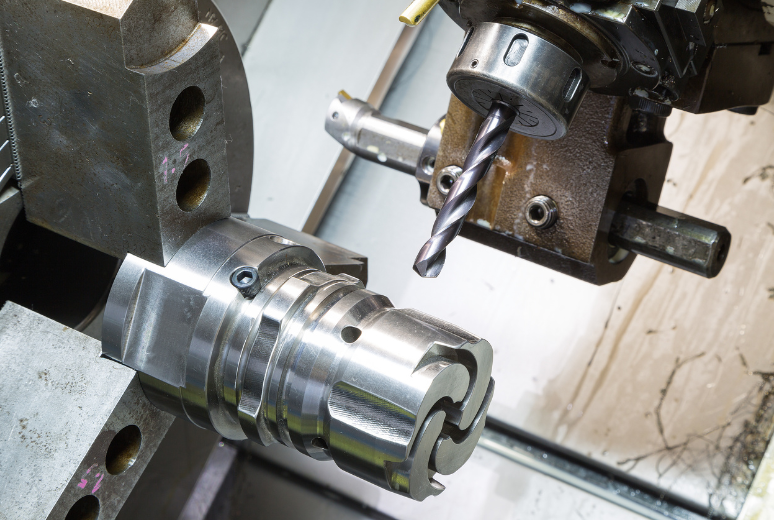
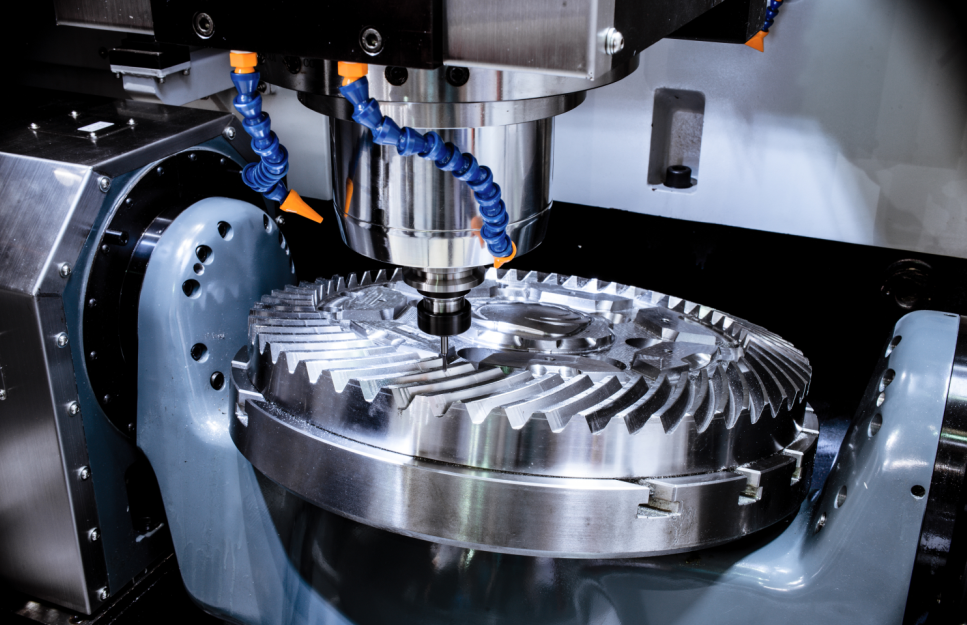
Step 4: CNC Machining & Monitoring
Machining: Executing the CNC Program
Once the G-code is loaded and the machine is set up, it’s time to start machining. The CNC machine follows the instructions, cutting away material to shape your part exactly as designed. Every move, speed, and tool choice is carefully controlled to hit the right dimensions and get a smooth finish.
Real-Time Monitoring: Observing the Machining Process
Keeping a close eye on the machining process ensures your part stays within the set parameters, preventing flaws and delivering the best possible results. These are the critical factors we monitor:
- Tool Wear Detection: Tool Wear Detection: Using advanced systems like TMAC, we monitor the spindle motor’s power in real-time to track tool wear. As your tools gradually wear down, they demand more power. TMAC helps us catch these changes early, ensuring your parts are always made with sharp, effective tools.
- Vibration Monitoring: Vibration sensors watch for unusual shakes or vibrations that might mean problems like tool chatter or machine wobble. Catching these early helps keep parts high-quality and protects the equipment.
- Material Consistency Checks: By monitoring spindle load and cutting forces, our sensors detect subtle variations in material properties—like hardness or composition—helping us adapt the process and keep quality consistent.
Using these monitoring systems helps us catch issues early and make quick adjustments, so the machining stays consistent and high-quality.
Adjustments: Fine-Tuning for Optimal Performance
Based on real-time data, operators can make necessary adjustments to maintain machining efficiency and part quality:
- Feed Rate Adjustments: When conditions change—like increased tool wear or tougher material—adjusting the feed rate helps protect the tool and maintain consistent quality, ensuring your part stays on point.
- Spindle Speed Modifications: Changing the spindle speed helps deal with tougher materials or worn tools, so the machine keeps cutting smoothly and efficiently.
- Tool Offsets: Systems like AutoComp can adjust tool positions automatically based on real-time data, helping keep part dimensions accurate without needing manual tweaks.
These kinds of adjustments make the machining process run more smoothly, cut down on downtime, and help deliver better-quality parts.
Integrating advanced monitoring and adaptive controls transforms CNC machining into a smarter, more responsive process. It empowers teams to achieve exceptional precision, reduce wear, and stay efficient. With constant real-time feedback and adjustments, consistent quality becomes the standard, not the goal.
Step 5: Inspection & Quality Control
Dimensional Inspection: Verifying Precision
Dimensional Inspection checks that the part’s measurements match the specs, so everything fits and works like it should. Here are some common tools and methods we use:
- Micrometers: Coordinate Measuring Machines (CMMs): Advanced devices that measure the geometry of physical objects by sensing discrete points on the surface with a probe. They offer high accuracy and are suitable for complex parts.
- Calipers: These are go-to tools for measuring inside, outside, and depth dimensions. Digital calipers are fast and easy to read, while vernier calipers give you that extra bit of precision when needed.
- Coordinate Measuring Machines (CMMs): These machines use a probe to touch points on a part’s surface and check its shape. They’re super accurate and great for measuring complex parts that are tough to inspect by hand.
These precision tools ensure every part meets its design intent and performs reliably in its final application, because great ideas deserve flawless execution.
Surface Finish Evaluation: Assessing Quality
Surface finish shapes both the beauty and the performance of your part. We use proven methods to make sure it meets your highest standards:
- Surface Roughness Comparators: These handy tools let inspectors feel and compare the surface texture of a part against standard samples, so they know how rough or smooth it is.
- Profilometers: Using either a gentle stylus or advanced laser optics, profilometers provide precise surface roughness measurements, helping us deliver the quality and finish your product deserves.
- Visual Inspection: We use magnifying tools to closely check the part’s surface for any scratches, dents, or other defects that might affect quality.
Surface finish is measured using numbers like Ra, which shows the average roughness of a surface. Here are some common Ra values and what they mean:
Ra 3.2 µm: Typical finish straight off the machine.
Ra 1.6 µm: Used for most general-purpose parts.
Ra 0.8 µm: Good for parts that fit together or need medium precision.
Ra 0.4 µm: Needed for sealing surfaces, medical devices, or high-performance parts.
Functional Testing: Ensuring Performance
Functional testing evaluates how well a part performs under real-world conditions. This may involve:
- Load Testing: Putting forces on the part to mimic how it’ll be stressed during use.
- Wear Testing: Seeing how it holds up against friction over time.
- Environmental Testing: Testing it under things like changing temperatures or chemicals.
By integrating thorough inspection and quality control, we ensure that every CNC-machined part delivers on precision, performance, and long-term reliability—exactly what your project deserves.
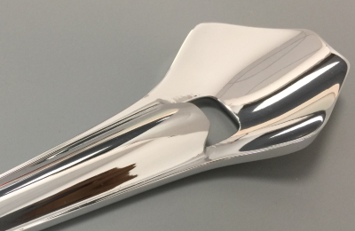
Step 6: Post-Processing & Finishing
After CNC machining, parts usually need some finishing touches. These steps help improve how the part looks, works, and lasts. Here are some key processes we use:
Deburring: Ensuring Safety and Precision
Deburring isn’t just about cleaning up edges—it’s about ensuring each part fits together seamlessly and performs reliably. By eliminating burrs, we make your product safer, smoother, and fully ready for its real-world role.
Common Deburring Techniques:
Manual Deburring: Using hand tools like files or abrasive pads for small, detailed work.
Mechanical Deburring: Machines like vibratory tumblers handle burrs through continuous motion and abrasion.
Thermal Deburring: A quick, controlled explosion clears burrs from tight or complex areas.
Cryogenic Deburring: Parts are frozen, making burrs brittle so they break off easily during finishing.
Each technique is selected to match your part’s material, geometry, and performance expectations, ensuring both beauty and precision.
Surface Treatments: Enhancing Durability and Appearance
At NOBLE, finishing isn’t an afterthought—it’s a final layer of confidence. Our surface treatments are engineered for durability, protection, and elevated aesthetics:
Common Surface Treatment Techniques:
Anodizing: An electrochemical process that creates a protective oxide layer on aluminum parts, enhancing corrosion resistance and allowing for dyeing in various colors.
Electroplating: Deposits a thin layer of metal onto the part’s surface to improve corrosion resistance, wear resistance, and to achieve a desired appearance.
Powder Coating: Applies a dry powder that is cured to form a hard, durable coating, offering excellent protection against corrosion and wear.
Passivation: Treats stainless steel parts with acid solutions to remove free iron and enhance corrosion resistance.
Black Oxide Coating: Forms a black oxide layer on ferrous materials, providing mild corrosion resistance and an attractive matte finish.
Brushing and Polishing: Mechanical methods that smooth the surface to achieve a desired finish, from matte to mirror-like.
The choice of surface treatment depends on the part’s application, environmental exposure, and aesthetic requirements.
Heat Treatment: Modifying Material Properties
Heat treatment changes how the material behaves, making it tougher, harder, or more flexible depending on what the part needs.
Common Heat Treatment Processes:
Hardening: Involves heating the part to a high temperature and then rapidly cooling it to increase hardness.
Tempering: Follows hardening to reduce brittleness while maintaining hardness.
Annealing: Heats the part to a specific temperature and then slowly cools it to relieve internal stresses and improve ductility.
Case Hardening: Adds carbon or nitrogen to the surface layer of the part to create a hard outer shell while maintaining a tough inner core.
Nitriding: Diffuses nitrogen into the surface of the part to form a hard, wear-resistant layer. Commonly used for steel components.
By carefully selecting and applying appropriate post-processing and finishing techniques, NOBLE can significantly enhance the performance, longevity, and appearance of CNC machined parts, ensuring they meet the specific requirements of their intended applications.
Step 7: Low-Volume Production & Scaling
Turning a prototype into a production-ready part is a critical step in bringing ideas to life. This phase ensures every detail is optimized—from machining processes to material sourcing—so that your product can move confidently from concept to market, one precise part at a time.
Tooling Preparation: Developing Efficient Production Tools
If you want things to run smoothly and look good, having the right tools is key, especially when you’re not churning out tons of parts. What tools you go with really comes down to how many you’re making, how complicated the parts are, and what you’re using to make them.
- Jigs and Fixtures: Jigs and fixtures are your best friends when you’re machining tricky parts. They keep everything locked in place so you don’t have to worry about stuff shifting mid-cut. Super handy when you’re dealing with weird shapes or need to make the same part over and over with tight precision.
- Molds: For parts that require casting or molding, developing molds is essential. Techniques like rapid injection molding can be employed to produce molds quickly and cost-effectively for low-volume runs.
- Additive Manufacturing: You can actually use 3D printing to whip up things like inserts or support brackets for your tooling. It’s a solid way to save time and money compared to going the old-school route.
Investing in durable and precise tooling is crucial, as it directly impacts the quality and consistency of the produced parts.
Production Run: Validating the Manufacturing Process
Starting with a small production run is a smart move—it gives you a chance to spot any problems, fine-tune the process, and make sure everything’s working smoothly before going big.
Batch Size: Usually, a low-volume run means making anywhere from 10 to about 1,000 parts at a time. It’s a sweet spot—enough to test things out without spending a fortune.
Process Optimization: While you’re running production, it’s super important to keep an eye on things like cycle times, tool wear, and machine settings. That way, you can spot what’s slowing you down and tweak it as you go.
Quality Control: Setting up solid inspection routines makes sure every part hits the specs and tolerances you need. That usually means checking dimensions, looking at surface finishes, and running tests to see if everything works right.
By carefully checking out the manufacturing process while you’re running production, you can make sure everything’s running smoothly before you ramp up to full-scale.
Supply Chain Coordination: Ensuring Material and Resource Availability
Good supply chain management is super important in low-volume production to make sure materials and parts show up on time.
- Material Planning: Using systems like Material Requirements Planning (MRP) helps you figure out what materials you’ll need based on your production plans, so you don’t run out or end up with too much.
- Supplier Relationships: Having good relationships with your suppliers makes sure you get quality materials when you need them. It helps to work with suppliers who get how low-volume production works and can be flexible with lead times.
NOBLE’s got your back—we work with material suppliers you can count on. From picking the right raw materials to full-on mass production, we take every step seriously, just to be able to provide you with the best quality service.
- Inventory Management: Using strategies like Just-in-Time (JIT) inventory helps cut down on storage costs and waste. But it’s important to balance that with having some backup stock, just in case there are supply hiccups.
A smooth-running supply chain makes sure you’ve got all the materials and parts you need right when you need them, so nothing slows down and your production stays on track.
Step 8: Full-Scale Production & Delivery
Moving from low-volume to full-scale CNC machining takes careful planning and execution to keep things efficient, high-quality, and on time. This means ramping up production, handling logistics, and sticking to strict quality checks along the way.
Ramp-Up Production: Scaling Operations While Maintaining Quality
When you boost production volume, you need to make smart changes to keep quality high and things running smoothly.
- Capacity Expansion: Look at what you’ve got and see if you need more CNC machines—or upgrades—to keep up with the extra work.
- Process Optimization: Use lean manufacturing to cut waste, speed things up, and get more done with less hassle.
- Workforce Training: Make sure your crew knows how to run the new machines and stick to quality standards.
- Supply Chain Coordination: Get your material orders and inventory set up in line with your faster pace so you’re not stuck waiting on parts.
By tackling these areas step by step, NOBLE can grow its operations smoothly without sacrificing quality.
Logistics Management: Coordinating Packaging, Labeling, and Shipping
Good logistics are key to making sure products get to customers or the assembly line on time and without any mess.
- Packaging: Come up with packaging that keeps parts safe during shipping but doesn’t cost a fortune. Using custom foam inserts or protective wraps is a smart move for fragile pieces.
- Labeling: Set up simple, consistent labeling so it’s easy to track inventory and avoid mix-ups. Make sure labels have part numbers, batch codes, and any handling tips.
- Shipping: Pick dependable shipping partners and figure out the best delivery times. Use tracking systems to keep an eye on shipments and quickly handle any problems that come up.
- Inventory Management: Keep good records of your stock levels and stay in touch with suppliers to make sure materials get replenished on time.
Good logistics management makes sure products get delivered on time, which keeps customers happy and operations running smoothly.
Ongoing Quality Assurance: Ensuring Consistent Product Quality
Keeping quality high during the whole production process is key to meeting what customers want and following the rules.
- Standard Operating Procedures (SOPs): Create clear SOPs for every step of production to keep things consistent and make sure quality standards are met.
- Training and Development: Keep your team up to speed with regular training on quality, new tech, and best practices to make sure everyone’s skilled and ready.
- Quality Control Measures: Use tools like Statistical Process Control (SPC) to keep an eye on production and catch any quality issues early.
- Continuous Improvement: Build a culture where feedback is welcome, regular checks happen, and fixes get made whenever needed to keep things getting better.
Using these strategies in full-scale production helps NOBLE deliver great-quality products quickly and dependably, keeping customers and the market happy.
NOBLE – From Design to Mass Production, Always by Your Side!
Providing custom CNC machining solutions at competitive prices, we choose from over 100 materials and 60+ surface finishes to ensure you receive high-precision, structurally complex, and performance-stable parts. Try our precision CNC machining services and become our next satisfied customer.
Economical Price & Perfect Quality
We can offer you the lowest price for the same quality. Strictly control the machining and finish treatment quality, and what you will get is what you designed.
Experienced & Capabilities
More than 10 years of professional machining and rapid prototyping experience, providing you with the most professional and effective advice. From prototyping to mass production, NOBLE combines high-quality materials with state-of-the-art technologies to bring products to life.
Fast Lead Time
Not only do we have a digital CNC machining services platform that provides a faster ordering process, but we also own domestic workshops and state-of-the-art machinery to accelerate the production of your prototypes or parts.
24/7 Engineering Support
No matter where you are, you can get our 24/7 engineering support all year round. Our experienced engineer can provide you with the most appropriate solution for your part design, material selection, surface finishing options, and even lead time.