If you want perfect results in acrylic CNC Machining, you must know the special problems this material has. Acrylic can melt and make rough edges when it gets too hot. It can bend if the heat is not spread out evenly. Acrylic can also crack because it is easy to break, and stress builds up when cutting. Sharp corners and strong clamping can make these problems worse. This is why picking the right material, tools, and steps is very important. NOBLE is a leader in accurate acrylic machining and gives helpful tips for clean and reliable results.
Preventing Defects of Acrylic CNC Machining
Temperature Control
Heat is one of the biggest challenges you face in acrylic CNC Machining. If the acrylic gets too hot, it can melt or crack. You want to keep the temperature steady and low during cutting. Here are some ways you can control heat:
- Use compressed air cooling. Blow clean, dry air right at the cutting spot. This helps move heat away fast and keeps the acrylic clear.
- Try mist cooling. A fine mist of water-soluble coolant can drop the temperature quickly. Make sure the coolant works with acrylic so you do not cause stress cracks.
- Pick the right coolant. Some coolants can damage acrylic, so always use one made for plastics.
- The program pauses in your machining process. Short breaks let the heat escape before it builds up.
Never blast cold air or coolant onto hot acrylic. Sudden cooling can cause thermal shock and make the part crack. Always let the temperature drop slowly.
In one project, changing the spindle speed by 15% and raising the feed rate by 20% stopped the edges from melting. This shows how small changes in your settings can make a big difference.
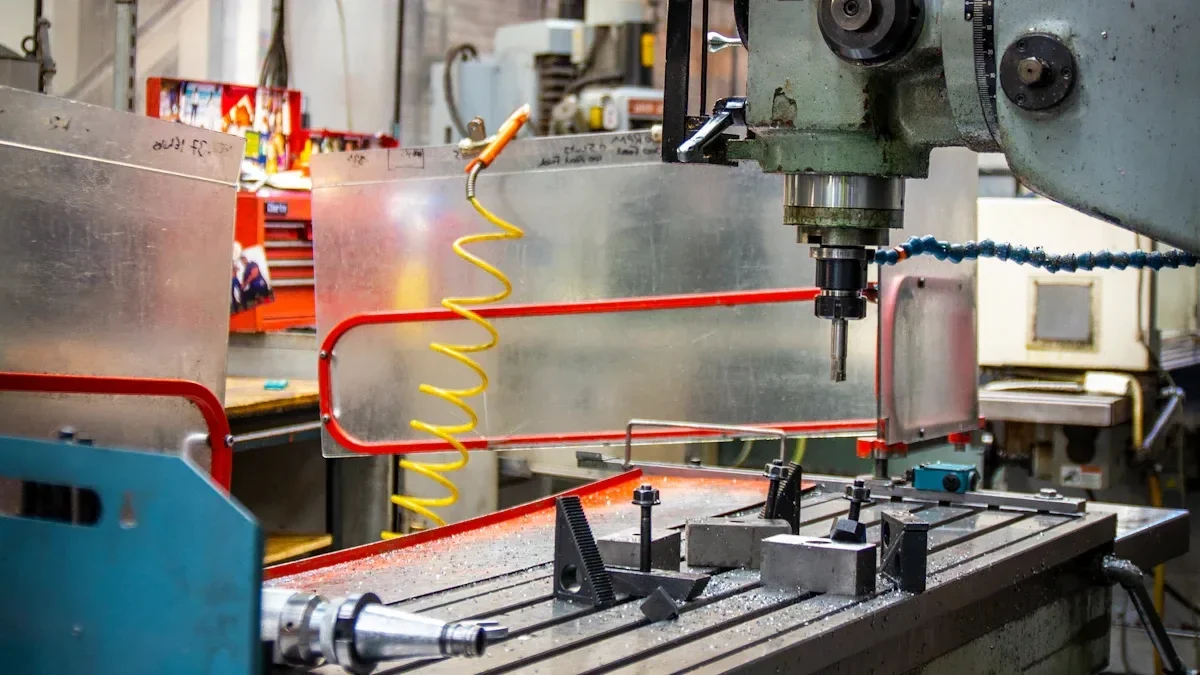
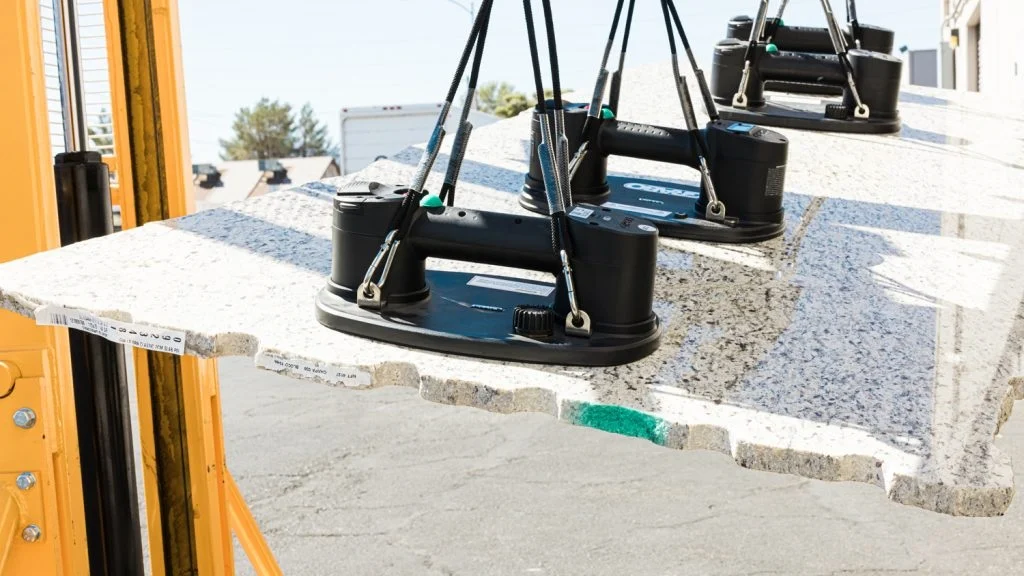
Fixturing
Holding your acrylic sheet tight and steady is key to a clean cut. If the material moves, you might see chips, cracks, or rough edges. Here’s what you should do:
- Check your acrylic parts for any cracks or marks before you start.
- Secure the sheet to the machine bed. Use clamps or a vacuum hold-down to keep it from shifting.
- Make sure the pressure is even. Too much force in one spot can cause stress and cracks.
A good fixture setup means your acrylic stays flat and still. You get better accuracy and fewer defects. NOBLE’s team always inspects the material and uses the best fixturing methods for every job.
Cutting Speed
Cutting speed matters a lot when you want a smooth, clear edge. If you go too fast, the acrylic heats up and melts. If you use a dull blade, you might see chips or rough spots. Here are some tips for the best results:
- Keep the cutting area cool. Avoid high speeds and always use sharp tools.
- Use a coolant like water or alcohol to lower the heat while cutting.
- Choose a blade that is gentle, not too aggressive. This helps prevent chipping.
- For laser cutting, use a higher frequency. This spreads the energy out and gives you a smooth, flame-polished edge.
A steady, controlled speed helps you avoid most problems. You get clean edges and a glossy finish every time.
Vibration Reduction
Vibration can mess up your acrylic CNC machining project fast. If the machine shakes, you might get rough edges or small cracks. Sometimes, the finish looks cloudy. You want every part to look sharp and clear. Keeping vibrations low is very important.
You can do a few things to lower vibration and get good results:
- Optimize your cutting parameters. Change the feed rate and spindle speed. Make small changes until the machine runs smoothly. Even tiny adjustments can help a lot.
- Always use sharp tools. Dull cutters make the machine work harder. This causes more shaking and rough cuts.
- Clamp your workpiece securely. If the acrylic moves, you might get chips or cracks. Use strong clamps or a vacuum table to hold it steady.
- Try damping materials or devices. Some factories use special pads or mounts. These soak up vibrations and help keep parts looking nice.
- Choose advanced tooling systems. Some tools are made to fight vibration. We help the cutting stay smooth for better surface quality.
- Check your machine’s rigidity. A solid machine shakes less. Tighten bolts and check for loose parts before you start.
- Support your workpiece close to the table. If the acrylic flexes less, your results will be better.
- Use modern fixturing solutions. New fixture materials can absorb more vibration. This gives you a cleaner cut.
If you follow these tips, your acrylic CNC machining project will be more precise. NOBLE’s factory uses these methods every day. We deliver custom machining with perfect finishes.
Tip: If you hear buzzing or see tool marks on your acrylic, stop and check your setup. Fixing vibration early saves time and material.
Annealing
Annealing is a special step in acrylic CNC machining. You might not see it, but it helps your parts look better and last longer. Cutting or shaping acrylic creates stress inside the material. If you skip annealing, those stresses can cause cracks or cloudy spots later.
To lower internal stresses that can cause cracking or crazing, especially after machining or forming.
Annealing means heating the acrylic gently and letting it cool slowly. This relaxes the material. Your parts become stronger and clearer. You want your display cases, lenses, or aquarium panels to stay perfect for years. Annealing helps make that happen.
Here’s why you should use annealing for your project:
- It lowers the chance of cracks and crazing.
- Your parts stay clear, almost like glass.
- Annealed acrylic is tougher and lasts longer.
- It is important for high-end products like lenses, display cases, and panels.
NOBLE’s factory uses careful temperature controls for annealing. This step is part of their quality process for custom machining. You get acrylic parts that look great and last longer. If you want flawless results in acrylic CNC machining, do not skip this step.
Achieving Precision of Acrylic CNC Machining
Tool Path
Getting the tool path right is the secret to making acrylic parts that look sharp and fit perfectly. You want every cut to be smooth, every edge to shine. When you plan your tool path, you control how the cutter moves through the material. This helps you avoid heat build-up, melting, and rough spots.
Here are some strategies you can use:
- Optimize the path for heat dissipation. Smooth, gentle movements keep the acrylic cool and prevent melting.
- Design chip removal and cooling paths. If chips pile up, they can scratch the surface or get cut again. Plan your path so chips clear out fast.
- Use multi-axis movement. Adjust the tool’s angle to get a better finish and reduce damage.
- Pick the right strategy for your part. Linear, spiral, or contour milling each work best for different shapes.
NOBLE uses advanced CAD/CAM software to map out these paths. You get parts with tight tolerances and clean surfaces. The software helps you handle complex shapes and fine details, so your acrylic CNC Machining project always meets your specs.
Supporting Parts
You need more than just a good machine to get precise results. Supporting parts like jigs and fixtures play a big role. We hold your acrylic steady and guide the cutting tool. If your part moves even a little, you might see chips, cracks, or crooked holes.
Let’s look at how these tools help:
- Jigs guide the cutter. You get holes and features in the exact spot every time.
- Fixtures clamp the acrylic in place. No shifting means no mistakes.
- Both tools cut down on human error. You get repeatable, high-quality results.
NOBLE’s factory uses custom fixtures for each job. The team checks every setup before starting. You can trust that your parts will come out just right, whether you need one or a hundred.
Quality Control
Precision manufacturing means checking every detail. You want your parts to match the design, down to the last millimeter. Quality control keeps mistakes from slipping through and helps you avoid costly rework.
Here’s what you should expect:
- Use precise instruments to measure each part. Calipers, micrometers, and gauges check if the size matches your plan.
- Watch for dimensional accuracy. If you need a 2-inch part, you want it to be exactly 2 inches, or within a tiny tolerance like ±0.002.
- Set clear tolerances. This tells the factory how much variation is allowed.
- Inspect parts at every stage. Catching errors early saves time and money.
- Mix different techniques. Visual checks, measurements, and automated scans all help spot problems.
NOBLE’s team works with diligence and care. We use innovative strategies to balance accuracy and cost. You get reliable components that meet industry standards and keep your reputation strong.
Burr Removal
When you finish an acrylic CNC machining job, you might see small rough spots or flakes on the edges. These are called burrs. Burrs can make your parts look messy. We can also make it hard to fit pieces together. If you want your acrylic parts to look neat and professional, you need to get rid of these burrs. This step is important in precision manufacturing. It helps you give high-quality, custom machining results.
There are different ways to remove burrs. Each way works best for certain shapes, batch sizes, or part designs. Here’s a table to compare the most common burr removal methods for acrylic:
| Technique | Advantages | Limitations |
| Manual Deburring | Simple tools, low technical requirement | High labor cost, low efficiency, tough for complex shapes |
| Stamping Die | Better efficiency for simple parts | Needs custom dies, limited to basic parting surfaces |
| Grinding Methods | Good for large batches, widely used | May need extra manual work for leftover burrs |
| CNC Machine Deburring | Direct cleaning for simple shapes, great for prototypes | High equipment cost, only for regular deburring locations |
| Electrolytic Deburring | Fast, handles complex shapes | Uses corrosive chemicals, may affect finish and accuracy |
| Ultrasonic Cleaning | Cleans micro-burrs, removes cutting oil | Best for small burrs, may need a microscope to check |
| Cryogenic Deburring | Consistent, does not harm surface finish | Needs special equipment, limited to certain applications |
Let’s look at what these methods mean for your acrylic CNC machining projects:
- Manual deburring uses hand tools like files or scrapers. This is good for small batches or simple shapes. It takes time and skill, especially if your part has many corners.
- Stamping dies fast if you have lots of parts with the same simple shape. You press the part through a die to knock off the burrs. This only works for basic designs.
- Grinding methods use abrasive wheels or belts. You can clean up many parts quickly. Sometimes you still need to fix tricky spots by hand.
- CNC machine deburring lets you program the machine to remove burrs after cutting. This works best for easy-to-reach spots. It saves time for prototypes.
- Electrolytic deburring uses electricity and a special solution to dissolve burrs. You can use this for complex shapes. You must watch out for changes in the surface finish.
- Ultrasonic cleaning shakes off tiny burrs using sound waves in a cleaning bath. This is great for micro-burrs and also cleans away cutting oil.
- Cryogenic deburring chills the parts with liquid nitrogen. The burrs get brittle and break off easily. This method gives you a smooth finish and keeps the part’s shape perfect. You get steady results, and it works well for tricky or delicate parts.
Tip: If you want the best results for high-precision or complex acrylic parts, ask your factory about cryogenic deburring. It works well and keeps your surface finish looking great.
Picking the right burr removal method depends on your part’s design, how many you need, and your quality needs. NOBLE’s factory uses a mix of these methods to make sure every acrylic CNC machining project meets strict standards. You get parts that look clean, fit well, and show off the best in custom machining.
Surface Finishing of Acrylic CNC Machining
Flame Polishing
You want your acrylic parts to look shiny and clear. Flame polishing is a common way to make them look like glass after acrylic CNC machining. In this method, a small flame gently melts the top layer of the acrylic. The heat makes tiny scratches and marks disappear. You can watch the dull surface turn shiny in just a few seconds.
- Flame polishing works best on edges and small spots.
- You must be careful. Too much heat can bend or harm the acrylic.
- The finish is smooth and shiny, like a mirror.
Factories and shops use flame polishing to help their parts look special. It is a top choice for display cases, awards, and signs where looks are important.
Tip: Try flame polishing on scrap pieces first. This helps you learn how close to hold the flame and how quickly to move it for the best shine.
Vapor Polishing
Vapor polishing makes your acrylic CNC machining project look even better. This method uses special chemical vapors to smooth out the surface. You put the acrylic part in a chamber. The vapor touches the surface and removes tiny marks, making the part almost see-through.
Here’s a quick look at the good and bad points:
| Benefits | Limitations |
| Makes the part clearer and lets in more light | Not good for every plastic type |
| Makes the product look much better | Needs costly tools and chemicals |
| Gets rid of small bumps and marks | Some plastics need extra steps before starting |
Vapor polishing is great for jobs that need perfect parts. You get pieces with no haze or blur. It works well for medical tools, lenses, and other things where you need to see clearly. If you need special machining for tough jobs, vapor polishing gives a pro finish.
Note: Some plastics need extra steps before vapor polishing. Always check if your material is ready for this process.
Buffing
Buffing is another way to make acrylic parts look shiny after acrylic CNC machining. You use soft wheels and special polish. You start with rough polish and then use finer ones. Each step takes away scratches and makes the surface smooth and clear.
- Buffing makes the part clearer and smoother.
- You get a shiny look with no wavy spots, especially on big flat areas.
- Flame polishing does not work well on large spots, but buffing does.
Factories and shops use buffing to finish parts for displays, panels, and covers. You can pick the shine and smoothness by choosing different polish and wheels. Buffing is a trusted step in making high-quality parts that look and feel nice.
Tip: Clean the part before buffing. Dirt and dust can scratch the acrylic and ruin your hard work.
Annealing
You might think your acrylic parts look perfect right after acrylic CNC machining. But sometimes, stress hides inside the material. This stress can cause cracks or cloudy spots later. Annealing helps you fix this problem. It is a heat treatment that makes your acrylic parts stronger and clearer.
When you anneal, you heat the acrylic slowly in a special oven. You hold it at a set temperature, then let it cool down very slowly. This process relaxes the material. It removes the stress from cutting, drilling, or engraving. Your parts become less likely to crack or craze.
Here’s a simple step-by-step guide for annealing:
- Place your acrylic part in an oven.
- Heat it to about 80°C (176°F). Keep it there for one to two hours.
- Let the part cool down slowly to room temperature.
Tip: Never rush the cooling step. Fast cooling can bring back stress and ruin your hard work.
Annealing is important for precision manufacturing. If you want your parts to last, you should not skip this step. NOBLE’s factory uses controlled ovens and careful timing. Their team checks every part before and after annealing. You get customized machining results that look great and stay strong.
Cleaning
After all the cutting, polishing, and annealing, your acrylic parts need a good cleaning. Dust, chips, and fingerprints can spoil the look. Cleaning is the last step before you use or ship your parts. It makes sure your acrylic CNC machining project shines.
You can clean acrylic with simple tools. Use a soft, lint-free cloth. Warm water with a little mild soap works well. Never use rough sponges or strong chemicals. These can scratch or cloud the surface.
Here’s a quick table to help you pick the right cleaning method:
| Cleaning Method | Safe for Acrylic? | Best Use Case |
| Mild Soap & Water | YES | Everyday cleaning |
| Isopropyl Alcohol | YES | Removing grease or oil |
| Glass Cleaner | NO | Can cause cracks or haze |
| Abrasive Pads | NO | Will scratch the surface |
Note: Always test your cleaning method on a small spot first.
NOBLE’s factory uses special cleaning stations for precision manufacturing. Their team checks every part for dust and marks. You get acrylic parts that are clear, smooth, and ready for display. Clean parts show off the quality of customized machining. We also last longer and look better in any setting.
If you want your acrylic CNC machining project to stand out, never skip the cleaning step. A clean finish is the mark of a true professional.
Troubleshooting of Acrylic CNC Machining
Problem Diagnosis
When you run into trouble with acrylic CNC machining, you want to find the cause fast. Sometimes, you see cracks, chips, or rough edges on your parts. Other times, the finish looks cloudy or the size is off. You can solve most problems by checking a few key areas.
Start by looking at your tools. Dull or worn-out cutters often cause poor cuts and extra heat. Next, check your machine settings. Wrong speeds or feeds can lead to melting or chipping. Always look at your cooling system. If the acrylic gets too hot, you might see burns or bubbles.
Here’s a quick checklist to help you spot common issues:
- Check tool sharpness and replace if needed.
- Review your CNC program for errors or missing steps.
- Inspect the machine for loose parts or vibration.
- Make sure the cooling system works well.
- Look for leftover chips that could scratch the surface.
- Double-check your fixturing to keep the acrylic steady.
If you follow these steps, you can catch most problems before they ruin your project. You keep your acrylic CNC machining process smooth and your parts looking great.
Parameter Adjustment
You can fix many machining problems by tweaking your parameters. If you see melting, slow down the spindle speed or increase the feed rate. This helps keep the acrylic cool. When you notice chipping, try using a sharper tool or lowering the cutting depth. Sometimes, just a small change makes a big difference.
Here are some adjustments you can try:
- Lower spindle speed to reduce heat.
- Increase feed rate for better chip removal.
- Use sharp, single-flute cutters for a cleaner edge.
- Adjust cutting depth to avoid stress on the material.
- Add more cooling or use a mist system for tough jobs.
Tip: Always make one change at a time. This way, you know what works and what doesn’t.
You can also improve your results by checking the CNC program. Make sure the tool paths avoid sharp turns or sudden stops. Smooth movements help prevent cracks and keep the finish clear. In a busy factory, these small tweaks help you keep up with orders and deliver top-quality customized machining.
Multi-Axis Machining
Sometimes, your project needs more than simple cuts. Multi-axis machining lets you create complex shapes and detailed features in acrylic. You can tilt and rotate the part, so the tool reaches every angle. This method works well for precision manufacturing, especially when you need custom parts with tight tolerances.
When you use multi-axis acrylic CNC machining, you must watch for new challenges. The part might flex or vibrate more as it moves. You need strong fixturing to hold everything steady. Tool paths get more complicated, so double-check your program for errors.
Here’s how you can get better results with multi-axis machining:
- Use custom jigs to support thin or large sheets.
- Plan tool paths to avoid sudden changes in direction.
- Keep the cutting area clean to prevent chip buildup.
- Monitor the machine for extra vibration and adjust as needed.
Multi-axis machining opens up new possibilities for your designs. You can make parts that stand out and meet the highest standards in any factory. With careful setup and smart troubleshooting, you get flawless results every time.
Large/Thin Sheets
Working with large or thin acrylic sheets in acrylic CNC machining can feel tricky. You might notice the material flexes, vibrates, or even cracks if you do not set things up just right. Let’s talk about how you can handle these challenges and get flawless results every time.
First, you want to support your sheet properly. Thin acrylic bends easily. If you let it hang off the edge of the machine, it might vibrate or snap. Use a vacuum table or a strong fixture to hold the sheet flat. Some factories use custom jigs that match the shape of the part. This keeps everything steady during precision manufacturing.
Tip: Place soft pads or rubber strips under the acrylic. These absorb vibration and protect the surface from scratches.
When you cut large sheets, you need to think about movement. The bigger the sheet, the more it can shift. Secure the edges with clamps, but do not squeeze too hard. Too much pressure can leave marks or cause cracks. Spread out the clamps so the force is even.
Here’s a quick checklist for handling large or thin sheets in customized machining:
- Check the sheet for cracks or chips before you start.
- Clean the surface to remove dust and debris.
- Use a vacuum table or soft pads for support.
- Clamp the edges gently but firmly.
- Set the right feed rate and spindle speed to avoid heat build-up.
- Watch for signs of flexing or vibration during cutting.
You might run into problems like warping or chatter marks. If you see these, slow down the cutting speed and use a sharper tool. Sometimes, you need to make several shallow passes instead of one deep cut. This reduces stress on the acrylic and gives you a cleaner finish.
Factories that focus on precision manufacturing often use special cooling systems for large sheets. A gentle stream of air or mist keeps the acrylic cool and clear. This helps prevent melting and keeps the edges smooth.
Here’s a table to help you troubleshoot common issues with large or thin sheets:
| Problem | Possible Cause | Solution |
| Warping | Too much heat | Lower spindle speed, add cooling |
| Chatter marks | Vibration or flexing | Add support, use sharper tools |
| Cracking | Uneven clamping, stress | Use soft pads, spread clamps evenly |
| Rough edges | Dull tool, fast speed | Sharpen the tool, slow down the feed rate |
If you follow these steps, you can handle even the biggest or thinnest acrylic sheets in your acrylic CNC machining projects. You get parts that look sharp and fit perfectly, whether you work in a small shop or a busy factory.
Comparison of Acrylic CNC Machining and Other Technologies
CNC vs. Laser Cutting
When you look at ways to cut acrylic, you might wonder if CNC or laser cutting is better. Both methods have their place, but they work differently and give you different results. CNC machines use sharp tools to carve and shape the acrylic. Laser cutters use a focused beam of light to slice through the material.
Here’s a quick side-by-side look:
| Aspect | CNC Machining | Laser Cutting |
| Edge Quality | Superior precision and edge quality | Good for decorative work, but struggles with thick sheets |
| Speed | Slower, but great for complex shapes | Fast for simple, flat parts in large batches |
| Cost | Higher up front, good for medium runs | Lower for big batches, but hidden costs can pop up |
If you want perfect edges and tight tolerances, CNC is your best bet. You get crisp, clean lines, even on thicker acrylic. Laser cutting works fast for simple shapes, but it can leave a frosted edge or even melt the sides if the sheet is thick. For projects where looks and accuracy matter, CNC machining stands out.
NOBLE recommends using cast acrylic, especially for pieces between 6 and 12 millimeters thick. Cast acrylic handles both CNC and laser cutting well, but you get the best finish and fewer chips with CNC. NOBLE’s factory uses high-quality cast acrylic to make sure your parts look sharp and last longer.
CNC vs. Molding
You might also think about molding when making acrylic parts. Molding, like injection molding, is great for making lots of the same part. CNC machining, on the other hand, shines when you need custom shapes or small batches.
CNC machining gives you amazing precision. You can make parts with tight tolerances and complex designs. The machine follows your digital model, so every detail comes out just right. You don’t need to wait for a mold to be made, which saves time if you need parts quickly.
- CNC machining offers high precision and tight tolerances. It’s perfect for low to medium volume runs.
- Injection molding costs less per part when you make thousands, but the molds are expensive and take time to build.
- CNC machining lets you start production right away. No need to wait for molds.
If you want to change your design, CNC machining makes it easy. You just update your digital file and start again. With molding, you’d need a whole new mold, which can get costly. NOBLE’s team uses advanced machines and software to make sure your custom parts fit your needs, whether you need one or one hundred.
Pros and Cons
Every method has its ups and downs. Here’s a table to help you see the differences between acrylic CNC machining and injection molding for acrylic:
| Aspect | CNC Machining | Injection Molding |
| Cost for Large Volumes | Higher cost due to slower output | More economical for big runs |
| Material Waste | More waste, less recycling | Less waste, extra can be recycled |
| Design Flexibility | Easy to change or tweak designs | Hard to change, new molds needed |
| Turnaround Time | Fast for small/medium orders | Slower, needs time for mold making |
You get more design freedom with acrylic CNC machining. You can make changes on the fly and try out new ideas. Molding works best when you know exactly what you want and need thousands of the same part.
Acrylic cnc machining gives you clear, strong parts with up to 92% light passing through. The material resists UV rays, so it won’t turn yellow in the sun. It’s also much tougher than glass and stands up to most household chemicals. You can trust NOBLE’s factory to use the best materials and the latest machines for your custom projects.
Application Scenarios
You may ask where acrylic CNC machining works best. It is great when you need parts that look perfect and fit well. Acrylic CNC machining is used in jobs that need high precision, a clear look, and custom shapes. Here are some common ways people use this technology.
| Application Scenario | Why Acrylic CNC Machining? |
| High-precision parts | You get detailed, accurate components every time. |
| Complex shapes | The machine forms intricate designs with ease. |
| Rapid prototyping | You can quickly test new ideas and models. |
| Medical devices | Clean, clear, and safe parts for sensitive uses. |
| Automotive components | Durable, custom-fit parts for vehicles. |
| Display and signage | High-gloss, eye-catching finishes for visibility. |
Acrylic CNC machining is used in many different fields. Here are some examples:
- Medical industry: You need parts that are clear and smooth. Acrylic CNC machining makes covers for medical tools and shields. These parts must be safe and easy to see through. The factory checks each piece to make sure it is perfect.
- Automotive industry: Car makers use acrylic CNC machining for light covers and panels. These parts must fit well and last a long time. Custom machining lets you make special shapes for each car.
- Electronics: You find CNC-machined acrylic in control panels and cases. The process gives you smooth edges and tight fits. This is important for delicate equipment.
- Retail and advertising: Stores use acrylic CNC machining for signs and stands. The shiny finish helps products stand out and look nice.
- Prototyping and R&D: When you want to try a new idea, acrylic CNC machining helps you make a sample fast. You can check your design before making more.
Tip: If you need a part with a hard shape or a super-clear look, acrylic CNC machining is a smart pick. The factory can make parts that match what you want.
Acrylic CNC machining handles the brittleness of acrylic better than old methods. You get good results, even for tricky or thin parts. This makes it a top choice for jobs that need careful work. Whether you need one part or many, this process gives you both quality and flexibility.
Why Choose NOBLE for Acrylic CNC Machining?
Our Plastic Injection Molding Service
Access top-notch acrylic CNC machining services for your custom prototypes and production parts. Get injection molded parts with impeccable quality, excellent finishes, and high dimensional stability at competitive prices.
- Advanced Equipment & Cost-Effective Price
- 10+ years of Plastic Parts Injection Molding
- ISO 9001 & ISO13485 Certified Factory
- Instant Acrylic CNC machining Quotes
- Acrylic CNC machining is as fast as 2 weeks
- Provide a Free DFM Report within 12 Hours
Work with Us in 4 Simple Steps Only
With many years of manufacturing experience, NOBLE offers the best solutions for all rapid prototyping and low-volume manufacturing needs. We streamline the innovation cycle into four simple but effective steps.
Upload Your Design
Simply upload your CAD files and submit RFQs with clear information online.
Receive Design Analysis
We’ll send you a design for manufacturability analysis and transparent pricing.
Start Manufacturing
Our experts will produce your parts with the required technologies and materials.
Receive Your Parts
Your parts will be delivered to your door directly with stringent deadlines.